Zopf-Beanie Stirnband Loop Nahen | Schuttelmutze | Ohne Schnittmuster | Ponytail Hat | Mommymade
- Posted on 03 January, 2020
- Ponytail Hairstyles
- By Anonymous
Schüttelmütze nähen - Heute nähen wir eine #Beanie mit Twist und ohne Schnittmuster - eine, die Ihr zudem als normale Beanie, als #Zopfmütze, als Stirnband oder als Loop tragen könnt! Ob sie nun ZopfBeanie-Stirnband-Loop oder einfach #Schüttelmütze heißt, müsst Ihr selbst entscheiden
..und als BMNS Maske geht das Ding auch zu tragen
Hier könnt Ihr mommymade abonnieren: https://goo.gl/VtkPxE
Aktiviert die Glocke, damit Ihr neue Videos sofort angezeigt bekommt ;-)
#ponycap #ponytailhat
HIER GEHT's ZUM FAQ-Video zur Schüttelmütze:
The English captions / subtitles for this video are online now! If you want the tutorial in English, hit the CC button at the bottom of the video, choose the Language of the subtitles by clicking onto the gear wheel icon next to the CC
++++++++++
Mein Equipment*:
Overlock Brother 2104D*: https://amzn.to/3iWNgGZ
Overlock Brother 4234D*: https://amzn.to/3iV7Uaf
Cover Brother CV3550*: https://amzn.to/3iR8Hcs
Nähmaschine Brother NV1100*: https://amzn.to/2GXRjFD
Brother Innov-Is 100 Prime Edition*: https://amzn.to/3dompT7
Brother F400*: https://amzn.to/2GV2yyQ
Mit * gekennzeichnete Links sind sogenannte Affiliate-Links, die mit Partnerprogrammen der verlinkten Webshops verknüpft sind. Kommt über einen solchen Link ein Einkauf zustande, erhalte ich vom jeweiligen Shop eine (kleinen) Provision. Für Euch entstehen dabei natürlich keine Mehrkosten. Wo, wann und wie Ihr ein Produkt kauft, bleibt natürlich Euch überlassen. Ihr unterstützt mich und meine Arbeit, wenn Ihr über einen der Links einkauft. Vielen Dank
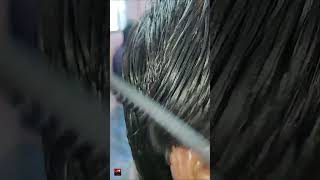
Hello and welcome to mommymade today I've got a very beginner-friendly project for you, an excellent first garment made of jersey or other stretchable fabrics and without a sewing pattern. This beanie hat with twist. - and this twist allows you to wear this gem like this, Like a normal beanie hat, but you can also pull the whole thing open put your head through and wear it like this as a scarf or as a headband or if you've Got long hair you can also wear like this. A Pony Tail hat. What you need is an elastic fabric such as jersey or the knitted fabric. You might have used last week to sew your convertible scarf.. I made my magic beanie Ifrom, the rest of the fabric used for this.. In any case, what you choose needs to be a stretchy fabric. if you're a sewing newbie and only starting with stretchy fabric check out. My video series'' learn to sew with mommymade `` theres, an episode there on sewing Jersey and other stretchy fabrics with the normal sewing machine. So if you don't own a serger and are new to sewing with the sewing machine, I'll link that video up here for you., Apart from that you'll need a tape. Measure use that to first measure your head, circumference ( or the head circumference of who ever's head you'll, be sewing for ), because the piece of fabric we need is exactly as wide as the head: circumference. and lengthwise. I cut 55 cm for adults 50cm for Kids and for smaller children, ( ie Toddlers, / Kids under 6 ). I usually take only 45cm because otherwise they have a huge amount of hat hanging at the back of their heards.. We don't want that., So that size is what you need of your Jersey fabric or other stretchy knit fabric like the one you might have used for your Sleeve scarf that video btw I'll also link up here for you.. Apart from that, you just need your sewing machine and fabric clips, and then you can get started I'll, be sewing this hat for my almost eight year old daughter today. So I cut out this pretty ice flower fabric (. Yes, she loves Frozen ) with a width of 52cm ( =Head, circumference ) and a height of 50cm. The first thing we do now is to spread that out in front of you with the width horizontally in front of you and vertically the length and we're going to fold it lengthwise right sides facing so nice side of fabric on nice, side of fabric pin or Clip the edge together and then sew along this side, either with your serger or using a stretch, stitch /, overlock stitch on your sewing machine Leave an opening to later turn your hat down here between the bottom two clips.. I mark this opening, which is not mandatory. I just do it so I I definitely leave that part open when sewing. So You sew all the way up to here leave a gap. There start again here, (, remember to backstitch ) and sew all the way to the end and backstitch again there. Once you've done that you lay down this tube. You now have in front of you the way it was lying there before. and now we'll turn it into a hat like this. Take a corner from the top and pull it diagonally to the opposite. Corner. put it on there and hold it onto the corner, then take the other top corner and fold it downward over all the rest diagonally to the opposite. Corner.. What you get is a structure a little bit like a crooked house., see here here here and here., and that's exactly how we want it.. You can now straighten this out a bit so that corner here lies on the corner and then we'll fold it up here and notice that we now have 4 layers, The two inner ones, we'll fold out of our way for now., so just fold them away toward The inside so the bottom layer of fabric, the top one end up on top of each other right sides, facing. And now clip them together, just at the center really in the base of the house.. We'Ll ignore the corners for now. and now put that under your sewing. Machinge ... - and I start sewing those 2 layers together here, where my first clip is. So about 5cm from the corner, either using the serger or a stretch, stitch or overlock stitch on the sewing machine Grab in there and make sure the two inner layers are out Of the way, so you don't accidentally sew them in. and then place the hat under the sewing machine, where the first clip is lower. The foot and start sewing just as far as you can get that way.. So now I've arraived at the end of the part. I originally clipped together. I stop there leave the needle in the fabric and the foot lowered and now reach in here and carefully pull out more fabric and continue to place these two layers that I've been sewing together on top of each other.. So now I have more space to go ..., so I just continue sewing.. You will pass the seam where you sewed the fabric length together ..., you just sew over it and that's how you keep going., always pull a little bit more out here, make sure the layers lie on top of eath other neatly and just keep sewing. Until at Some point: ..., you end up where you started. If you didn't pull or stretch any of the layers that should even out and fit exactly., And you just sew to where you started a bit over the starting point. Backstitch there and you're done, we've gone once around the bottom of the hat. This is what it looks like, then not much like anything yet really.. The first thing you do now is you look for the opening that you left in the first seam. through this. You now turn this entire thing. and then you fold the seam allowances against each other here and pin or clip this opening shut. And now this opening needs to be stitched. Up., The nicest and most invisible way to do so is with a hand needle and thread using a ladder. Stitch. I'll put a link to my ladder, stitch tutorial up here for you, of course, If you don't want to do that, you can also close the opening by flattening it and stitching over the edge with your sewing machine. and if you've done, that. That will give you mainly a hat or a scarf or buff whatever you want to call it, and if you guys then look for the seam around the bottom grab that and shake then the top swirls and closes itself, and it turns into a hat again and Gives you several other possibilities which I demonstrated at the beginning of this video.? Maybe you have an idea for a name for this thing. I don't know if there's an official name for it. ... I mean ..., it's kind of a beaniehat and somehow also a scarf. Loop scarf ... buff .... I know some people call things like this beanie-loops. You could also call the whole thing a pony tail hat, because you can pull your hair through the top. My daughter actually calls it twist hat or shake beanie, because you need to shake it back into that beanie shape if you've been wearing it as a scarf. ... to make it a hat again., so shake hat or shake beanie .... Maybe it is all of that: a pony tail twist, beanie buff, scarf or whatever. If you have an idea or just feel like letting me know what YOU call, this leave a comment under this video in the comments, I would love to hear from you Apart from that, if you feel like watching more of my sewing and DIY tutorials subscribe to The mommymade channel and tick that little bells so youtube informs you when I upload something new.. I look forward to welcoming you here again. Bye, see you soon, xoxo


Comments
Oller Lappen: Perfekte Geschenkidee! Ob Weiblein, Männlein oder Kindlein. Das kann (bei dem Wetter) doch jeder gebrauchen. Danke Sarah für dein tolles Video du machst das super
Maxine Sutherland: This is a fabulous tutorial, thank you! I'm thinking that I will call it a "Spiral Beanie" :) <3
Sabrina Ramn: Ein LoBeZoSt mega genial!!!! Vielen Dank für deine Kreativität und das veröffentlichen dieser. Mein nächstes Projekt steht jetzt auf jeden Fall fest
Melanie Paumann: Hab die Mütze heute Abend genäht. Die ist soooo toll hab dann, weil sie sehr fix geht, noch eine für meine Freundin genäht. Da wir zusammen laufen gehen ist das ein tolles multitool vielen Dank für dein Video! Hast auch gleich ein Abo von mir❤️
Sandra Mainka: Super einfach gemacht Vielen Dank für die erstklassige Anleitung
Elke Grimm: Sehr verständlich und übersichtlich erklärt. Danke schön. Tolle Arbeit!
Carmen Hanzig: Die ist super toll ,vielen Dank dafür.Endlich eine Mütze die sitzt
Beatrix Wengenroth: Super erklärt, schnell genäht und passt perfekt. Ich bin begeistert!
Kat: Oh endlich eine verständliche Erklärung. Hab so lang jetzt danach gesucht Danke......Du machst das so super
Ran: So, auch noch schnell vorm Urlaub erledigt, Ärmelschal und Schüttelmütze komplett im Set <3 Soooo cool!! muss ich dringend auch beides noch für Tochter machen ^^
Anda Mottl: OMG!!! I just want to say THANK YOU SO MUCH!!!!!! I made this tonight with no expectation at all and it turned out super easy, and nice!!! Im laughing in happy tears to see the result. Amazing. I made 2. One for me and one for my daughter. Im thinking to make another 10 tomorrow Thanks once again. A new subscriber from New Zealand
eleonora restelli: Thank you so much for thus tutorial, such an handy scarf/hat/beany whatever!!! I can't wait to try it!!!
Maria Stuart: Genial und richtig richtig praktisch. Ganz toll erklärt, vielen Dank. Werde ich sofort nachnähen
Beate Heister: Super Idee und so einfach zu machen. Danke für die mega gute Anleitung und Deine Ideen! Hab die Mütze bereits dreimal genäht, sie ist super angekommen. Mach weiter so!!!!
Fresien Duft: Liebe Sarah, das ist eine tolle Mütze und deine Anleitung ist super! Vielen Dank dafür!!!! Ichhabe schon 2 davon genäht! Herrlich!!!!
Regine Grud: Klasse!! Ich freu mich richtig doll über die Schüttelmütze :) So einfach zum nachnähen! Danke für das Video!!!! LG
Oller Lappen: Eine perfekte Geschenkidee. Ob Weiblein, Männlein oder Kindlein...das kann jede/r gebrauchen (gerade bei dem Wetter momentan). Danke für deine tolle Idee und deine super Erklärung, die absolut Anfängertauglich ist.
Susanne Müller: ach wie cool - bin durch Zufall auf dein Kanal gekommen und mega begeistert über die Beanie - und darum geht's dann gleich rüber zum Ärmelschal :-) der schaut sooooo cool aus, danke für die Ideen und die Anleitung, gerade als Anfänger ist es sehr gut verständlich was Du da machst :-)
Siglinde Weber: Danke für die schöne, raffinierte Anleitung! Sehr praktisch!
Angel ReDefined: Great video... The official name for this is Twisted Beanie. With the help of your video I can now make my own instead of buying online. Thank you so much. P.S. love your german language. I'm half german but unfortunately I was not raised by my german parent and never learned to speak it or read it and my baby book is written in German. . Thank you for your video and many blessings to you.
Carmen Klein: super tolles Video. Schüttelmütze finde ich gut. Habe nach deiner Anleitung gerade die Erste genäht für meine Enkelin. Jetzt kommt die Nächst dran. Habe letztes Jahr im Oktober zwei Enkelinnen bekommen. Da macht nähen wieder Spaß. Vielen Dank für das tolle Video.
skydiverpeg: Liebe Sarah! DAAANKE für diese tolle Anleitung! Das erste Tutorial einer Zopfmütze zum Nähen! Man findet immer nur Strickanleitungen. Und dann ist diese wunderschöne Mütze auch noch vielseitig verwendbar und sieht besonders aus durch den Twist! Ich setze mich direkt an die Nähmaschine und nähe eine für meine große Tochter. Und wenn sie ihr nicht gefällt ... dann gibt's aber was auf die Mütze . Vielen Dank für deine tollen Videos!
Jenny Halima: Wow was für ein tolles Video Endlich ein Video was ich als Anfänger verstehe
Annika: Wie genial. Die mache ich mir. Vielen, vielen Dank
Kirsch Kind: mega praktisch, nähe gleich los. Danke ❤
Vee61: Hi, I love your twisted beanie. I just finished one. I'm Afrikaans speaking and I understood how you explained everything in detail. I even enjoyed the background music. Thanks so much for sharing ❤️
Andrea Frey: Danke für die tolle Idee, hab gleich ein paar genäht. Man braucht keine umständlichen Formen mehr ausschneiden und hat keine Reste mehr. Finde ich super. Hab sogar eine Wende Mütze daraus entworfen. Danke für deine tollen Anleitungen
marines de almeida: Muito obrigada pela agilidade. Mesmo sem entender seu idioma aprendo muito com você, sua didática é maravilhosa continue assim e parabéns pela sua simpatia.
Elke W.: Vielen Dank für die tolle Anleitung! Meine Enkelin mit langen Haaren wird sich sehr darüber freuen!
Kristin: THANK YOU THANK YOU THANK YOU!!! I get these from Amazon but have been searching all over for DIY instructions! I bought a metric ton Of knit maxi skirts to upcycle into these hats and I CANT WAIT TO START!
Vera Bill: So eine schöne Mütze! So eine tolle und einfache Erklärung! Sie sind ein Schatz! Ganz herzlichen Dank dafür.!
Anigmandra: Du hast total recht, das Tutorial ist genau das was ich gesucht habe. Vielen Dank dafür, kommt auf die Liste für das neue Jahr. Wo auch immer noch der Ärmelschal wartet.
Sabrina Brückl: Hallo hab dein Video gesehen und sofort losgelegt meine Tochter ist höchst begeistert!! Danke schön!
Sabine Eumann: Vielen vielen Dank super Erklärung hab gerade eine genäht
Medusa303: Wow - wie genial ist das denn! Danke für die Tolle Anleitung!!!
Petra G.: Hallo, hab jetzt schon 5 Hauben mit den verschiedenen Stoffen gemacht einfach cool. Alle sind begeistert und hat man das Prinzip verstanden geht es so schnell. Hab auch eine aus Handtuch Stoff gemacht. Ist ein Traum bei nassen Haaren!!! Würde so gerne dazu passend ein Wendekleid auf Handtuchstoff machen, aber finde keine passende Anleitung...
L Paulyzei: Ey das ist so eine tolle Idee!! Und eine richtig tolle Anleitung, vielen Dank!
Ute Bruncke: Danke für diese tolle Anleitung. Habe gerade diese Schüttelmütze genäht und bin total begeistert. Wird nicht das letzte von dir sein, was ich von dir nähen werde.
Littmark1: Tolles Video! Vielen Dank!
Anke Kawohlus: Das ist ein mega Video... Die Schüttel Mütze wird morgen nachgenäht... Du hast es wiedermal toll erklärt.. Wieder was zum verschenken... Danke fürs Video
Anja Kronenberg: Ich finde die Anleitung und die Mütze einfach super
Dajana Schulz: Ich glaube ich kenne das unter dem Namen Multifunktions-Tuch oder -Loop, aber Schüttelmütze gefällt meinem Sohn und mir auch am besten *.* Vielen lieben Dank für das tolle Video! Super erklärt!
Manuela Witt: Coole "schüttelmütze", muss glatt nachnähen. Hab immer nach einer mützen variante gesucht die ideal ist mit langen Haaren und die ist perfekt. Toll erklärt,danke.
K H: Wunderbar und praktisch , will ich auch mal probieren in kurzer Zeit , vielen Dank für Nähtips ((:
Ingrid F.: Vielen Dank für die tolle Anleitung. ❤❤❤
Sabrina Dörfler: Die habe ich meiner Tochter auch schon vor zwei Jahren genäht. Sie liebt diese Zaubermütze
Neroloto: Hab die Mütze gerade nachgenäht. Hat super geklappt! Vielen Dank!
Melanie Schmölzer: Die Schüttelmütze ist toll werde ich nähen und vielen Dank für das Video ❤ glg Melanie
knot great: Thank You very much - I thought I was doing this wrongly, because the english language videos I watched first did not mention there is SUPPOSED to be an opening on the top, also. Your demonstration was helpful! yay! :-)
Jessica G: Ich muss mich bei dir so sehr für dieses Video bedanken! Du erklärst ja sowieso immer richtig toll, in diesem natürlich ebenso, wirklich super, Dankeschön aber gerade diese Mütze ist genau das, was ich immer gesucht habe, ganz ehrlich! Ich habe auch langes Haar und ich habe es immer bei normalen Mützen so gehasst, dass einem die Haare so am Nacken gehangen haben und die Mützen auch immer hoch gerutscht sind. Das sah noch dazu überhaupt nicht schön aus. Ich habe diese Mütze genäht, mit Alpenfleecestoff übrigens, und ich liebe, liebe, liebe sie so sehr sie sieht so toll aus mit dem Pferdeschwanz und verrutscht nicht. Der "Twist" ist auch so hübsch. Jetzt trage ich an kalten Tagen endlich wieder eine Mütze. Wurde auch schon mehrfach darauf angesprochen. Meiner Schwiegermutter habe ich auch schon eine genäht, sie ist auch begeistert. Einfach toll, Dankeschön
Tina Tina: Mega, die beste Mütze ever! Und Schüttelmütze ist der perfekte Name!!! Danke für die tolle Anleitung!
Ni Pa: Super sehr schöne Anleitung ☺️
Diane Perkins: Brilliant video.. I need to make some of these. Thanks for sharing xx
Jessica Wierz: Mega Idee, perfekt
Annelie Greese: Durch eine liebe Kolleginn, bin ich auf deinen Kanal gestoßen und bin jetzt schon begeistert! Die Kollegin hat s schon mehrere schöne Zopfbeanies nach deiner Anleitung genäht. Ich werde morgen loslegen und dann berichten und gleich erstmal deinen Kanal abonieren! Danke für deine sympathische und freundliche Art!♥️
Anna-Lena Bader: Super Idee! Wird auf jedenfall genäht! Schüttelmütze ist ein toller Name!
Mandy Gl.: Danke für das tolle Video ☺️!
Luisa Schulz: Danke für tolles Video, sehr gute Anleitung in schöne Mütze ! Habe mich sehr gefreut und sofort Abonniert . Wünsche dir viel Erfolg und noch viele interessante und hübsche Kleidungsstücke von zu sehen !
Birgit Flierl: Tolle Mütze. Habe sie gerade nachgenäht. Ich leibe 3 in 1 :)) Vielen Dank.
B Z: Perfekt. Wird definitiv nachgenäht. Vielen Dank für diese Idee und das Tutorial. Ich lasse Dir ein Abo da. Mal schauen, was es bei Dir sonst noch Tolles zu entdecken gibt.
Rosi: Astrein mach ich gleich mal nach freu mich voll Vielen Dank
Erd Weibchen: Wie super, jetzt kann ich mir selber eine Mütze für meine Dreads nähen, die eigent sich nämlich perfekt dafür :) Vielen Dank, deine Videos sind wirklich sehr gut gemacht!
Gulnara Azhgaliyeva: Supeeer!!!! Практичная шапочка 3 в 1 . Благодарю !!!
Yvonne Dombrowski: Absolut genial. Habe sie schon einige Male genäht. Super Geschenk für Geburtstage oder zu Weihnachten.
Denise Gerisch: Liebe Sarah, danke für die tolle Anleitung! Wenn jetzt die kühleren Tage kommen, werde ich diese Anleitung von dir nachnähen :-) Stoff ist bestellt und ich freu mich schon jetzt auf das Ergebnis...
Onamico2301: tolle Anleitung - gleich die Nähmaschine angeworfen - Schüttelmütze find ich super :)
Deni K: Meine Mum hat mir das nachgenäht. Merci, dass du das tolle Video reingestellt hast
Michaela Brenner: Großartige Idee! Sowas suche ich schon länger! Ganz toll erklärt auch! Ich mache mich dann mal gleich an die Arbeit! Und Schüttelmütze finde ich auch einen klasse Begriff!
Stefanie Vorderderfler: Du bist genial, hast es super dokumentiert. Das sind tolle Ideen zum Beispiel für Geschenke! Alles gute weiterhin liebe Grüße Stefanie
xx: I made it, thank you for the English subtitles!
Netti S.: Oh wie toll..das wird demnächst gleich ausprobiert für meine Mädels
Jangles Jangles: Hallo mommymade! Ein super Tipp: wenn du fürs "Aufschütteln" nicht die Naht, die du als erstes genäht hast, im Inneren suchst, sondern genau die andere Seite, (also quasi den Bug, der durch die erste Naht entstanden ist) dann hast du a) keine Naht vorne an der Kante der Haube und b) die Naht, an der die Teile zusammengenäht sind, an EINER Stelle (und nicht vorne und hinten, oder links und rechts) Falls das jetzt zu kompliziert war: einfach die Haube wie gewohnt aufschütteln und dann am "verdrehten" Ende auseinanderziehen - und sehen was passiert :) Liebe Grüße!
conny heiler: Raffiniert, tolle Mütze. Dankeschön für die Anleitung
Beate Winderl: Du bist echt genial, wirklich toll erklärt. , ich würde sie Circle Beanie nennen
mittelhof mama: Danke für die tolle Anleitung. In den nächsten Tagen werde ich mir auf jeden Fall eine Schüttelmütze (das, finde ich, ist ein Supername) nähen.
Edith: Danke für diese super Anleitung. Nach 30-jähriger Nähabstinenz auf Anhieb geschafft und passt. Genau nach einer solchen Mütze für Pferdeschwanz suchte ich seit Jahren.
Ca Ro: Tolle Idee mit toller Anleitung! Zaubermütze oder Schüttelmütze finde ich gut.
Cindy Rittel: Ist tolle Anleitung und ich habe sie gleich mal ausprobiert. Hatte alles super geklappt für einen Anfänger. Schüttelmütze finde ich richtig cool
Edeltraud Koch: Lieben lieben Dank für die tolle Idee ich hab's probiert suppi geworden
schwarzetaste: Perfekt erklärt, da bleibt nichts offen, nicht mal für mich ;-)
Bianka: Wahhh,wie cool ist die denn bitte..genau so etwas hab ich gesucht,da ich lange Haare habe und eine Beanie für den Stall (o.ä.) brauche...perfekt danke schön
Gabi Rädel: Find ich genial einfach und einfach genial. Dankeschön fürs Zeigen. Lass gleich mal ein Abo da.
Judith Jebsen-Kohn: Habe letzte Woche erfahren, was eine Schüttelmütze ist und dann nach einem Schnitt zum Nachmachen gesucht. Vielen Dank für die Anleitung ... nach ca. 20 Min war ich komplett fertig. Super schnell, effektiv und geiles Ergebnis. Danke ;)
Andrea Finger: Super Idee , morgen mal meine Stoffkiste nach Jersey durch suchen………… Dankeschön
Ellen Heinzel: Die Zopfbeanie ist super. Ich werde versuchen, sie fuer meine Nichte zu naehen. Viele Möglichkeiten, tolle Idee. D a n K e
Antje: Ich nenne es Must-Have Beanie!
Moonlightie: Total genial. Habe mir eben aus einem Stück Reststoff eine gemacht, hat inklusive zuschneiden vielleicht zehn Minuten gedauert.
Arzu ARZU: ist ja mal eine geniale Idee, das ich direkt am Anfang geliked habe Danke
mommymade: The ENGLISH and FRENCH captions / subtitles for this video are online now! If you want the tutorial in English, hit the CC button at the bottom of the video, choose the Language of the subtitles by clicking onto the gear wheel icon next to the CC FAQ Video zu den Themen Motivstoff / Verwenden mehrerer Stoffe / Wende-Schüttelmütze findet Ihr hier: https://youtu.be/9WKgR5XQWaI
Gitti Schlang: Danke fürs Zeigen. Ich kannte den "Schnitt" zwar schon von anderer Stelle, aber trotzden Danke! ... werde auch mal nach deinem Ärmelschal schauen.
@zauber_diy: Das ist ja eine tolle Mütze muss ich unbedingt nähen, Danke
Chanty Tea: Wow die ist ja toll. Ich werde sie nächste Woche für mich und meine Tochter nachnähen
K. L.S.: Mega klasse ....total easyJet,total schnell....inkl. Zuschnitt vom Stoff knapp 20 min gebraucht
Manuela Scheel: Dankeschön für diese tolle Anleitung für diese praktische "Schüttelbeanieloopmütze", habe sie für meinen Enkel genäht
Franziska Wegener: Die Schüttelmütze ist super! Ich habe Unmengen von diesen Multifunktionstüchern, die ich meist nach dem tauchen (nasse Haare, Ohren warm halten und so ...) nehme, und es war jedes mal ein Kampf aus denen eine Mütze zu basteln ... DANKE, dass dieser Kampf ein Ende hat! Hab gleich die Overlock angeschmissen, die Wendeöffnung habe ich dann eben unten offen gelassen. Hat super funktioniert! DANKE für diese tolle Idee und die wie immer unkomplizierte super Anleitung!!!
Verena S.: Loopbeenie oder Schüttelmütze, egal, denn die ist so cool. Dankeschön!!! Die mach ich für meine Enkeltöchter auf jeden Fall. Aber ich bin mir sicher, das da noch mehr eine haben möchten :-) bis bald LG
Sasa Maus: Eine wirklich gute Anleitung
Dorothea Hochgeschurz: Wow....super toll❣️
elenamirela botu: O MEIN Gott!!!wie schön sieht die Mütze, ich habe gerade nachgenäht. Sehr gut erklärt, vielen Dank!!!!!
Sigrid Nonnenmacher: Genial ,einfach genial......diese "Schüttelmütze" werde ich für meine Enkelschar (5) versuchen hinzugekommen, den Mützen hat man nie genug..... ganz liebe Grüße aus dem Schwabenländle. Sigrid