Getting A Seamless Hairline With Your Synthetic Wig | Jesse M Simons Wig Education
- Posted on 17 February, 2023
- Ponytail Hairstyles
- By Anonymous
Hey guys! Today we are going over a cool wig hack that I like to do to get that seamless synthetic wig hairline. It's cheap and simple. The best part is you can do it in minutes. Using scar tape on synthetic wigs is a simple process that can make your wig look natural.
~ Jesse M. Simons ~
Do you want to keep your wig looking new and smelling fresh? Then try using my Everyday Synthetic Wig Spray! It's been used on hundreds of different types of wigs. You can find it @ https://www.jmsimons.com/shop or you can click on the picture above!
**Follow me on**
IG: @Jesse_M_Simons
Facebook: https://www.facebook.com/JesseMSimons
Email: [email protected]
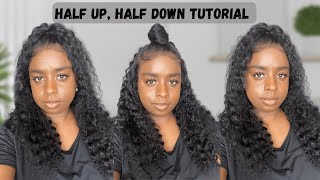
Hi guys I wanted to come on here today and I wanted to show you how to add scar tape to your hard laced, wigs all right, so a little disclaimer. I like my lace, to be like all the way where the hairline starts. So I did trim this lace just a tiny bit, so there will be just a tiny bit more lace on here than there is, but you're really not going to notice a difference. I just really like my lace to be like right, where that first hair is attached to it also trimming it just a little bit will help with the hardness. That'S right there on the edge of the lace. I found that it was a little bit softer when I cut it back all right, so I have on Brianna from envy, and this is a hard lace wig. So what that means is when you get it in, you aren't going to have to cut any lace on the weight, but the lace tends to be a little more scratchy and thick and kind of hard, which is where the name comes from so on this wig. Here you can see I've already added a little piece of Scar tape and I want to show you guys with another Brianna in a different color, exactly how you can add scar tape to your wig, all right. So when you're looking at this cap, you guys are going to see like I said you won't have to cut the lace off, which is really nice. If you are afraid of cutting lace, these are really literally throw on and go wigs, but I have super sensitive skin. So I like to add a little scar to the front, just because I tend to get irritated and get kind of scratchy feeling, because this lace is a little bit harder and the reason for that being is it is going to give you a really seamless, Flawless Hairline finish but, like I said, if you have sensitive skin you're going to want to add scar tape to it, so that's what we're going to do today. This one here has a small area of lace, so we're only going to be putting it on the small space for the other one that I'm going to show you guys, but you can absolutely add scar tape to the whole hairline of any way that you have. I do this on my lace for our regular wigs all the time as well. If I just feel like the lace is just a little itchy for irritating, I love to just add star tape to it, because it makes it so much better, so much faster. Alright. Before we get into actually adding the scar tape, I want to show you guys this wig without any scar tape added to it. So you can really just see what I'm talking about when we're talking about this ready to go hard lace front. Technically, it is also a mono top because it does have this monofilament kind of material here. But this one in particular, still kind of feels exactly the same as the lace all right so for this I do recommend putting it on a wig head. I do this in my lap sometimes, but it's just a little bit easier. If you have it on a nice flat surface to be able to lay and measure out your scar tape, all right, so once you have your skirt tape or if it's branded for wings either way it's scar tape, you're going to want to go ahead, and I Cut mine in half, I get way more uses out of it this way, and I really don't need a giant huge strip. I really just need this small amount to go across and then the only other thing you're going to need other than the scar tape is you're going to want a pair of scissors. We'Re going to need this to measure and cut our skirt tape. I'M going to go ahead and just take this and run it right along from one side of the other. Obviously, if you were doing this on the whole head, you would measure it. However, you need to to get whatever area you want to cover, so we're going to do here to here and I like to make just a tiny bit shorter. So it's not overlapping with the actual wig cap, all right, and so now the easy part you're going to just kind of peel this off and slowly lay it. I find that it's easier if you take a small amount peel and then slowly peel back as you go. This is back in my vinyl days how I used to have to lay final now on cars, and then you want to just kind of go right along the hairline, but you want to be back behind the lace, just a tiny bit. If you put this over or right on the edge of the lace, sometimes the adhesive that is actually attached to this can kind of almost bead off on the end, so I like to leave just a tiny, tiny bit of lace right there. It will definitely not make a difference and it's still going to feel so much better. I promise thank you like this and, as you can see, this adds a little bit of a stretch to it. So, as I was laying and stretching this out, I have a little bit too much. So that's why I said I always like to cut it a little bit short and I'm just going to trim this off and then I'll show you guys all right and then you're, just gon na take your hand and just kind of give this a nice little Rub just to make sure it's stuffed really well, thank you and see you can see right here. I put this a little too close to the edge and you can see that there's some of that adhesive coming off. If that happens, you can just get a little micistellar water or makeup remover and just kind of take those beads off, and when you flip this, the only other thing that you might want to go in and do is take a little bit of powder. I use eyeshadow powder or setting powder that kind of matches the roots here and just kind of get that going right here only because now you can see, especially with this wig, it has a really awesome, amazing, invisible lace. If you touch this, you can feel the stickiness of that scar tape. So this is something that I feel like people - people don't talk to you about, and you're gon na feel that if you don't put something there, so you can either use some translucent setting powder. If you don't want to add any color or you can grab some powder that matches the actual roots and you can put that there as well, so I'm just going in with a color, that's similar to The Roots, because I really don't want to see any of That tape and I'm just going to blend that in all along this hairline, because this is a free parting wig. So you want to do this anywhere, where you have said that scar tape at and we're just going to go all the way across and just kind of dust it on there and just make sure we don't feel when we're touching it that it feels tacky. Still it just kind of helps blend it in so you can see that's blending it in a little bit better. All right, I'm gon na go ahead and throw it on. So you guys can see what it looks like. Oh thank you all right. So here is the final result. As you can see, this is a free part wig. So you can move it. However, you want, but no matter where you're moving it you're not going to see that scar tape and it feels so much better on my forehead. So I hope this was helpful for you guys if you are new to my channel, make sure you check out this video right here is our new Channel video. Thank you guys. So much for watching and I'll see you on the next one.


Comments
Kelli Delfin: Great tips! Love the production value. That slow motion shaking of the hair! Get it Girl!
Clara: I'd not heard of hard lace wigs. Yes this is helpful thanks
Check out Angie's wigs: I cut my lace way back too
BOLSOSSUPPORT: Super like abrazos
D.E. H: What in heaven's name is "scar tape"??