Low Frontal Ponytail | Arrogant Tae Method
- Posted on 03 May, 2021
- Ponytail Hairstyles
- By Anonymous
Top knot bun install
Low knot bun tutorial
Ig https://www.instagram.com/hairbynbbeau...
Lipgloss ig https://www.instagram.com/nellyb.beaut...
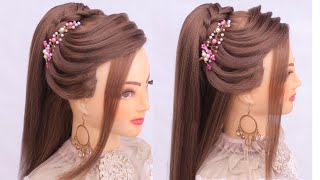
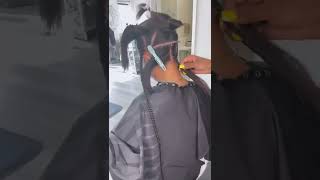
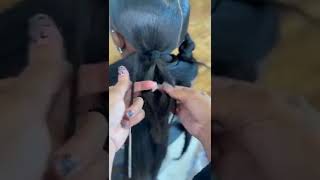
What is up you guys welcome back to the channel, so in today's video i'm going to show you guys exactly how i did this a frontal ponytail with the little braid, and i curled the end like this. You want to see exactly how i achieve this look. Then keep on watching, don't forget to like comment, subscribe and see you guys in the next one all right. So this is a 13 by 6, so you guys see how much parting space there is transparent frontal and i kind of styled it already to how i want it to lay it just. It makes the install so much easier once you style it before putting it on and that black thing right. There is because i dyed the hair jet black and i got a little bit on the lace, but that's no big deal so then i apply my ball cap and just cut a hole at the back to expose my ponytail. Then you want to go in with the makeup of your shade and just cover the hairline you're. Basically just trying to make yourself look bald and then this is the frontal. After i cut the lace off, you see how it's white, but that's transparent lace. It doesn't really have a color, it doesn't match my skin, which is fine. That'S what transparent lace is. So i'm just going to go in with my makeup and color delays. You can also use tin spray. So this video right here that i did with the top knot bun, i didn't do this step because that was hd lace with the hd lace. You don't have to do all that so i'll link that video in the description bar down below. So this is the erica j hold me down, adhesive in the watermelon flavor, and it smells amazing. I usually use the boldhole active and it works really well for me, like my installs, do not move unless i remove it with a remover but, like i said, i've been hearing a lot about this um adhesive, so i decided to try it out so we're gon Na see how it works all right so from what i've seen tay works in sections, so he would do one half first and then do the other half after. So this is the technique that i'm trying i usually um, apply the head adhesive all over the hairline and then i apply the wig. But this way actually does make more sense, because sometimes the other side can dry up before you're finished the other side. So and another thing he also said you don't have to wait until the glue is completely dry before you add um your second layer, because it kind of defeats the purpose of layering your glue. So that also makes sense as well, so we're going to see how this turns out y'all but yeah. You want to still make sure you're applying really really thin layers and you're, smoothing it out. So once you lay your lace down you're going to use the back of your comb and just kind of push it down into the glue so that everything lays then you're going to do the same thing. On the other side, um make sure you're applying thin thin thin layers and then you're gon na smooth it out. I think i did about three layers of glue all right so once my frontal is on i'm gon na take this band and i actually use two. This time and i'm gon na tie it really really tight. This band is going to apply a lot of pressure and it's really gon na help to melt that lace into my skin y'all. So now i'm just parting the hair and making sure it's right so with every install, a wax stick and a hot comb should be your best friend. That'S the only way you're going to get a nice flat, flawless sleek. Look, you guys see, look how nice and smooth and flat this looks once i run my hot comb through the hair. Also, that's why i like dyeing my hair jet black. It just gives it a nice shiny. Look you guys so now, i'm just cutting out the stocking cap because i'm going to put the hair in a ponytail, you don't want the stocking cap to show and i took the elastic band off and you guys see that melt like it's really melted. So, as you guys can see, this lace is melted. The transparent lace is really not bad as long as you tint the lace or apply your makeup. It'S a bomb, but if you're trying to go for a no baby hair, look like really flawless no filter in real life. I would suggest getting the hd lace for sure, but for the most part, transparent is just as good. Now, i'm just taking this small, tiny flat iron and just curling my baby hairs um. I seen tay do this as well, but i will be honest. I didn't see, i don't know where i seen it first, but i seen someone do it and i just started doing my baby hairs like this and it just. It really really really helps like this small tiny little detail makes such a difference, because i used to struggle with baby hairs a lot, but ever since i started doing on this method, it really helps. I actually really liked it like this. I'M really feeling this baby hair trend, like i think it's so cute, but i don't know if i'm ready to walk outside like that. So now i'm just taking the mousse and just like molding my baby hairs into place, but once your baby hairs are curled, it's just so much easier. So once your baby hairs are molded, i'm going to use a silk band and tie it down. You definitely don't want to use this stretchy elastic band that i was using before you want to use a nice silky band just until it's dried and then i kind of um comb out the baby hairs a bit just to give it a fluffy. Look because i don't like when the baby hairs look like gel down pasty down, i like when it looks nice and fluffy. So here where i got the die on the part accidentally, i'm just gon na that's an easy fix. I'M just gon na take my foundation or concealer and just go over the part, and that's pretty much it you guys. That'S all for this video um, don't forget to like comment, subscribe and i'll see you guys in the next one.

Comments
Victoria Mckee: May the hair angels be with me trying this out . This came out perfect!!!
SheSoAmi: You did that! This was exactly the style I had pictured in my head to do but I needed to see it on someone else first, super pretty
Ms10outta10: This is so cute! I want to try it . Thanks for sharing
Divine Infinity: You really did a great job on this. So dope
Tamzin: This is amazing! What did you use to glue down your wig cap? ❤️
Mrs. Jones: Excellent job!!!
Mz Gemmy: Love this! So talented
Stephanie A: what vendor is the frontal from? x
Mz Chocolitt: Love it
Nicole Nixon: I ❤️it. Did you sew the back of the lace down?
Blessing Tanix: You really did a good job
Shanesha Benjamin: Was the wig cap showing in the back? Also, how long did you keep this in for?
Lisa TKHopes: Where’d you get the frontal from?
Catchmeifyoucan: Wow this did look really good
Jael Marbury: What brand of hd lace front do you use
Adearee: I love this look
Michelle: Nice job!
Charleace Pugh: What length is this frontal
Cr8zCOCO: Amazing! Your gorgeous!
Montanaa: I love this . Can somebody tell me how to glued the back of the frontal down or does she just leave it
BrittneyKiara Hair: Blended well
2HOTT2HATE1: This wasn't a real tutorial..you didn't really show how you did anything except glue the frontal and baby hair..what about the specs on the hair, the bald cap method, how you attach the pony, did you sew it? Came out cute tho..
Lola Bunny: I wish you would’ve shown the bald cap did you sew it through your hair?
BrittneyKiara Hair: You have to pull it until you get a headache he says lol
BYNXX: BABY you did DET OKAYYY
Jaeana: Omgggg where yuu get the frontal
Shantana Impress Music: Good job my carribean sister