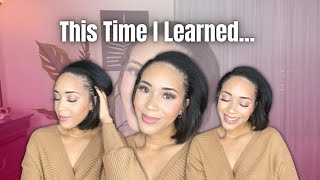
5 Hairstyles For Short Hair! - How To Wear Hair Rings!
- Posted on 18 August, 2016
- Short Hair
- By Anonymous
Follow me
http://instagram.com/tashietinks
Snapchat - @tashietinks
http://twitter.com/tashietinks
http://facebook.com/tashietinks
Periscope - @tashietinks
Hey guys!!
Finally filmed some hairstyles for shorter hair without extensions!!! as i know a lot of you have been asking for this as you all don't want to wear extensions!
Let me know your fav!
Hair rings - Claires accessories - http://bit.ly/2bbStug
OR
TOP - http://bit.ly/2b8AQdX
Necklaces - https://www.cherrydiva.co.uk - CODE TASHIETINKS for 20% OFF
Tashie
xoxo
All enquiries - [email protected]
This video is NOT sponsored
Hey guys welcome to my channel today, i will be showing you some hairstyles for short hair. I'Ve done loads of hair tutorials before they've all been for long hair or with extensions, and you guys have been asking for short hairstyles. So here they are, i've incorporated hair rings in a majority of them. Well all of them um, but obviously you can totally do the look without the hair rings. I just wanted to show you how to wear hairs because hair rings are like everywhere right now. So obviously the hairstyles are still hairstyles without hair rings, wow, i'm just rambling. Let'S get started okay, so starting off with our first hairstyle, i'm doing a variation of the half up top knot that i wear pretty much all the time um, but to make it a little bit different. What i'm going to do is i'm first of all, sectioning off where i want the top knot to be, and then i'm going to braid the front part of the hair into the bun. So you just want to take three sections like this and we're going to be doing a dutch braid, and so this basically means you're just going underneath, instead of over so you're, taking the section here and you're, taking a bit like adding a bit of hair. As you go back and putting it underneath the middle section, rather than over, like you would usually do with a french braid, so adding a bit of hair and putting it underneath adding a bit of hair and putting it underneath - and you want to do this - all The way back to kind of your crown area, but basically the top of your head, depending on how high you want your top knot to be hey: okay, okay, once you've finished, braiding that all the way down. So once you get to the crown, you just want to do a regular braid, and then you just want to twist it into a top knot. It'S good to braid it all the way down, because this also gives your bun a bit more texture, rather than it just being like a smooth bun tie it with an elastic and then just loosen up that braid slightly, and that is the finished hairstyle. If you didn't want to wear the hair rings, but to apply the hair rings, it's super easy. I got these ones from claire's, you literally just open them like with your finger and just put them in wherever you want, and also as many as you want. I just went for a few with this one and once you've done that. That is the finished hairstyle, for this look come get us with me, okay, so for look number two you're gon na three head upside down and we're gon na do the exact same braid. We did on that top, so this is a dutch braid, so you're taking everything underneath the middle and just adding hair as you go. This is basically exactly the same as you would do like a french plait, but it's a dutch braid and it's upside down. This was so hard to get on camera because i'm literally standing with my head upside down, so obviously i filmed completely on my own. I obviously couldn't see if i was in shot or not. I just kept having to put my head up and check if i was um, but you can see here. I mean i've just done the exact same as i just did in the other one. You want to go to again, like the top of your head around just above your crown area, that one is a bit of a workout, and then you want to tie that into a ponytail and then just twist it round into a bun. I don't like to braid this one, because i like the bun to be a little bit bigger and if you don't braid it it's going to be like a little bit poofier. So that's the finished look, so it just looks like a regular top knot from the front this one's really good if you've got super short hair, because you know what it's like, if you try and put your hair up in a bun and all those short bits. Just fall out the bottom, so by braiding it which obviously you could braid it tighter than i have, which would help with shorter hair and but it keeps all those short bits in place plus looks super cute. So, obviously again you can wear with or without the rings, but this one i love with the rings. I saw this photo of shea mitchell. So how do you say her name? I think it is that was um, a hairstyle done by chris appleton, who i actually met when i did a thing with beauty works and he is such a good hairdresser and he did this look and he looked so bombed. So that was the inspiration for this. Look okay, so moving on to look number three, just like your hair parted wherever and then work out what part of your hair you would like to go back, whether it's a big section or a small section. I go fairly big and then you're going to take that section and literally just braid it, not a french braid, not a dutch braid, just a plait. You know just like a regular three strand plait. So this is probably going to be the easiest option, because there's no braiding involved, it's literally just a plait and i think most of you can do a plait. So it's the easiest one. So you just want to plat the section all the way down. You probably notice with all of my hairstyles i do prefer them to be quite undone and messy. Looking i'm not really into the whole super neat, braids or even like just you know, i just like them to be a bit messier. I think it just looks a bit cooler, especially if you're like going to a festival or something. Then realistically you probably don't even have a mirror. So it's just really easy to do so once you've placed that hair all the way down, i'm just tying it with an elastic, and then you want to pin it at the back. I personally like to pin it and i just take a bobby pin and instead of putting it over the hair like this, i like to like work out where i want it, and then i lift that section of hair up and pin the braid underneath that section. So that hair falls back on top of it, so i don't know i just i like the way it looks because it kind of covers the pin really easily and the hair band, and you just get like a cute little accent braid. So i just do the exact same thing on the other side and then, once again you can leave the hairstyle like that or add in your hair rings. For this one. I do really like it with the hair rings, because i think it's quite hard to see the braids, especially if, like at the top of my head, my hair is pretty much just like one color and because these braids are at the top they're, not as noticeable. If you had blonde hair like all the way through, then it'll be a bit more noticeable, but if you don't a ring, these herons are a great way to make you like people, see like oh hold on what the hell has. She got going on up there that looks pretty damn cool girl anyway. That is the finished. Look for this one, we'll get free, okay! So look number four! Are we on four yeah? Okay? So you want to section off a section of your hair over your parting and middle parting is best for this one. It'S not really going to work on a side, so you want to section off like this i'd say: that's what like two inch section, maybe like an inch either side of your parting and just take a bit away at the crown. You do want your crown to go back so just make sure that bit is going back, so you have like a little bit of body in that area. So that is the section. We'Ve got it's like a little rectangle at the front of your head, and then i just tie the rest of the hair out of the way, because it's just going to get in the way. For this part. Next, we are going to dutch braid this hair, but we're going to go forward so instead of going back we're going forward so exactly the same as the first braid and so taking a piece and going underneath the middle, taking a piece and adding a bit and Going underneath the middle - and you want to do this - all the way down - make sure you kind of pull it tight after each turn, and - and you just want to do this all the way down until you get to your hairline - hey, yes, okay and then once You get to your hairline, you just want to tie that with an elastic and you've got a unicorn horn, but we're not going to leave it like this. Obviously you want to split that part into two sections, and i just pin one section out of the way. Just so it doesn't get in our way, and then you just want to do a regular braid down at that section. So all the way down and then also tie that with an elastic and then you want to once you've done that you can release the band at the top. So just pull that band out and then do the exact same thing on that other side. So plait it all the way down just a regular braid uh all the way down and then you're gon na pin these at the side of your head. This one is definitely a bit more out there and definitely ideal for festival, type vibes or, like maybe your grains, like ibiza or just somewhere, like a cool like day beach party, because it's gon na keep your hair off your face. And it's basically like you basically made a headpiece for yourself. You know like people wear like those head pieces, you know like the bands you can put around your head. This is like you just peanut, just snored, so about that. This is like you just made it yourself, so it's pretty cool um, so yeah you're just pinning those two bits out of the way and then once you've done that you can obviously let your hair down and just loosen the braid slightly and put in some herrings Herrings with this one, i do think also look pretty cool because it makes it more like it is jewelry. I don't know what was going on with that one kept falling out, but just apply as many as you want, but do make sure you're putting them in the the top the top braid, as well as their braids, going on the side of your head. You know just all the way over. I know okay. Finally, my fifth and final, and probably my favorite hairstyle, you wanna break you wan na split your hair in the middle and just tie that one section away and then we're going to do a dutch braid yup. You guessed it my favorite hairstyle couldn't leave it out for all you short girls to show you that it does work with short hair and it looks freaking bomb. So it's all good, so braiding down you wan na i've done so many tutorials on how to double dutch braid um, but just to explain it again, so you basically are doing a french flap. Instead of going over you're going under and you're adding pieces as you go, i think the thing to notice in this which people struggle with the most is, if you just notice, where my hand positioning is so one hand, is completely at the front and the other One is not all the way back, it's kind of more. Obviously, it's bent it's at the side. This is much easier and it prevents your arm from aching too much and because before i used to do it, where i used to hold my hand like right at the back, but i prefer my braids for this to be more at the side of my head. Rather than going down the back of my head, i think especially this works better for short hair. If you have them going down the back, then from the front, it doesn't really look. You'Ve got much going on because they don't reach like around the front. Do you know what i mean so if you have them at the side of your head, it's much better for short hair and also it's way easier to do so. Just keep the braiding all the way down and we're going to do this on both sides and, obviously again you can totally leave it like that and that's how you would do a double dutch braid for short hair. But you know i'm going to add some rings in there to make it a bit more festively. Come get us with me. Just throw away hey, okay, okay, so put those rings all the way down the braids as many as you like, like you, can go crazy and then once you've done, that that is the finished. And fifth and final look do. Let me know down below which one is your favorite and give this video a thumbs up if you liked it and thumbs up for more hair tutorials - and i will see you guys in i'm - losing my voice i'll see you guys in my next video bye guys In the name of


Comments
Brenda Aquino: I love your grungy makeup! it would be awesome if you made a tutorial
Marlene van Laar: Your hair is more medium length darling But despite that, these hairstyles are bomb ❤
Sophie M: I'm going to V fest and this tutorial came just in time, had no idea what to do with my hair over the weekend but this has given me some inspiration! Keep slaying girl x
cameron walker: Tashie Tinks u are seriously a life saver and and I love these X
Buket Komur: the hairdresser cut my hair wayyyy shorter than i wanted yesterday so i was having a crisis - the timing of this video is legendary!
KamberSykes: I think it's your beautiful face that carries off these hairstyles so much more :-)
Catherine Walsh: love love love these hair styles and you girl xx
Anna Rose: Thank you!!! ❤️
Linn Christine Finstad: Loved the 5th!
It’s vans: I love them thank you sm
My Hunger: Step 1: know how to do Dutch braid
Paola Hein: ...reaaaallyyyyyy niiiiiiice looks
Becki Damron: Does any of these work better with wet hair
loving drama: i can't you're super pretty
bess. mh: wow your are sublime
bess. mh: wow your are sublime
Helena Leite: ""short hair""
Charlotte Watson: Hmmmm nope sorry not keen on these rings at all. They look like giant staples