Live Class: Tips, Tricks, & Easy Updos | Diy University By Sally Beauty
- Posted on 23 November, 2021
- Updos
- By Anonymous
#DIYUniversity #SallyBeauty #EasyUpdos
Tips, Tricks, & Easy Updos | DIY University by Sally Beauty
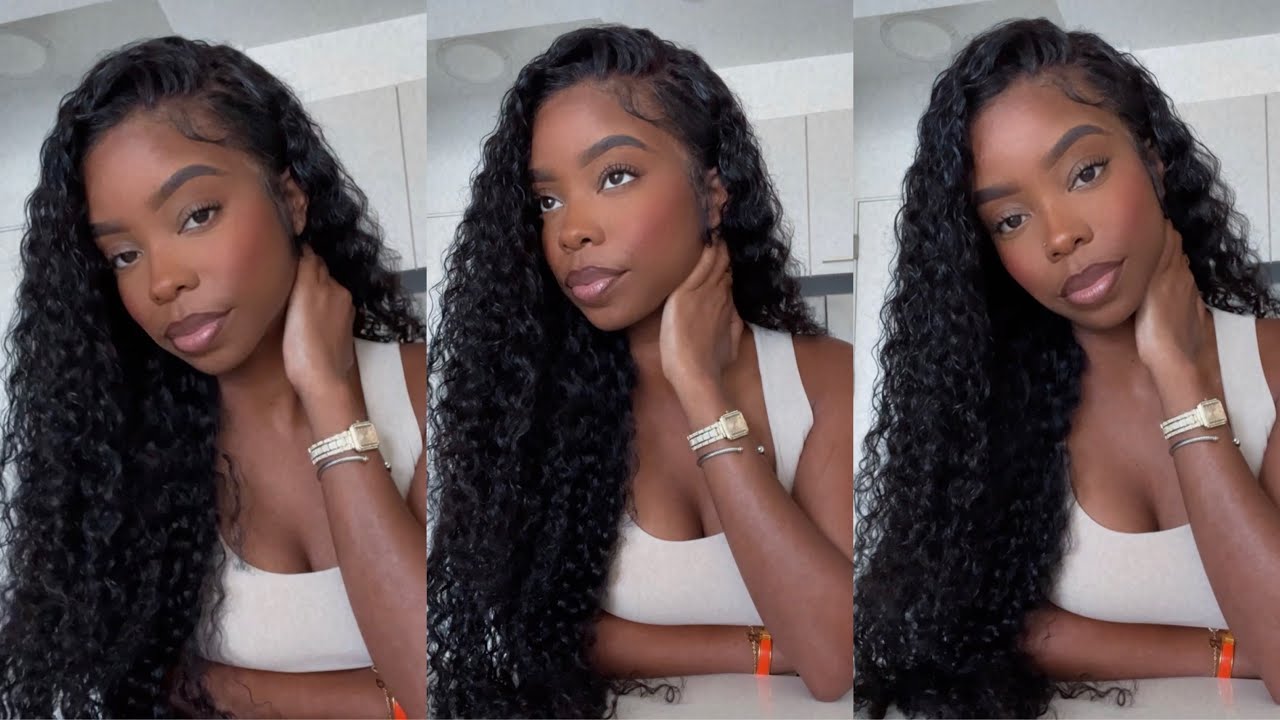
Time to plan your updo for those upcoming holiday festivities! Emily has the best tips and tricks for simple looks that will make an impact. Grab your small curling iron, bobby pins, small rubber bands, and styling spray and let's get to it.
-------------------------------------------------
Products Featured:
- Proclaim Black 450 Count Rubber Band Tub: https://bit.ly/3xgFhgz
- Finishing Solutions by ion Shaping Plus Styling Spray: https://bit.ly/3DJjxwq
- ion Magnesium Paddle Brush: https://bit.ly/3CJw1ma
- ion Titanium Pro 1-1/4 Inch Curling Iron: https://bit.ly/3nGznSX
- Eva NYC Kween Glitter Spray: https://bit.ly/3DKcovF
- Eva NYC Shapeshifter Texturizing Hairspray: https://bit.ly/3nGVw3y
- Salon Care Professional Jumbo Hair Pins 25 Count: https://bit.ly/3DXpIx7
- Strictly Professional Blonde Premium Bobby Pins 300 ct: https://bit.ly/3DHSuBH
--------------------------------------------------
Visit Our Website:
Follow Sally Beauty
Tik Tok: https://www.tiktok.com/@sallybeauty
Instagram: https://www.instagram.com/sallybeauty/...
Facebook: https://www.facebook.com/sallybeauty/
Pinterest: https://www.pinterest.com/sallybeauty/...
Twitter: https://twitter.com/sallybeauty
Hey guys, thanks for coming to diy university by sally beauty, my name is emily boland, i'm a pro colorist based out of baltimore, maryland and also a member of the sally crew. So i'm here to help you be able to do your hair like a pro at home, so i just want to break down this class really quick just so you can know what to expect as we move through it. So at first i'm going to show you all the materials which you can get from sally beauty from there we're going to prep the hair. So we're going to talk about curling hair, how to get it ready for those updos so that we have a more polished finish and then i'm going to show you updos. I know you can do at home. So the main point of this class is, i want you to be able to do a pro style at home by yourself, and i know what a lot of people say. I can't braid. I can't do up dues for anything. How am i able to do that? The updos i'm going to show you anybody can do if you can put your hair back in a ponytail. You can do all the updos, but i'm going to show you how to make them look even more professional. So to begin, let's move right into talking about those materials. Also before we begin, please save any questions for the very end. That way, i won't lose track. We'Ll get everything all that good information in before we finish and then i'll. Take questions also feel free to visit me on my platform at emily, bowlin hair and also the sally beauty platform, where a lot of my content is and visit diy university for any information that you may need to do: updos coloring anything you need to do at Home, so to begin, let's move into what you're going to need for this class. The first thing is going to be the eva nyc, shape-shifting, texturizing spray. The reason that i love this spray, so much is because it's texturizing what that means to you is that it's workable and it's flexible so a lot of times when we use hairspray it can often feel sticky stiff and if we ever try to move the hair Or rework it because maybe something fell out of place, it actually ends up breaking down the style. So the great thing about using a texturizing spray is it's going to give you a grip. It'S going to give you volume and you'll be able to move the hair without losing the curl and style that you put in with your heat tools. So i'm a big fan of this one texturizing spray, a b. The eva nyc, is the way to go. So on top of that, we're going to use the ion curling iron. This is a 1 in 1 4 inch barrel. The size does matter to me. I feel like it's the most versatile, just remember the smaller, the curling iron, the tighter the spiral, the bigger the curling iron. It'S going to be a little bit looser. So i tend to use this in my studio and i use this exact curling iron, including including the fact that it's the ion. So if you were needing to buy a new curling iron, i highly suggest is readily available at sally beauty, but it works so well. It heats up very, very quickly and it heats all the way up to 450 degrees. One thing i do want to mention, though, is generally: we don't need to curl. We don't need to turn our curling iron up that high, so using a curlier and that's got an adjustable heat to it is going to help you preserve your hair, be able to heat style it without damaging it, so that curling iron is great for heating. Up very quickly being able to adjust the temperature, and it also has an auto off meaning after a certain amount of time, it will shut itself off. So if you're like me and you're one of those people uh that leaves the house or the salon - and you think, did i shut my curling iron off. I love tools that do that for me, because it takes away the anxiety so on top of the curling iron, we're also going to be using rubber bands because we're doing updos uh a rubber band today i'll be using the proclaim at sally beauty uh. There are a lot of different brands when it comes to rubber bands and bobby pins. So you don't. You may necessarily not have to need the exact brand just know that you can find them at sally beauty and they usually come in a clear or black. I prefer the clear just because, when we're doing updos to make them look more professional, you kind of want to be able to hide them and, if they're, transparent, they'll kind of blend into the hair a little bit better. I'M using black today because we are on webcam, and i want you to be able to see everything that i'm doing so i'll be using these tiny little rubber bands. What i will say is, day to day i wouldn't be using this tiny of a rubber band in general. If you want to keep your hair intact, maybe put it up with a clip so that it's not uh the tension isn't pulling on your hair as much, but for updos you're going to need tiny rubber bands for that tension to keep the style in and, of Course we're also going to be using salon care bobby pins, so bobby pins are just going to help secure your style. Make those updo stay in and using a bobby pin. That'S also geared toward the color of your hair is also going to hide uh. Anything we're using to put it up, because the styles that are really in right now are kind of those lived in romantic. Uh looks like you were in the woods and the birds put the hair up and you don't know how it kind of got there. So we want to do those lived in romantic. Looks we don't want to see rubber bands bobby pins so today i'm going to be using close to my model here, something that's more like a reddish blonde color and that's what i have with my bronze bobby pin and finally, i will be using the eva nyc Queen glitter spray, so this is kind of what brings that holiday fun to our look. So i'm going to show you a couple of different looks and when we go to set the spray, that's why we want something: that's a little bit stronger, but what's fun about this, is it has glitter in it, and the glitter comes in a couple different colors. So i've been with sally beauty for a little over a year now, and i've collected these because i love them so much. The silver is the one that i'll be using today, but i love the glitter that comes out and i'll show you guys how it looks. I hope you can see it through the webcam, but it does come out very fine and it looks very chic and effortless. But when you're going to parties and you're underneath lights, it's a really cool way to pick up and you'll have so many people asking you. What'S in your hair, because they'll see the shine and the glitter to it, and this is a fun little thing that you can add to your hair and your updo to make it look more holiday and festive, and even for new year's. So because we're going into that season right now is a really good time to learn how to do all of these things. So those are our materials for today and now we're going to move on to prepping the hair. The reason i want to talk about curling is a as a stylist behind the chair. I hear a lot of clients say i don't know how to curl my own hair clients that i've had for almost 10 years that i try to teach curl their hair. They still have a hard time, bringing it at home and doing it. So i do want to show you how to do that today, but i also want to point on the fact that it's going to make your updos look that much better and more polished. So, even if you have a hard time doing the updo, if the ends look pristine and everything looks more sophisticated, if you're able to use a curling iron also, not only are curling irons meant to curl the hair and maybe add a little texture, but because it's Wrapping the hair, it's pressing down on the cuticle, and it's going to make it look more smooth, more refined and give you a more professional finish so for time's sake, i might not get through curling all of her hair. I just want you to understand the basis. So let's go ahead and move on to curling your hair, we're going to prep the hair, so i'm going to try and stand in the same formation as my model, because you'll be doing this on yourself at home. So i'm going to turn her this way. So this is the back and i'm kind of like mimicking if you were at home doing this. So if you've watched any of my diy classes before i'm very big on sectioning sectioning in subsections keeping your sections clean is what's going to make you be more like a pro. If you kind of are just curling the hair, as you see it, it'll be a different look. I'M not saying you can't do that, but for the looks that we're doing today for that uh really iconic polished, stylus kind of updo. I'M going to show you how we're going to go through and there's different ways to curl the hair today. The way i want to do it for a very balanced look is we're going to curl away from the face. You can curl all the hair in one direction and follow that consistently. You can also choose to do uh, curls forward and backward and mix them up. That would give you more of a texturized beach wave style today, because we want that soft elegant romantic style. I'M going to do everything in unison, but i want it to be balanced, so we're going to curl one side of the head toward the middle on this side and the same thing so everything's going to go back to begin. We start with those sections that i talked about, so i'm going to go ahead and pull her hair up, and this is, if you're doing it on yourself at home, so you're going to pull all your hair up and about an inch down. So we have about an inch width section, we're going to leave that and then we're going to pin the rest up that way, we're working in a controlled group and if you ever need help wondering you know what kind of clip can you get to help secure? All that hair sally beauty has croco clips, which i love, because they work on wet, hair, dry hair. You can have thick hair thin hair, they do a really good job and they kind of help. You, in any scenario, so croco clips to me, are kind of like the basis for knowing what to use or what kind of clip to have around the house that you know will be used. So next now that we only have this inch section we're going to work on this and i'm going to take about an inch in which means we have about a square, that's an inch by an inch square foot right there. So i'm going to take my curling iron and i'm going to hold it vertically, because if we were to turn it under we're not going to get the spiral, we want the spiral to mimic the curling iron see how, when i hold my curling iron, it's going In the same direction as the curl, it's because we're going to take the heat and we're going to mimic that on the hair. So i'm going to pull that out and i'm going to open the curling iron because i want the curls to come back. I can face the clamp toward the front of the face, the round part towards the back and we're going to grab the hair and see how i'm staying up by the base. I have not pulled the ends of the hair into the curling iron. The reason for that is the ends of your hair are some of the most fragile parts on the hair, meaning that's where it'll start to break so by leaving those out, that's going to make sure that's going to preserve the ends of your hair and keep them From getting fried or damaged, and also using a heat protectant beforehand now, when i did her hair, the heat protectant i used was going on wet hair and a lot of times. I hear um, you know some of the feedback on some of the uh heat protectants, and one thing i wanted to point out about that was if they come out very oily or you feel like they're too, they got too much of a sheen to them and When you put it on dry hair, it just feels like it flattens your hair. A lot of these heat protectants that are designed like that are actually meant to go on wet hair. So if you've noticed that, with any of your heat protectants, i highly suggest basing your hair with that heat protectant. While your hair is still wet, then blow drying, then curly, because you're still going to have that heat protection. So just continuing this and going off of it, i want to just emphasize i'm holding the curling iron vertically and i'm staying toward the base, and all i do is i curl that curl and i'm moving the curling iron with my curl and my ends haven't even Reached in there yet and notice how it grabbed it so we're gon na, let him hang and move on to the next one going to take an inch by an inch section directly. Next to that, one that we just did i'm going to stay up by the base and i'm just going to curl the curling iron through the mid shaft not doing the ends until the very end because it'll get pulled through and then i'm holding that vertically and I'M going to drop and i have a really nice shape - i'm not going to comb through these curls, because if it's still warm and we curl through them, we're going to lose it. So we want to leave them alone and just move on so now that we're on this side we're going to do the opposite. These curls are facing in now we're going to do the same thing. So the round part of the curling iron is facing the back of the head. The clamp is going to go toward the front, we're going to stay up by that base as high as we can and we're just going to roll and pull through on that. Curling iron see how the ends aren't in yet at the very end the ends go in and we just pull down. Look how nice that curl is super easy to do it's just a matter of keeping structure, taking the same amount of hair each time and making sure that all that hair is receiving the heat and now that we're meeting the other curls same thing, we're going to Curl away from the face not putting the ends of the hair in curling inward vertical and down so here everything looks great, it's still a little warm. So what i'm going to do - and you can clip these up if you want to have like a very big blowout vibe if you're at home and you're like i just want to curl my hair, and i want to get it done. This is fine. You can go right here; this is how i do it at the salon. This is my texturizing spray. I'M going to go ahead about six inches to a foot away from the hair, very fine mist and it kind of smells like dessert, which is kind of fun. Um you're going to spray that away, let those curls kind of sit and we're not going to come through them. Yet we're going to go ahead and grab the hair from here and we're going to repeat that cycle. So we're going to grab about an inch section above what we just did, pull that down over the hair that we just curled pin the rest up. I think you can see where i'm going with this a lot of repetition, so that was our section. Our next section now we want subsections so facing this way, where, if you were doing this to yourself, you're going to grab hair on the next level, find about an inch by inch section, pick up that curling iron and make sure you're curling away from the face. Because we want those curls to match the ones we just did notice, i'm staying as high as i can by the base holding the curling iron vertically rolling the curling iron through the mid shafts and not touching the ends till the very end. Dropping vertically beautiful curl. We'Re going to do the same thing right next to that one. So we're going to repeat - and i'm going to work my way through these curls just a little bit quicker, because it's the same thing on repeat: we just want them to kind of meet in the back and face each other. You see how good this curling iron grabs those curls, because i can barely like even when i'm letting them drop look how high they spring. And if you also notice, which is really interesting. I focus so much on keeping our curl so close to the base, because did you notice they still drop so if you're curling your hair so far down the hair shaft by the time you're done you're not going to have any wave up here see how much Area there is so we definitely want to make sure when we're curling our hair, we're not starting down here and just curling on the hair. We want to keep it as close to the head shape as possible and just keep curling that and weaving that in all right so same thing now we have all of that. It'S still very warm. The underneath sections cooled off and the texturizing spray helps cool it off a little bit because it's like a cooler mist. So i'm going to tap that and you would continue this process going all the way up so to save ourselves time so that we can get these updos into this class, which is the fun part i'm going to skip ahead a little bit. But i hope this helped. You learn how to go ahead and base your hair and get it ready for an updo to look more polished, i'm going to speed forward just go ahead and brush this out right here. I do want to tap these front pieces as well, just because, when we're talking about those romantic styles, i love leaving out little face framing pieces like pieces around um the face or ears. Just because that's how you get that undone. Look so making sure that we tap those is going to give us an even better finish on. Some of these looks so same thing just you would be going through section by section, i'm just going to tap these just so we get the full effect for when we're doing our updos. So it's away from the face gon na pull that down and i'm gon na grab this side and curl this away from the face. This curling iron is so good guys. Definitely a big fan and we'll go ahead and tap that and she's a mannequin she's, not a client, so i can kind of spray her face without you know, ruining her day, that'll get me through just a little bit quicker all right. So now here comes the fun part. We'Ve talked about the materials we've talked about curling hair and getting it ready for these easy to do updos. Now i'm going to show you how to do these updos and feel free to tag me online or let me know if you tried them yourself and how it went, because i'm telling you guys. I really think you can do this, so i'm going to do my best to show you, because i don't want to stand in front of my mannequin and get in the way, so i'm going to stand a little off to the side. So this is her curled hair. It'S all down. It'S ready to go in an updo, so this first updo is something that i love, because i think it looks very professional. It looks difficult to do, but the end result is like it's spectacular and you'd have no idea how easy it actually was. So here's my little rubber band so we're going to grab those little rubber bands and i'm going to go ahead and just take this top section of hair, as if you're gon na do like a very light. Easy, like half up half down kind of thing, like maybe you're, just tossing your hair back right and you don't need a lot of tension for these styles. So don't stress out about like is every piece smoothed down. Is it tight enough? Because that looks actually not even in we're into those romantic soft um, whimsical styles, so just having your hair curled is already going to give you a more polished. Look and all i'm going to do. Is that all right, so we're starting? You can do that. That is just the top section of hair i put in the ponytail okay, you can do that, so this is where the fun comes in, and it makes it look like it's more difficult than it is we're going to make inverted ponytails. What does that mean? Well, okay, so we have this top section. My rubber band is right here and i'm splitting it in half above the rubber band, and all you have to do is turn your ponytail in through that section, and it's inverted right, so we're going to squeeze that a little and that'll give it a little bit Of texture, and then we can pinch and pull so. This is a pro tip that we all do as hair stylist. When we have something it's a little refined, you want the shape to happen. You don't pull it until you have your shape once you have your shape, you're just going to pick and pinch just to get more volume in there and give it more life, and that's going to give it volume, and you can even pick up the crown and Technically, that's a style right there, but that's not the style i'm doing, but you could stop right there and how? How cute is that and you could put glitter hair spray in that super gorgeous, but we're going to make it a little more fun. Looking a little more professional looking and it looks harder to do so - the next thing we're going to do a lot of repetition in this class. Is i'm going to take the next section of hair right below it? So this is probably like an inch and you can vary. You can do whatever amount of sections you want. You'Ll just get different results, but i like to be a little consistent, so i'm grabbing a decent amount of hair, maybe one that matches close to the ponytail above it and i'm grabbing the sections just the section. And when i go to make my ponytail i'm going to go over my last rubber band so same thing, i'm going to make a ponytail right beneath that ponytail. And what do you think i'm going to do with this ponytail i'm going to invert it. So i'm going to split that in half take that ponytail right below it invert it same thing. So then i'm going to squeeze got my shape, i'm gon na pick and pinch and you can kind of see how that style is already building up on itself. You guys this is two ponytails look at with the curl look with like that. Looks so good, like that's a wedding, updo right there, and you know what you can continue to work out this style. So i'm going to take my next section and it's going to be the one below that from the sides i'm going to put a ponytail right on top of the last rubber band, we're going to split it in half we're going to invert, it squeeze pinch and You can continue to work this meaning like you can go. You know. I want a little more volume here. I want more tension here. This is gorgeous and you can continue to just do ponytails all the way down and you can pull bigger pieces. So if you want this to look bigger, maybe you don't need as much tension on the sides just continue to pinch and pull don't you love that and it's so easy anybody can do that and the other point i want to make is see when i talked About the curling iron, a we don't have a ton of frizzies, because i did prep this for a class, so it doesn't have frizzy's because we curled everything but the ends, keep it looking romantic and styled and give it that whimsical. Look. If you didn't go in and curl it, it's not going to have the same effect, because we want it to be like the birds put it up and made your hair beautiful this way. But we want enough control that it looks like you know. It'S professionally done that we didn't just slap it together, so it's that nice balance between um. You know organic and controlled if that makes sense. So this is our first updo. I think anybody can do it because all it is is ponytails and you just invert them on top of each other. Okay, so we're gon na move on to the next one, and i am using the same mannequin. So i'm gon na go ahead and pull these ponytails out and start over and guess what we're going to use more ponytails, because that's what's so fun about this, and that was that last one was definitely a look that i do at weddings or when i did Do weddings, i did those looks all the time, so the fact that i'm able to kind of like recreate them for you at home, i get clients all the time. That'Ll say i just don't know how you put up two together so quickly like. Has it just come to you? Well, i'm outing myself now they're, not that hard when you know how to simplify them. So the next one we're going to do is going to be an elegant, low, sophisticated pony. So we're going to do the same thing. We did last time, but this time i'm going to maybe take more than half of the hair on top and i'm going to put that into a ponytail so easy and see how i don't have a lot of tension. I'M just wrapping it like once or twice, because you don't need it once the hair is curled, it kind of styles itself and you'll see by curling the hair how the hair wants to lay, because it already has that wave in it. So just so, you guys can see what i'm doing i'm going to take that ponytail and i'm going to clip him up here. I'M gon na then ponytail this one down here and this one's got slightly less hair and notice. Like there's these pieces that hang out, we were talking about those romantic styles leaving out the bangs and the pieces around the ears. That'S kind of what gives it a little bit of a whimsical feel so feel free to like leave out pieces of your ponytails. If you feel like the face, framers are what is going to make your style look the way you want it to look so lower ponytail. So we've got two ponytails, and now i'm gon na release this one from the clip. What do you guys think i'm gon na do with this ponytail i'm gon na invert it so i'm gon na split above it i'm to invert this ponytail. But this is what's going to be different, this time, uh we have our inverted ponytail. I haven't scrunched it or done anything, yet what i want to do is flip. It see how that created tension at the base by just turning it over, so we're gon na turn it over. We still have that opening that opening that was already there still there. So you're gon na reach your hand into the opening. After twisting it grab that lower ponytail and pull it through. Now we can go ahead and scrunch pull and because we curled the hair, see how it wants to lay in that formation and same thing. I'M going to scrunch so that i can get the tension i want and then i can kind of pick and pull and even take some hair down here. But that's an elegant ponytail because you can't see the bobby pins. You can't see the rubber bands, it looks. Effortless, yet you can wear it to one side, it looks whimsical, you've left the face framing pieces out and it looks like you know how to do your hair, maybe more than you even expected and that's the goal. We want to have easy solutions to doing our hair if we're not good at doing hair right. So we have our low pony. We had our last big, like wedding updo, that fountains down as we go, and now i'm going to show you a third updo that you can do. The third one's gon na involve a couple bobby pins, but nothing overwhelming you guys should be just fine and we're lucky that the whimsical look uh and that, like romantic, soft lived-in style is in because it doesn't require you to have to get tension and use a Lot of products and make sure that there's no bumps in the hair - these are all so easy, and i know you guys can do them alright, so for this next one i'm gon na get this last rubber band out. This is going to be more of like a sophisticated bun so from here this time, we're going to part the hair down the middle so think pigtails, but instead of being literal pigtails, i want them to be closer to the neck, meaning pigtails a lot of times. We secure them here. I want them to be kind of like next to each other in the back, just above the nape. So we're going to take this side and when i do this, i'm going to go one two on my third loop: i'm not going to pull it all the way through. So i get this like. You know little space bun, but it's lower. I didn't pull the hair all the way through, so you put the hair through twice and then on the last one you're going to leave it kind of like halfway now, because i'm standing off to the side, it's a little bit difficult for me to get this In the right angle, so i'm gon na do the best i can so i want you guys to see what i'm doing i'm gon na take another rubber band and we're gon na go one two and then on the last one. Oh, please don't break not all the way through, so we've got two of these all right, so that's actually kind of cute, but that's not what we're going for um, here's the you could grab one side and because you didn't pull it all the way through there Should be like a little donut shape, you're gon na put your fingers through the donut shape and you're gon na grab the other bun and pull it through all right. So one bun, just kind of ate the other you're gon na hold this hair in place. This is where your bobby pins come in, and you're gon na secure, where the buns met. So i'm going to make sure that they're kind of like pasted against the back of the style so before they were just kind of hanging on by rubber bands. I'M now using the bobby pins to secure them to the hair like to the actual head, so that guy's coming over here. I can squeeze him a little bit and this bun i'm going to secure right here and it just kind of gives you a base to work off of so by taking one bun putting it inside the other, then kind of pasting them up onto the head, and You - and this is all creative - that's all hair is this should be fun. This should be an art project and it does not have to be perfect, especially since we're doing a more lived-in look. So this should be completely easy. Like any time you're like you know what i'd like this uh to look a little more like you know, voluminous i'm gon na pull a little bit more hair and pin that to the head, but you can already see that shape. That'S happening right and you get these romantic little twisties that fall. You guys this is so easy and then, like i said we leave out a little bit of hair in the front. How pretty is that and the curling does have to work and just setting the bases does the other part the curl helps you find the style, have it drape on itself, and then you just do a couple things just to get that kind of professional. Look. If you wanted to get rid of the wispies, all you would need to do is take a bobby, pin put it there and then you can just tuck it in and hide it. I, like the wispies, so i leave them on so this was my low, sophisticated bun um, a couple things you can do to level this up for the holidays is a remember. We talked about the eva nyc glitter spray, so this is where it's really fun um. Once you're ready to set - because this is the last style we're doing so now - i can actually set it um same thing: you're gon na hold it away about six inches, twelve inches away, and it's a very fine mist and i don't know i'll try to push It up to the screen, if you guys can see it, but it is so pretty and it's very buildable. So if you want more, you can spray more. If you want less, you don't have to use that much um, but it is very elegant. Looking it's very fine, i don't know if you guys can see it, but in person it's gorgeous so you'll just have to take my word for it, but it's a really great way to kind of wrap up a style. Give it something different that other people don't have in their hair. It'S something that's going to be noticeable. It'S one of those things. That'S so easy, and yet it's going to make such a difference and make you feel like you're holiday, you're festive and it's really fun. Um other fun things you can do are, i know sally beauty does have a lot of embellishments like in the makeup section. They a lot of times, they'll have like um hair pieces like for weddings or things that you can put in um. I have this from decorations around my house, but i have sally beauty um little pendants that you can put in. But a way to make this look really festive in two seconds. Is there you go, you could do like a little piece of pine um, something but that's great, and now you just went from updo, elegant, updo to a little holiday festive and between using like a glitter spray and a fun little like piece to put in there. You'Ve now created a beautiful holiday. Look that was so easy to do. We just did three looks guys that i know you can do because they're all based off a ponytail. So if you can put your hair back in a ponytail, i know you can do any of these looks so i'm going to go ahead and we're going to wrap up because we got through our products that which you can get any of them at sally beauty. I tried to help you with curling your hair, so i hope you can prep your hair and also have three different up styles that are easy to do basically within five minutes. So does anybody have any questions that i can answer? If not, please hit me up on instagram. I try to touch base with everybody that reaches out to me um. I love sharing what i love to do so, please, let me know if there's something you'd like to know how hot is that curling iron? Okay, i'm gon na be honest with you guys. I have it at 400, but what i also want to point out is she's, not real, so i'm not really concerned. I wanted to make sure that the curl kind of grabbed for this class, because her hair is also processed differently than a lot of natural hair. What i would say is i find with most clients, 250 degrees might be a little low to get a true heated style in there, but the closer you can keep it to 250. Most people have to go above 300, but the closer you can keep it to 250, the safer, also using it with the heat protectant and also, i believe, when we're doing uh like an event style uh. Those are nights that we maybe turn the heat up, because that's the moment we really want to get the most out of our hair uh. If we're doing it day to day turn it down or like don't even heat style it, because if you're working from home or you don't have an event to go to, it's not worth the stress that it puts on your hair. But if you're going to a gala, maybe that's the night, we're heat styling and doing all the things any other questions. Your updates usually fall. Okay, so um there's a couple things for that. The reason i like these styles, a little bit is because they're more relaxed so you're not facing the whole fall situation for me um. So i'm going to speak about something called like bases and anchors. So when i was putting the ponytails in her hair, you can use more tension and that's what we call a base because we're gathering the hair and we're setting it in a spot right. An anchor is going to be your bobby pin because then you're, taking the hair and you're placing it somewhere going against the grain of the hair or going back into the base, is going to help secure. You can even cross bobby pins, also using products or setting up the hair, so we talked about prepping the hair, with a curling iron. One step i didn't talk about uh, which is before all of this is you can give yourself a blowout if you have trouble doing that, we do have classes. For that. I know i've done. Videos for sally so be sure to check those out online, but we have blowouts and blowouts will set the hair to go in the direction that you want. You combine that with the power of the curling iron, because, even as we talked about these updos before and they were kind of like laying on each other um the way the hair wefted you're gon na have a better chance of it. Staying up if you're setting your hair up for success and heat styling it into that motion, so between using bases and anchors going against the grain of the hair, i try not to use a lot of bobby pins, because what you also don't want is to have So much weight in the hair because we just keep sticking things in there that it wants to fall. So if you have a lot of hair using more bases and then minimizing your anchors that'll also help it stay up. I hope that helped a little bit best heat setting for dry, coarse, hair, well, the best heat setting for anyone is probably going to be lower. I would say just know your intention and also keep up with your hair um. If your hair's dry and coarse, i would actually try to tackle that from the get go, meaning the solution, probably isn't in how we're using heat on our hair when doing it up style. The solution for that really is more about. Why is my hair dry um? You know course is obviously a texture of hair. What products can i be using to counteract that? So i always talk about. If you follow me on my page, i love bond builders. Bond builders are uh, basically uh treatments that you can even get if you're somebody that chemically treats their hair they're they're found in lighteners um, but specific lighteners. You have to look for them, but bond builders are basically your hair's made of a bunch of disulfide bonds and it's going to heal uh all of those disulfide bonds that have broken, and it's going to create more structure in the hair so that it wants to Lay flat because your hair is made up of all these little airplane flaps. So when you use a bond builder, it's going to fill in the gaps and make it a full structure. Again, however, that does not make your hair moisturized or hydrated. Necessarily, that's fixing the structure, so i always start with a bond builder and then i'll go in with a moisturizing product, because hydration moisture that goes hand in hand with bond builders, and i can't stress that enough, if you're, not using those two things. Please do because even on dry, coarse hair, you still want strong, coarse hair and you want it to relax a little bit so that it doesn't feel dry, so making sure you're doing mask hydration anything. That'S got moisture uh and um hydration, in the words in combination with your structure, is going to help you also a lot of times i find with brittle hair or dry hair. Sometimes people lean on protein to be the solution. That is actually not always the solution. You want to use protein, but you want to use it um sparingly if you use protein every day that can weigh down a hair, shaft and actually shred it a little more and i feel, like that happens a lot with um dry, brittle, coarse hair. So what i would say is just make sure you find the right amount of balance like a lot of times the protein treatment um. You could just get it in like a it's, a 10 product like a spray-on treatment and maybe use that when styling or once a week, depending on what your hair situation is, some people only use a protein treatment once a month um, but just knowing how much To use based on your personal preferences, um, that's a great start, but bond builders moisture start there because worrying about the heat setting and how to not damage your hair heat's, never good for your hair. You know it does a beautiful job of styling it and setting it and we use it responsibly. It'S great, you know we're not further damaging our hair, but it hair is an organic thing and we need to respect that because it's natural and we're putting something unnatural on it. That that can happen, especially if you're color treated, because that also uh weighs on the hair so make sure you're using the right products at home and turn down your curling iron as much as you can so the same thing goes, i don't think many people can Get a lot of use out of um under 250 degrees of heat. I mean you can try and if it works for you, i love it. But the biggest complaint i hear is like that's not doing anything. For me. It'S not curling my hair, so just staying as close to that number as you can, if you're going above it is what i'm gon na say, but everybody's different, because everybody has a different hair texture. So i don't like to speak for everyone and sometimes that rule doesn't even apply to your hair type. So it's a it's a deep question. I'M sorry, i'm trying to answer it as best as i can is there any other questions. Should i use hairspray before styling. So you can um, there are people that do do it that way, um. What i did today was i curled, and then i set it with my texturizing spray because it's a flexible working spray. So this is interesting. Maybe one day we should have a class about this um. There are so many different types of hairsprays and i'm sure when you've looked at cans, it'll say firm, hold medium hold, uh, flexible, hold, texturizing spray and a lot of times we're like okay. So it's probably like how heavy and sticky it is. The truth is there are hairsprays that are meant to be used in combination with heat. A lot of them will have a thermal protectant in it. Um they'll be called workable, they'll be called texturizing and that's what i mean by you can use those ahead of time. What you don't want is a firm sticky, hairspray layering that on and then adding heat, because if you hear a sizzle or you hear something going on in the hair - that's not good, because that can damage your hair so um. When i was in eighth grade, i was in cheerleading and i remember i used to do firm, hair spray and then i'd curl with the curling iron to get these like really tight, ringlets and that will damage your hair. And i learned that the hard way - and i don't want that for you so um - make sure you're using the right type of hairspray. You definitely can, but you want something: that's going to be more thermal, protecting spray. That gives you a little bit of styling control and it says workable on it, meaning it'll go with the style and you're not actually um doing any type of wet sticky hairspray in combination with your curling iron. Any more questions all right. Well, i think we're going to wrap it up, so i hope i answered as much as i could and, like i said, feel free um to visit my instagram emily bowlin hair. I also have a lot of content on the sally beauty platform and diy university. Has a vast array of many hair stylists many diyers that are there to show you how they do their hair so that you can do it at home? I hope this class is helpful today. Every single thing you saw me use can be found at sally beauty. Um and also remember, you can revisit these lives, so if you saw the way i curled hair or how i did a hairstyle and you thought, how am i going to remember this later? You can visit diy university and this exact class will be on there. Also on their facebook page under lives so be sure to revisit, share it with a friend. If you think that this information would be helpful - and let us know what kind of classes you guys want, because we're trying to make this so much easier for you, we don't want any more hair, fails. So um again follow me at emily bowling hair follow sally beauty, make sure to check out even more diy university classes. Thank you so much for showing up. We had such a good time with you today, thanks guys,
Comments
Chase Bennett: can u please do a slick straight low ponytail tutorial layer by layer with hairspray only? a live class?