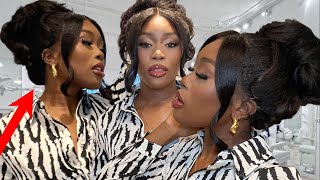
Messy Romantic Updo / Loose Boho Updo
In this video I show you step by step how to get this beautiful, romantic updo and share all of my "Must Have" bridal hair products.
Products Used:
Kenra Luxe Shine Oil
Moroccan Oil Luminous Hairspray
Paul Mitchel Hot Off The Press
Kenra Whipped Taffy
PURCHASE my Bridal Hair/Makeup CONTRACT: https://bridalbeautybiz.samcart.com/pr...
GET MY 11 TEMPLATE, CUSTOMIZABLE BRIDAL BOOKING GUIDE AND BOOK YOUR DREAM BRIDES! https://bridalbeautybiz.samcart.com/pr...-
Instagram: @Megan.lorson
For collabs: [email protected]
Hey: hey: it's megan larson back with another video, so today i'm going to be doing a textured, bridal updo. It was one that i just recently posted on my instagram page. I did like a quick little reel of how i did it and it did really well a lot of people really liked it. So i figured i would make a little bit more in-depth video step by step on how to do it and show you how you can work smarter, not harder and how you can maybe some tricks and tips that will help you to simplify your updos help. You do them a little bit faster, but still get beautiful, beautiful, perfect, bridal updo. So let's get started okay, so i don't know how good you guys can see her ends, but i just got done taking her hair out from another updo and the ends are a little bit frizzy. So i'm going to go ahead and put a little bit of the kenra luxe shine oil on her ends. I want to make sure they're, nice and polished, shiny and nourished before i go in and start putting her hair up, and this is what it looks like. It'S in this little gold bottle, it's so beautiful and it looks it just looks so luxurious and it does have like little gold, um flakes or specks in it, and it's just so pretty. But it's very lightweight. It'S nothing! That'S going to weigh their hair down, but just adds a beautiful shine and helps to nourish and condition the hair okay. So the first thing i'm going to do is section off her hair and i am working with my comb from pink pewter. I love working with this comb because it makes it so easy to section the hair comb, the hair and then i can hold it and put bobby pins and continue to work all the same time. So it just helps me work faster and this comb just works. Really well, okay, so we're gon na start off by sectioning right behind the ear, and i'm going to take this section like straight, not straight. Actually, i'm gon na like weave it or zigzag it just slightly and we're gon na go kind of up at a slight diagonal and she does have extensions in so i'm gon na try to avoid those extensions because they're a little bit lower. But i want to make sure i get all this hair on the sides and basically all the hair, that's going to cover back we're going to curl that so it's going to give it that really pretty textured. Look so don't worry about it being super super clean or anything. I do want to be a little bit uneven and zigzag it, and then i'm just going to follow that straight across. You can see my extensions here, i'm going to kind of follow that and then on the other side, i'm just going to go down right behind the ear. So basically, this whole crown section and then like a little chunk on the side, because this is going to be curled and then i'm just going to lightly comb this. So it's just nice and clean. I always like to keep everything clean, even though we're gon na come back to this section work on it. I still want it to be clean and as organized as possible as i'm working through okay. So that is our section. I'M just going to grab this little bit right here. Okay, so we're going to go ahead and clip this all out of the way, i'm just going to twist it up in a little bun just so it stays out. I'M going to get one of these little jaw clips and clip it up, and then the next thing we're going to do is i'm just going to take this brush and just brush through everything, make sure the flyaways are tamed and then we're going to gather this And put her hair into a low ponytail, i'm going to be using a clear elastic band and i'm just going to secure this ponytail with the elastic band and then do it one more time. Okay and then you can just pull it tight a little bit and then the next thing we're going to do is split this section in half now in the instagram video. I did this video really quick on instagram and i actually started with the top first and then came back into the bottom. So basically i curled the whole top and then i pinned the curls up and then i came back down here. But this time i'm going to start by doing the base. Typically that's most of the time. What i do is i'll do the base first and then start working my way up to the top um, but it just depends: everybody works differently. Different styles, different hair types textures - sometimes that can come into play too all right. So i'm going to split this ponytail into sections. I'M going to put this one over her shoulder that way. I can just it'll be easier to work with this side and then i'm going to get a little bit of this schwarzkopf osis tame wild. This stuff is amazing. If you do not have this in your bridal kit, you need it in your bridal haircut. It is the balm, so what it does is it helps to smooth any frizz gives the perfect amount of polished shiny shine to help your looks just basically look polished, but i love putting it in the hair and it just helps to hold those frizzies down in Place and then it gives a little bit of grip a little bit of hold to help hold your style as well. It'S just it's so amazing all right! So then, and i'm kind of just smoothing the hair out, as i twist it and continuing to run any excess product that i have left down into the hair as i'm twisting it down. So we're twisting it all the way down to the ends. And then i'm going to take another clear elastic band and i'm just going to tie this off and then i'm going to go ahead and put this one over her shoulder and come over here, i'm going to take a little bit more of that osis tame wild. This awesome, i don't really know how you say it properly. So if i'm saying it wrong, let me know basically tame wild. That'S usually what i call it scorch cough tame, wild all right, i'm going to split this one into two sections make sure everything's, nice and smooth, and even though you may be doing a textured, boho bridal look. You still want it to be clean. Looking and you don't want it to be overly frizzy, because you can still have texture without frizz all right, we're just going to twist this again, i'm just kind of smoothing and pulling the hair down as i twist it, and then we're going to take another elastic. If i can grab it okay and then we're just going to secure the ends so again, this is going to be the base of the updo. So the base is always the most important part because it's what's going to secure the whole entire updo. So you want to make sure that your base is secure, and this is what everything else is going to go into all right. So i'm going to just very gently: pull this out just a little bit. I don't want to go crazy overboard, pulling it out. I do want to fluff it up just a little bit so by doing these twists in these two sections, it's going to again just keep that textured look throughout our updo and then i'm just going to start wrapping it around and as i do that, i'm just Going to secure it with some bobby pins one over here, we'll do one here and one underneath and when i'm pushing my bobby pins in, i kind of do like a a scoop. So i'm not skipping too much hair because i don't want the bobby pin to open, but just enough to like lock it in place and then let me do one more on this tail right here. We want to make sure that stays under there. Okay, so there's our first one and then i just always play with my updos and kind of place them where i want the pieces and also making sure it's proportional as i work through. So i like how this is positioned right here, so i'm going to make sure i lock this in there and then this one right here and for anybody wondering this is one of my lamage mannequins and her name is elena. She is so pretty, as you guys can tell she just has she has lots of hair a decent amount of hair, naturally or naturally um as she comes, but i do like i love working with extensions, even in like, whenever i'm doing any kind of updates. On my mannequins, but especially like my actual brides in real life and um, even bridesmaids, i love working with extensions because it just really elevates the whole entire look as so much volume, and it just really makes my looks, look elevated. You know and make my style stand out like what i'm posting on instagram things like that, all right, i'm just making sure this is really secure, making sure nothing's, sagging or anything like that. You can see the little tail end is up here, but that's totally fine, because everything else is going to kind of come down and over okay. So we just have a nice textured bun base. It'S really secure, it's not going anywhere! It'S really nice and tight to her head oops. Let me fix this one right here and then we're going to start on the top okay, let me put one more right there just to secure it. Okay! Now let me back my camera a little bit we're going to take this top section down and i'm just going to let it fall, i'm going to kind of split it in half a little bit that way. It'S and just keep in mind when you are working. You really don't want to do too much to mess up this bun and actually what i should have done. Let me go ahead and spray this just a little bit, because that'll help i'm gon na. I like using the moroccan oil luminous finish hairspray. This stuff is so amazing. I love this stuff so much. It gives like the most beautiful, perfect amount of shine to the hair. A nice hold. You can still work through the hair. If you need to, though, all right so i'm gon na kind of split it in half, so i can just comb through it to help start smoothing some of this frizz. Okay, there's that side and then here's this side and just something to note when you are sectioning for this style or for a look. That'S similar just make sure that when you section it, the sectioning is even even on both sides, because if it's not, then you might have it looking really different on both sides. So just make sure you have the same amount of hair pulled up, especially for a look like this all right. So then, i'm going to go in with a little bit of my paul mitchell, hot off the press, heat protectant spray. This, in my opinion, is also another must-have in your bridal kit, because it gives heat protection, but it also gives like a really nice hole to the hair, and it also helps to fight um, frizz and humidity, which is great for anyone. Who'S been getting married outside or gon na, be any kind of humidity, while taking pictures. It really just helps to prevent extra frizz from humidity or anything else. So i love using that on and then the cool thing is, you can use it again on top or after the updo or stylist finish just to give it even more protection. So this is a must-have in my kit, all right, i'm going to start off by sectioning her hair right here and dropping my stuff, okay and then i'm gon na clip it up and i'm gon na be working with a three-quarter inch hot tools, curling iron. I love using three-quarter inch size for those textured curls or any kind of textured updo style, so i'm going to turn it this way and i am curling it away from her face and i'm going to go ahead and curl. It all the way to the ends, because this is going to be a textured sort of boho look and we're going to leave some pieces out. It'S going to be very kind of messy ish. I guess you could say so. I want those ends to be nice and have a beautiful, curl. Okay and then you can spray the hot off the press as you go normally that's what i do when i'm working on a real person, but i'll go ahead and just not do that. For the sake of time and for the sake of saving, some of my product plus she's already got tons of products in her hair and then notice that i'm the way i'm curling i'm almost doing um, let's see, is that vertical sections. Gosh lord tell me. Well, if you're standing this way, it's horizontal um, i guess it depends on how you look at it, but i'm getting it really close to the scalp almost like curling the hair, in a line, because i want that curl and that texture to start right at the Base, hopefully that made sense, and i didn't confuse anybody and then, as i'm taking it out, i like to twist it what that does is because it still has heat in it. It still helps to allow the curl to get tighter and sometimes even get closer to the scalp, as i'm twisting it out with that heat still in it all right, then we're gon na start curling back here, just taking and i'm taking skinnier sections um. I would say they're definitely about less than a half an inch thick, because this is this is the reason. Why is because it allows me to get really close to the scalp, and that is how we are going to get that textured look. So you want to make sure that you get it really close to the scalp okay, and you also want to make sure when you're curling two, that the hair is smooth. If you curl the hair, while there's frizz in it already and the hair is not properly smoothed out beforehand, then it's just going to create even more frizz and start making a mess after you curl it. So take your section and then a lot of times. What i like to do is run the curling iron through it once kind of helps to start seal, those flyways and those crazy ends, and then i go in and curl and then i'm just going to twist. It out and then i'm just going to continue working in the back, i'm going to lay this hair on top and i'm going to go ahead and start right in the back center and i'm just going to take a section. Now, if it's easier for you to work in sections and clip things off, that's fine for me a lot of times when i'm doing an actual wedding - i don't have time to you know, do so many precise sections, so this is kind of exactly what i would Do as long as i can still keep things clean and get the curl that i want and need to get, then this is how i'm going to do it. Okay and then i'm going to take another section. Now i am going to point out here. I am going to start alternating them, so i did this one this way now this one's going to go this way that way, it just blends really well, once we get all the curls done now, when i get close to the face, i'm going to curl. Most of them back away from the face, which is what i was doing on this side and again twist it as you take it out, make sure you get those ends nice and curled, so they're going to be really pretty once they kind of fall out, and I'M just going taking sections just kind of following the hairline or following this section around this way, and then what i'm going to do. As i start getting, i don't have as much hair right here and it starts getting to be too much as far as i don't want to keep doing all these sections all the way up like this, because i want the top hair to come back. So i'm going to start, let me see if you guys can see this taking sections on top like this. Let me turn her, so you guys can see so this one is just a thin section straight on top and i'm going to go ahead and curl that so again, i'm going to run the curling iron through it and curl it i'm going to get really close To that scalp keeping it really close to that texture and that curl starts right at the base and i'm going to start working down the head in vertical sections and just laying these curls on top and bringing it all the way back here. And then you can just start laying them on top of each other, and then i'm going to take this one this side and i'm going to do it the opposite of what i did the curl right beside it. So i'm basically just grabbing hair as i see fit and then making sure it's going to flow back. Okay, it's all about just filling in the gaps with this style and making sure everything is cohesive and there's not like any weird gaps when getting this textured look. So whatever you need to do, however, you need to curl it, and then you can even start stacking. You can cur pull the curls out a little bit a lot of times. That'S what and actually i'll do that once we finish curling it i'll, usually pinch and pull and move the hair around to fill in gaps and spray it. So it stays to give it more volume, all that, so i'm going to go ahead and finish curling. Her top you just want to make sure that you keep the curling iron really close to the base and just make sure that when working on the top of her head, you want to start taking horizontal sections this way and curling the hair. So it goes back. This way, okay, so here we've got all her curls in she's gon na have a lot of texture, and hopefully you guys can see just by doing the style. We totally cut this in half and i do a lot of i do this a lot for my updos and things like that when i'm working actual weddings, it saves so much time we just created this base. It took away almost half the hair or more than half the hair, and just by curling the top we've got plenty of hair to come over this updo and create the look that we want. So this can really cut down your time if you're looking for ways to save time, creating a base like this and then creating your top section according to what look you're going for. This can save a lot of time. Okay, so now we're going to just play with the curls a little bit and start positioning them how and where we want them. And when i'm doing this, i'm going to work with the moroccan oil luminous, hairspray and just start pinching out these curls a little bit. And when i'm doing this, i'm basically just look looking to fill in any gaps and start to just position. These curls, where they need to go - and you can twist them and especially on the top, just want to make sure that everything is nice and even okay. And then let me sometimes you have to redefine the curls a little bit too. So i just do that by re-twisting them and then maybe pulling out the curl a little bit and giving it a little bit of a spray with the hairspray just to create some more volume in it. By expanding that curl and defining it a little bit more - and this is going to start positioning it where i want it and then we're going to start pinning it in just a second - and i do want to leave some hair down in the front as well. So i do typically like to establish that also when i start pinning the hair back, because i want to decide that first before i start pinning everything back and then because you don't want to pull it out once it's pinned back all right, i'm going to leave These pieces down right here, because i want it to be very, like soft, whimsical, boho effortless, let's see okay and we'll pull these back and spray those and then in the front, i'm definitely going to want some hair down. I think that looks nice. I'M gon na leave quite a bit down in the front. Just again i want. I want it to be very loose okay, so i'm going to go ahead and once i like how everything is positioned and i like how the side looks, i'm going to take a pin one of these ones. It looks like this. Hopefully, you guys can see that there you go and i'm just going to take all this hair right here and just place it right there and it's just going to hold that in place. Now it's not super secure. Yet but again it's just kind of positioning the hair where i want it, so i can see it so i can still play with it and pull it out. If i need to and then when i like, where everything is, then i can go in and start pinning it with bobby pins to actually hold it in place. Okay, so there's that side and i'm going to do the same thing with this side just start positioning the curls playing with them filling in the gaps and i'm just working on bringing all this hair back here and picking out the pieces that i want left down. So i'm pretty much copy. What i did on the other side just want some soft pieces down. That'S and perfect try to turn her, so you can see all right we're going to keep these pieces and i might need to. Then you can look at her from the front, just make sure that everything's looking kind of even make sure that you have the amount of hair that you want left down and, if not then go ahead and pull it back now. Okay, i think i like that. Let me take a little bit more right there, okay and then we're going to go ahead and pin that on the side and then we're going to start okay, so i've got both sides kind of just tacked up in place. So that way we have the sides. Looking how we want it so now i'm going to go in with some actual bobby pins and we're going to start pinning it. So i want to pin this side i'm just going to pin it straight like behind the base, bun it's where it's going into and then do the same thing on the other side, just pinning it straight into like a right behind that base and then okay, it's Already looking so pretty, i just love those curls. Let me know if you guys are obsessed with these girls they're just so gorgeous. You could really do a lot with this updo you could you could just i mean there's so many different ways. You could pin it and style it. You can really just make it your own, so i'm going to go in and start weaving across and sliding them into that base and do one right here weave it in slide it into that and i'm base do another one over here, weave it in slide it Into that base, okay, and as they're going in like i can tell they are locking in like they are not just floating around, they are like locking in you can feel it when you push it and you can tell usually when you push in a bobby pin, If it's locking in or if it's just kind of floating around in there and easily going to slide out, i don't know, there's usually a difference. I can tell there's a big difference when i'm sliding a bobby pin in if it's locked in or if it's you know possibly going to come out. Okay, so then i'm really just going to play around with this and position it where i want it, that's really what creating updos is all about is just being creative and i'm just going to like twist it a little bit and whenever i like, where it's positioned, I'M going to just pop a bobby pin in there perfect and then i'm going to come over here and i'm going to keep some hair down too. So i'm just going to pick out some pieces that i think would look pretty hanged down. I'M gon na take this, give it a twist and just kind of pull it out a little bit. I think that looks pretty right there, so i'm going to right in the center and just kind of weave it, so it catches all the hair and then, depending on the look, you could really like leave a lot of this down. I want to go ahead and pin this up right here, see i'm going to just twist it a little bit more, and the most important thing is just to make sure that you step back and look at your updo from all sides make sure it's looking proportional Make sure there's no funky gaps in it or anything all right, so i just twisted the hair a little bit, i'm just going to leave another bobby pin in it, and it's looking so pretty tell me what you guys think about this. So far, give it a thumbs up make sure you guys subscribe if you're liking. This look liking. This video i've got lots more videos coming your way on this topic and other things all right. So now i just want to take a couple bobby pins and pin some of these tails up, because i don't want them quite as long so i'm just going to pick them up a little bit. Stick the bobby pin in there make sure it's locked in so they're still out, but they're, just not quite as long and then i'm just going to make sure i keep them nice and smooth as frizz free as possible and then just kind of redefine those curls And then i'm going to pick this one up, i'm just going to slide the bobby pin right through it and just pin it right up into the updo and by doing this, it's just kind of making those pieces. Look like they're more incorporated into the updo versus just kind of hanging on top of it. If that makes sense, and then, as you're going just keep pulling pinching pulling shaping, you feel like things need to be in tighter need to be pulled out. Just do what you feel is going to make it look the best all right, and then this side is a little bit longer. So i want to do something with this tail right here. Let'S see i'm going to pin that up into her bun a little bit, so this tendril is not hanging down quite as far so i'm just going to that way. It makes it look like it's coming from underneath the bun, since we had the uh her base. Is that bun she doesn't really have any pieces coming down on the neck, which i typically do. If i'm going to leave pieces out, i like it to have pieces down underneath too it just makes it look more organic more together. So i'm going to go ahead on this side and i'm just going to sneak this piece underneath so it makes it look like she's got pieces coming from underneath. So i'm going to pin that if you guys hear a baby crying my little hunter ruth just woke up from her nap, i need to go get her okay. So i really like how this looks so i'm gon na go ahead and give her a quick spray. It'S so pretty, and if you guys can tell the ends, are pretty frizzy right now, so i'm going to show you my all-time favorite product for polishing those ends. First, i want to give her a quick spray block. Everything in place, perfect, looks so good, okay and i'm going to use a little bit of kenra whipped taffy. This stuff is the balm. Also a must have product in your bridal hair kit. If you do not have it kendra whipped taffy is the bomb. So i'm just going to work it into my hands. It should be clear on your hands. You should not see the color blue of the product. If you can it's too much so work it into your hands and then what you're going to do? I want you guys to really see this, so i don't know if you can see how frizzy that is, it might be hard to tell on camera, but i'm just going to go through each piece run my hands down through it and twist it the way. The curl wants to go so you're define defining that curl, but as you're doing that it is completely polishing the strand taking away that frizz and giving it like the perfect polished look, but it's also adding some texture to it, which is going to hold it. Um. Honestly, sometimes this stuff works so much better than hair spray. So you know those pieces around people's face that get funky and sometimes frizzy or they just don't want to hold just run a little bit of the kenra whipped taffy through these pieces in the front, and it holds so well because sometimes hairspray can get heavy on People, especially if you just spray a ton of it and then before you leave the wedding party they're like. Can you just spray it one more time in the front, sometimes it's too much, and that hairspray is going to take the hair out more than hold those pieces, so putting a little bit of kenner, whipped taffy gives it that texture that it needs to hold perfect. All right, so i don't know if you guys can tell, but those ends are so much more polished, looks so much better. Just it just really takes your updo and your style to the next level. All right, i will show you guys the whole look with a beautiful bridal piece in. Thank you so much for watching make sure you subscribe and like this video and i'll see you in the next one. You
Comments
Abby Maldonado: Thank you for all the helpful tips
Katie: This was so helpful. I’ve had two wedding trials and they’ve done a terrible job… I’m resorting to just doing it myself at this point.
Tamim Hayes Yasharahla: I know the baby crying in the background routine all too well! lol you have great teaching skills btw! it was easy to follow and a beautiful result!
SweetBaby Ga: Gorgeous