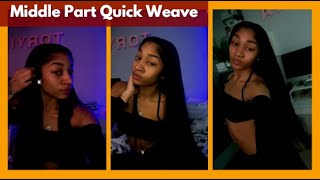
Braided Beachy Wave Half-Up Bridal Hair Style
Join Pam Wrigley - award winning London bridal hair stylist for a new quick tutorial on how to create a beautiful beachy waves half up half down hairstyle with gorgeous braid. We curled the hair in this styling tutorial using curling tongs, but you an use a different method such as hair straighteners or with a hot roller set. Learn how to prepare and section the hair properly or add hair extensions if you are working with thin hair or need some extra volume in the hair. Learn more with Pam's learn at home, online bridal hair styling course. More information below!
Subscribe and learn the latest wedding, bridal, prom & party hairstyles alongside timeless, classic hairstyles and vintage looks that never go out of fashion.
Links to the products used by Pam (where available):
L'Oreal Professional French Girl Hair Texture Definition Spray: https://amzn.to/3cEaui6
L'Oréal Techni Art Liss Control Smooth Gel Cream: https://amzn.to/3lYYFYm
L'Oreal Infinium Extra Strong Hair Spray: https://amzn.to/2wQ5b08
Visit https://www.createbeautifulhair.co.uk/... for more information on learning with Pam.
Want to master the art of bridal/wedding hair and learn with Create Beautiful Hair? There are many ways to learn with Pam:
1. Join our Habia approved award-winning online bridal hair course, learn from home and submit work directly to Pam for assessment and feedback as you work through the models; receive as much support as you need! Complete the assessments and receive a Habia approved CPD certificate upon completion of your bridal hair training. We have a 50% off offer on the full subscription (use code HOMESTUDY at checkout), or join from 9.99 per month on a view-only basis. Click for more information: https://www.createbeautifulhair.co.uk...
2. If you are in London or nearby, enquire into private Bridal Hair 121 tuition for yourself or for a salon! DM for more information on private courses!
3. Check out more of our YouTube channel for a selection of our freely available tutorial...like and subscribe for more information and updates, YouTube link: https://www.youtube.com/channel/UCDKU...
4. Join us on Facebook for more tutorials and all things bridal and wedding hair!! https://www.facebook.com/createbeautif...
Whichever option you choose, please do get in touch and share your fabulous creations and suggestions on what you want to see next!
We've got it covered . . . we even have tutorials covering the curly girl technique!
Great for fans of natural unintentional ASMR!
Hairstyle tutorials include hair prep, hairstyling and hair up, blow-drying, curly girl techniques, working with different hair types, hair textures and hair lengths.
Create hair up & bridal hairstyles and become a bridal hairstylist with Pam Wrigley, UK Wedding Hairstylist of the Year
Just SUBSCRIBE & LIKE!
I'M going to show you how to do a fabulous half up, half down style on Gul and we're going to put a few beachy waves in her hair and then do a fabulous braid just across the front.. So it's quite a quick style. This one Gulhas quite coarse, thick hair, so i don't need to texturize too much.. If your lady has fine thin hair, then I would recommend putting some mousse and some texture spray in her hair.. I'Ve spritzed the hair with a little bit of the french girl spray and my shine and care lotion, and i'm just going to use quite big sections of hair and do a beachy wave on the hair., Leaving the ends of the hair straight. So i'm not wrapping them around their tongue. I know Gul's hair holds a curl quite nicely, so i can use quite big sections and still get a really pretty looking wave. A little bit of texture spray. You could use a hairspray here or even a setting lotion.. I might mix these up a little bit and see what works best on Gul's hair.. So I'm going to do this in a different direction now, because i want it to look really effortlessly beachy, so the waves going in slightly different directions., You can see I'm just touch testing it here once you feel that heat coming through the tongs have done their Job loosen them off, hold it just for a second., That's it and then let that go. Spray as we go along this time. I might try a little bit of hairspray on this one., So if you're not sure try out different products, the back of the hair is a really good place to to practice and to try out different products and see what works best on that person., Because the Hair right at the bottom here is going to be covered by the hair above so it's good to see whether you should be working with smaller sections or bigger sections, whether you need to hold it in your hand, until it's completely cool. or whether you can let It go quite quickly., I quite like actually, the way it looks with the hairspray. So i'm going to use that again., I'm using a strong, cold hairspray here by L'oreal, and it does act as a heat protector. As well.. We have got some style and care lotion already on Gul's hair, so actually that will do the trick to protect the hair from the heat of the tongs.. The hairspray acts like a kind of setting lotion, so it does help the curl to hold and curl in the opposite direction.. I usually just have a quick look if you're not sure which direction you want to go so when it curves that way. First, it means that I started with the tongue here so now. I need to start with the tong on this side, so I can wave the hair in a different direction.. You could use your straighteners as well. That would give a lovely look for this particular style. Actually, I have to say the hairspray is making the hair very shiny.. So then we get to our top section. You have to be a bit more careful now with these sections, because this bit's all going to be visible., It's a little bit of a beachy wave. So you could use any kind of curl, I'm just doing a beachy wave here, but you could do a reverse wind or a traditional wind.. You could do a deeper one with the reverse wind with a twist. So you get that really deep, more hollywood looking wave, but I kind of think this is going to be a soft braided style. So I think something not too set is going to look better. A little bit of my product, l'oreal Techni, Art, Liss Control. Just on the ends, here. We've left the front sections out here and we're going to start working here.. So I'm going to work out which bits of hair we're going to leave forwards for this style.. So here we're going to have a braid across the head and we're going to have some little sections out at the front here and again, some sections out at the front on this side.. What I'm going to do is decide now which bits of hair i'm actually going to leave out. Section the hair, so I've got a middle panel here that I'm going to be working with., I'm going to clip this hair here out of the way., So just pop A little clip on there to keep that out of the way I'm going to also put a clip on this bit of hair. So i can keep this bit of hair out of the way.. Then, on this side, I'm going to ..., so we've got our central panel here that I'm going to be braiding have a little play around. I want to try and avoid having parting visible when we create this style.. Sometimes I feel i need to start kind of underneath here so that it allows this hair to drop down over the beginning of the braid.. If you get your little extension here, this is the beginning of the first section of the braid., I'm just going to clip the extension or fit the extension here. So it's with that hair there and just pop a grip across there. So it connects the two together.. It would be easier if you've got clip in extensions, but we haven't. so we're going to use the little grip there.. Then we flip the hair over and we can start braiding.. So we're going to be doing a dutch braid, so create your three sections and remember to go under ..., don't forget which bits you're leaving out as you continue with your braid.. If you find it easier, you could always ask your bride to keep hold of the sections that are going to be kept out. .... That'S it thank you ... and just keep going there. We go So if you're not sure how to do a dutch braid and have a look in our at our braiding section. Continue to the end. Before you put the band on the end, we're going to come back and loosen our braid., I usually find it better To work my way up, one side and back down the other, I'm just grabbing a little bit of hair on the outside edges of the braid and spreading it out.. I just need to curl this hair backwards away from the face.. We still have the rest of the braid to secure at the other side, so we're not finished yet lovely. So now, let's come and finish off on the other side.. Let'S tweak our braid now make sure we're happy with it., Make sure it's big enough and chunky enough and it can sit just nicely.. I might pull a few little bits of that hair back out again. A little bit of backcombing on the end of that braid. Now I know I don't need to pull any more hair out.. So if you're working with somebody with quite fine hair, then you would just put on just a little elastic band.. I'M going to twist that over keep your finger on that hair and the grip goes behind and underneath your finger at the same angle as your finger just push gently against the head with your finger as you slide the grip in position.. Now, if your finger is horizontal, the grip will go, horizontal. Get one more pin and i'm going to go at a right angle to that grip. That feels much better. That'S it and then that doesn't move. So now we've got our lovely beachy wave with a gorgeous chunky braid as a hair band.

Comments
Carlo Ricciardi: Love this!
Natalie Sully: Pam , I love your videos . I’ve been inspired by the Tv series Bridgerton could you show us a style that has the Bridgerton feel ??
Hair by Chris Beck's: Beautiful
•Copel•: Was her hair “dirty” or freshly washed?