Regular Haircut.Scissors On Top And A 3 Guard On The Sides.
- Posted on 06 September, 2013
- Hot Topic
- By Anonymous
To vote for Ricardo the barber to get a Barber Grammy for this 2022 year please use the link below. Be sure to confirm your vote through your email.
https://ctbarberexpo.wishpondpages.com...
Click here to purchase Andis Master clippers
http://www.amazon.com/gp/product/B000B...
Website:http://www.ricardothebarber.com
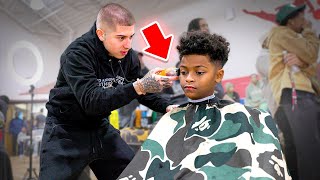
Here i am giving a haircut with scissors on top and a 3 guard on the sides.In this video i will talk through the whole cut and give some tips for beginners.I did forget to recore me using the razor but it should be fine because the main focus is on learning the haircut and the techniques.I used my canon 6d to record and the rest is history.Thanks for watching.Like,comment and subscribe.
How'S it goin it's Ricardo, barber, I'm going to show you in this video how to do a regular haircut. My client here has scissors on top and he has a number three on the sides. So starting off, I'm gon na be using my three guard to go all the way around the head and put my guideline in there just going up and scooping out just to not make any hard lines, basically trying to clean up around his head to get all The hair around his neck and then the sides cleaning up as good as possible, so I just continue that all the way around the head, where I want the actual fade to be at in his case, it's somewhere around like a mid, fade typical area. So here I pretty much got all around his head, so I'm going to do. Is I'm going to go straight to this as a work, all right? Typically, what the clients hair before I use scissors right now, he's probably getting around two fingers worth so somewhere around. Like 1/8, so I'm gon na go through his whole hair cut it all the same length and I cross cross cut it just clean it up to go a to double-check. How good you? You know you cut your hair in the first place, get all the high spots. So now I got a number four guard on here. I have it open, so it's a four and a half and I'm just scooping up and out and trying to get all the extra weight from the side of his head cut it right off. So I'm also closing this blade. So this way it goes straight to a four all right. Now I put a three on there and I want it to be a three and a half, so I keep it open. I blend into the four that I just had and mind you. He does have a three in a size, so I'm just going to work with this until this three is closed, so I'll probably do three open three Midway and then three clothes just to knock out that you know. If there's any line, I'm going to basically continue and do the same thing on his other side, so here I'm using a four and a half combing the hair as a as I'm cutting it. This way, I know I cut against the grain. I could see the fate as it's coming in so worked yourself. You know to the back of the head as you're closing the blade going from four and a half back to a four. So when you're done with that, you're, basically gon na do the same thing with your three guard, alright, which I'm doing here, I got a three got on there. It'S open not going to hair down a bit closing it as I'm fading down and I fade down. Some people fade upwards. It depends on your style I like to fade down because it's easier to not raise a blend. You know, if you make a mistake when you're fading upwards, it could cost you, so I try to just do it the safe way, or at least what way it works better with me. So here I am on the back of the head. Doing the same thing for open for clothes, put the three back on there: have it open blend it down? Now you can cut this hair. You can blend it into the top a number of ways. This way, I'm just showing you because it's probably the most typical way put it between your fingers. The way I like to do it is with the comb I like to just blend it up. Let the scissors do the work. You know blend it in slowly as I'm moving the comb. It'S looks the way that works good with me. You know, there's plenty different ways to do it, just the way that I prefer. So, as you can see, it's all coming together, it's all blended in pretty well same thing. On the other side, it's gon na be the same thing in the back. No different you're going to get all around the head and just be careful, make sure you put the your actual comb tilted outwards to this way. You'Re not cutting too much hair off the tilt now helps you get just the ends that happen to be too long. Let you shorten them up pretty good. So, as you can see the blends coming together, even though it's all along here, keep combing it down. Just to get all the old any hair you cut, get it out the way make sure it's not. You know screwing you up, I like to comb my hair or brush the hair, as i'm doing fade the whole time. Okay, so from here on we're going to shape up in the back, my client likes a straight line. He doesn't like you know he doesn't like the super-crispy look. He likes to just have his lines done up nice finished, so you know just make sure you go straight across the back. It'S good to get. You know if you put your head down to where their neck is, and you look you'll be able to see a better a better. You know view of what you're doing so make sure that line straight from there. Then you can go up around the ear. Basically, just a box, you know squaring it in a lot of cases. You know you don't want to hold that trimmer blade on the neck too much, because you can't hurt the client. I don't care how good you got that thing: zero gapped! If you're, if you're around tender areas, it's going to hurt, if you're there too long, it's going to get red, it's going to happen, you know there's no way to really change that unless you flip the blade around and use the back of the blade. So here I'm just cleaning around the ears. You want to make sure you get get they're good. I try to brush the hair out, so this way expose everything that I need to cut and then again make your cut all right. Sometimes you got to move the air when I'm left-handed, so when I need to do the person's left side, I use my my pointer it'll, probably take a little bit of practice to learn like that, but you could use your pinky on your right hand too. If that's the case for you right handed, it's just backwards, so just make sure the air is nice and clean he's keeping his beard. So you know, while I'm there. I might as well just finish up that line, which is what you see me doing here, I'll just continue it down where he wants. It now flows, nice and smooth. So basically, I'm moving back on to the other side. So same same way. The other side was just block that thing up come around the air try to make as little contact as possible with your trimmers whenever you're around someone's neck. You know not that you're always going to hurt them, because your blade should be set fine, but you know it's a good habit to to get into it because sooner or later you know you're going to get somebody with some real stuff to the skin and yeah They'Re gon na be real red and burning so background. The air keep a nice and clean doing the same technique as I, as I did on the other side, no different in this case I'm pulling his ear down. With my other hand, there's no way. I could do it with one hand on this side, brushing the hair to expose all all the pieces that I need to cut continuing it down all right, Harry I'm going against the grain. Just this, you know less contact on his skin, so here I make sure. Don'T forget: whenever you're cutting certain parts on a client's face or anywhere in the haircut you got to remember the client can move, you shouldn't be ducking down or straining yourself to get to a certain part. A client can always move. All you got to do is position them where you need them. So in this case you know I put the seat up higher. I make sure he's sitting back in the chair all the way and then I have him tilt his head. This way I can get where I need to get, and he gets a better haircut. I don't have to worry about trying to uh. You know having a problem trying to get where I need to get so here I am using the back of the blade again. This way, there's less contact with the movement part of the blade you don't get irritated and hurt from it. So continue the same thing on the other side, when you're you get them as even as you can and the way I like to do, it is when I'm done I'll, look at them straight on I'll. Have them lift his head up and I'll say you know. Basically, stay like that I'll see where I need to adjust I'll cut. Both sides connect it to the middle and make sure it's a perfect straight line going across, and that's big. You want to do that before you do any kind of shape, and above so this way you know everything's symmetrical and it's the same on both sides. You want to just be screwing stuff up again. The back of the blade keep its least amount of contact with the moving blade. So this way you don't irritate anything any skin. Okay, so I did connect it. I didn't have it in the video. Basically, here it doesn't like me messing with a shape up too much I'll just lightly touch. He does have done already and connected up to his sideburns, but I will not do his front line. He doesn't really have get that square shape up that you know. Other people do, like you, know, use a little more casual look, so I'm just connected in here going up to the top and continue the same thing on the other side. You know you want to make sure you know either keep it natural or keep it to where they want. You know and keeping the rest natural. So in his case you know neither temple area is going to be where it's supposed to be. He likes him a little thinner than what he has not too not too too wide. So you know I'll take a little bit off in this case, but not too much. So that's what you see me doing here. I did use the razor I forgot to videotape. It so you won't see me doing the razor, whereas you know the more important part is learning how to do the regular haircut and the techniques involved. So the Rays is already done here in this portion. So what I'm doing is I'm cleaning up the rest of the neck. This client does not like the razor on his neck and I don't have you know I would use a heated towels, but I don't have the heat that machine that heats up the towels. So um this guy is satisfied with using just the shaver, so I use the shaver on them and then at the end I clean up the rest of his neck and uh. You know basically that that summed it up. You see, you know again nice and easy on a neck, make sure a lot of times. Sometimes they could have little moles and stuff on the back of the neck. You got to be careful because you don't want to cut one of them. Sometimes they could. They could bleed, you know and not. Stop that you don't want. You don't want to cut the guy. So basically I'm you know. I already know him because I've cut his hair for a couple years now, so he had no problem with me just going straight with a razor blade Here. I am touching up his eyebrows particularly likes me to do that. There'S no need to use the trimmers beforehand. I like to go straight in with the blade as long as you know what you're doing and you're careful it shouldn't be a problem really ever you know a lot of people, don't like using the blade on eyebrows, but if you know what you're doing you're good So, basically lightly touching both sides. I keep them the same and you know in some cases somebody might want you to do them real thin, whereas here he just likes him cleaned up. So that's that's all I'm doing so. I'M basically making his one eyebrow that he had and I'm making it at two because he had a lot of hair in between them. Here you know lightly to cleaning up all the longer hairs, keeping it all the same length. So this way later on, when he you know he might gel his hair up. At least you know, you won't see any long hairs coming out and that pretty much concludes it. Here'S a few pictures to show the final results, so I hope you guys like it throw me a comment subscribe if you aren't subscribed yet and I'll definitely get back to you, though. Alright thanks for watching guys,


Comments
Adrienne Robin: I'm a cosmetology student and itching to learn as much as possible. This video shows such an awesome but reasonable everyday cut. You have a talent! Keep up the good work.
liek boss: just started mastering the scissor over comb technique, definitely not as easy as it looks. You are a pro for sure hope to be as good as you one day Ricardo and thanks for all that you do for aspiring barbers like myself!. Not all barbers are willing to show their knowledge.
ktkclipper: Wow that's the best explained, most comprehensive men's cut with facial hair trimming I've seen yet. Thank you so much for taking the time to produce this tutorial.
Madina: Thanks for this video. I have watched it several times. Now I give my husband regular haircuts. The cuts look as good as some barbershop cuts. Very timely during this COVID lockdown. Thanks again.
BeautifulGamer89: amazing work i've been out of school for almost three months and the only issue I've had is blending but your videos really are a big help
Jono: Pretty cool using the Shavette to clean up the neck. I typically buzz my head all one setting and use a safety razor to clean the back of my neck up. Hoping to learn a bit more about blending in hair before I take on cutting my sides and back different lengths like I want to do. Thanks for the vid
Angel Ash: great video ricardo, im just doing my barbering course at college and this is the best easily understood and easily followed tutorial on here, you should be a teacher.
Louise D: Great video/tutorial. I've never been to cosmetology school but this is how I cut my husband's hair. Very good to know that I'm doing it right
Stacy Rodgers: Thank you for this video. I am a cosmetologist transitioning to barbering & I have been searching for a clippers and shear technique that I can use and master and you made this sweet. I have been using my majic clips or 76ers, but Imma do Just as you did till I master my tools. Thanks again. I subscribed
bsheehy94: It's good that someone put up a video like this so I know what a no.3 looks like
Jerry G.: Nice job, you work with such ease- I'm surprised he stayed awake. It is sheer hell for my 2 boys when it's time for their haircut. Thanks for the tutorial.
Funky Fresh Show: This has to be the best instructional video I've ever seen,I give you lots of respect for making this especially showing step by step nice work to man seriously!!!
Galactic Stardust: You did a fantastic haircut. Thank you for this tutorial. Nice to know how to fade properly.
hdflame: Just cut my son’s hair for the second time. I used a 3 & 4 on the sides. Shears on top and cleaned up with the blending shears. I’m going to try the comb and clippers next time. Thanks for the video.
Valeria Lora: I look up a whole lot of barbers videos but your is by far the best ones. Thanks for explaining EVERYTHING your doing keep up the great work.
Rico Flexxxin: Ricardo!! First off you the man bro! Appreciate your videos and I can honestly say I've learned a lot from you. I've been following these vids for months and it's a huge help man. Just felt like I should let you know to keep doing you, the best barber I follow, and you got a lot of support out here. Appreciate the time you take to make these brother. Peace and blessings to you and the fam.
Francy54: Great haircut and I have been doing hair for years also and you do wonderful work! Good on you!
Diane Sanchez: Great job! Very well explained. Thank you. ☺
bashar edais: I'm a barber for over 17 years and i can tell you .. you're an exellent barber ..
Yhin R: Great explanation on the cut man ! I appreciate it , I learn a lot from your videos !
Emanuel Hernandez: I like your videos. Your haircuts are very good and I like your style. You're different from the other barbers and that's really good. I enjoy watching your videos, they're pleasing to watch and are very helpful. Thank you.
Guadalupe Escamilla: me gusta como explicas tus tecnicas, yo soy una estilista ,que todavia tengo grandes problemas haciendo esos corete,gracias eres maravilloso
TA L.: Great tutorial! I do allot of men's cuts...love learning and mastering my skills..thanks for sharing this!
Jason Whiteside: Wow what a simple and effective video this is. Perfect for beginner like myself wanting to know/see the basics. I created a YouTube account just to like and comment on this video lol. Great watch
I am a Phoenix: Great work damn. I always wanted to cut hair and I'm finally making it happen these videos are very helpful.
Dileny S: Great work!!! Me ayudo mucho para aprender hacer mis primero corte...
Josh: Good narration man, less is more with these things and you kept it casual when explaining. Well done.
Ferndog928: Love your videos I'm in barber college right now in Phx AZ with 600 hours thanks for all the details and steps hope to see more soon!!!
Kevin Siu: Thank you for making these videos, I really enjoy watching them. I was wondering how do you go about the cowlick? It seems whenever I cut hair, hairs around the cowlick tend to stick up in all different directions.
Jo Lee: Great video! Thanks for narrating it has really helped me especially with the blending!
jakShowy: i'm a beginner and your videos have been really helpful. thank you man
WHS: Nice work with the razor around the eyes….you’re a true professional. Bravo
L R: Great work! Fundamentals of a basic men's cut!
Alex Flores: Great tutorial..very well explained :) thank you
Selo Kuvuna: You are an awesome instructor, great cut as well, just picked up another subscriber! ✔️
Freddy G. Clippz: Nice video and explained very good I'm currently in Barber College so learning a lot there and with your videos also nice cut bro
Panterawill: Great video,Ricardo. Lots of great info but not overdrawn!
McDragon Pancakes: amazing barber skills. thanks for the videos!
Tracey M: Nice. That's a very particular cut and a lot of very careful areas, done very well.
Billy Whiteshoez: Damn good cut, Bro. Detailed tutorial as well. Keep up the good work!
Lakita Butler: I am a stylist and just graduated from beauty school and work at a hair cuttery I am new to cutting but I am a visual learner and I am practicing my skills better now I am glad you show new stylist like me to do it right Nice job.
Jacqie Miles: Nice job I learned a lot watching this, thank you.
Neia Brazil: PUXA!!!! VOCE É MUITO BOMMMMMMMMM!!!!!! PARABÉNS! ESTOU APRENDENDO MUITO CONTIGO! MUITO OBRIGADA POR DIVIDIR SUA EXPERIENCIA CONOSCO! SUCESSO MENINO DE OURO!!!!!!!!!!
Evna: flawlessly done :) thank you
Regina Malicdem: Thank you for sharing your knowledge! Very clear and detailed demo... You are the best :)
Freddy G. Clippz: Nice video and explained very good I'm currently in Barber College so learning a lot there and with your videos also nice cut bro
Julian Kollias: Very nice work, Ricardo. Thank you for posting!
supermanthathoe100: amazing work. u should do before and after pix with these videos... just the little detailing you do makes the biggest difference between an excellent barber and an amateur barber
Gus Macedo: Great video. Always detailed. Just a question. I've always thought that the andis improved masters went from 0(closed) to a 1 (opened). I kept hearing u say in ur vid when u had the #3 guard and had it open, it's a 3 1/2. Wouldn't a #3 guard open be consider a 4? Can u clarity that please. Other than that, keep up the good work brotha.
TEONA: This looks great! Nice work!
Alex G.: Thank you for this there isn’t many out there like this one
Jasmine Campbell: I'm a cosmetology student and this is a great video for learning how to blend better, THANKS
SVLogger: Great vid man, just have a quick question. When a client asks for a 3 around and scissors on top. Is it always going to requiere blending with another guard(3 1/2 & 4) to get rid of the line? Besides using scissors to blend?
Nicola Francis: Thank you!! This video has been great! On my course they teach you how to fade up and i just cant get it! Im much better doing it this way! Thank you!
Marta Dziegielewski: thats nice work, and you keep it simple! how long do you think it takes you to do a typical haircut like this? how long do you think it should take to do a fade?
emeeraldd c: loved this video. I'm currently going to cosmetology school and we don't learn in depth men hair cuts like this. we learn the basics. this video has helped a lot. I'm watching this before having to cut my dads hair. I feel a little more confident now. thank you!
andrew kelly: It’s nice to see a good normal haircut video on a YouTube
brice arnaud: awsome job man !! so straight ,bet you got lots practice !!! i am trying to get my wife to get better ....
jalenahairstyle: thanks for the time you dedicate to record this hair cut is really easy and clear, help me a lot thanks. Hellen
LIVERNIL753: Randomly clicked on this and although it's not the style I go for, I genuinely enjoyed watching the method and technique. Best Wishes.
Hanzon: Informative video .Liked the alternative scissors over comb for blending.Thanks for sharing.
Camilo Valencia Rodriguez: Hola soy de Colombia y me gusta mucho tus videos, quisiera saber cual es la marca de la maquina GRACIAS SALUDOS
Nasrin Davallou: Great hair cut, thank you for explaining every step,where did you buy the small brush please???♀️
sunday squares: Great job man! i really like your videos and the way you do you work, but i have a question. What scissors are you using ?
tiago plus oliveira: cara moro no brasil, aki nao tem essa maquina t outliner os barbeiros sofrem so com as navalhetes,eu estou fazendo o curso de barbeiro e ja pedi 1 maquina dessa t outliner,muito bom seu trabalho tanks
johnzeroseven: Nice work Ricardo and I like your professional approach.
Ni Ma: great work. Could you tell me where i can buy the machine you used for lining around the ear? what is the model? Thank you
Ricardo The Barber: Nice man im glad you liked it.I try to keep it simple.Its too easy to try and complicate blending.Thank you for watching my man.
Kerrin Osborne: Landed a new job. I can cut woman's hair all day every day but struggle with mens, this video may just save my job!!! Thanks a ton
Amber Hand: Great shaping. Final result looked really good
Vargas: Excellent cut. We need more videos of regular cuts, and not these Instagram haircuts.
X0nslaught: Amazing, you are a master and a professional sir.
Jorden Ashley: Very useful tips! Thanks a bunch
art garcia: Ricardo, love your videos man very jelly how you always go into detail about everything ive learned all of my cutting with your videos.. I'm not sure if you've been asked before but if you ever have a chance to make a video on how to zero gap the andis improve masters and t outliner, it would be helpful man specially if you go into details how you normally do, I have issues when I zero gap the masters , I feel like one of the corner of the blade always shifts up , maybe I'm not doing it right ... Have a great Xmas man with your love ones... Cheers
Monster Cuts: Your my #Role Model You have very good skills keep the work up man your channel is gonna be way bigger than what it is now!
Gorevet: Great work, I need to find a barber like this
Martha Septién: Muy bien hecho, es un profesional
Akhil Raj: very nice and clean man.. loved ur work. keep it up
Hristo Hristov: Good haircut, even cleaning the eyebrows. I have never seen a barber doing that. Some of the barbers clean the ears if they are not too lazy. And the problem with hygiene, barbers rarely clean their combs. Because of all this I try to cut my hair myself.
Lisa Zehrung: This video was so helpful! Thanks!
Colby S: Great job. Really soft touch with the razor.
nyrockchicxx: Looks very good. Like your communication style--nice explaining.
Naomi King: Such a helpful video! Thanks!
I Salazar: You rock! You did it with art!
Ang Mesta: Out of allege videos I've watched I have to say that you have explained it the best.
steven pham: Thank you , I’m beginner so this help me a lot
Steve-in-Cornwall: Very nice haircut and well styled. I like it.
Lima viagens diversos vídeos.: Escrito aprendendo ótimo vídeo
Danilo Biccari: Ricardo these videos are great man. Thanks for sharing.
David Bembas: great cut man, good job. do u charge the line up separately from the haircut?
darthclone7: when the hair is long and has strange growth patterns on the back of the neck.. I find a very tough time lining up the back nice and straight like displayed in this video. Does this happen to you?
Kati Smrz: I enjoyed you video. You do everything I would on a fade like this accept I do like to use the thinning shears to finish blending and around the cowlick. Do you use thinning shears?
TheRazorsharp101: i see you've stepped your game up... impressive!! way to go!!
Kheara Rhodes: Thank you! I'm left handed this video really helped.
Ricardo Rojas: Very educational video on hair cutting. I learned a couple of tips. Thnks.
Jorge Galvan: Good stuff do more videos like this bro they really help
John Loftus: Ricardo, great video bud, I'm also a lefty barber just starting out, great seeing your technique over the ears. I noticed you cut with the sciccors right handed?
Elsea: Nice work, great video...thank you!!
CARmechanic71brooo: I’m growing my hair back out because I messed it up but I’m wanting to get it cut to a number 2 on sides and back and number 5 on top and the sides like the guidelines what scissors do you use to scissor over comb to take the bulk and blend it?
jhesagen Narayanasawmy: I really like :) you explained very well.. Thnks a lot