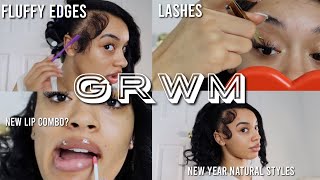
How To Flatten A 4X4 Highlighted Closure Wig Ft Ishow Hair
- Posted on 19 February, 2021
- Closure Wig
- By Anonymous
My 10% off discount code: "IshowMDD10"
Ishowbeauty hair official store: http://bit.ly/3bkq3MY
Get same highlighted lace wig: http://bit.ly/2Nfn5S1
Hot sell 4x4 closure lace wig: http://bit.ly/3doEUsA
All wig types from Ishowbeauty.com: http://bit.ly/3qvewB2
New arrival highlighted hair bundles: http://bit.ly/2NjpCuv
Ishow hair hot selling items: http://bit.ly/3baMyUE
Ishow hair 3 bundles: http://bit.ly/3b9bCLy
Ishow hair 3 bundles with 4x4 closure: http://bit.ly/2ND1P8q
Ishow hair 3 bundles with 13x4 frontal: http://bit.ly/2OOYB2s
**** Contact #Ishowhair *****
Email: [email protected]
Whatsapp: +86 182 3684 8017
Follow #Ishowbeauty on social media:
YouTube (@Ishowhair): http://bit.ly/2PTT7Bb
Instagram (@officialishowhair): https://bit.ly/37pvZDk
Facebook (@Ishowbeauty): http://bit.ly/3drw4ds
#highlightedwig #highlightedhair #highlightshair #highlightswig #honeybrown #honeybrownhair #ombrewig #brownblondewig
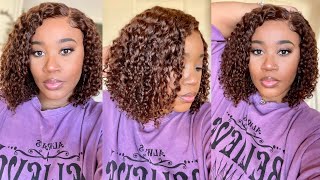
Hey guys welcome back to my channel, it's me and dio in today's video. I got this beautiful wig from eyeshow hair. It'S a highlighted. 4X4 closure wig. It is so, yes, this is a 4x4 and it is 24 inches, and it is just so pretty and i'm so excited to put this on, but this specific video i just want to show you guys how to make sure that your by four closure is as Flat as possible - and it just looks like scalp - you know like we're not trying to make it look like a four by four closure. So i just want to put this on my head and i'm gon na show you guys how it'd be looking when you first get it. So this is how the four by four closure is looking on me. This is what i'm talking about. So this video, i'm just going to show you guys how to pluck and make sure that it is just extremely flat and looks like a wig and not a hat. You know that's the goal all right, so the first thing you want to do is put it on the wig head and you want to start plucking all over here, like all in here and in here and in here for the ones in the back. That don't know how to pluck you're just using the pointy side and you're going to just. Let me hold this properly, and this is this is all you're doing, but i do it quicker. You know so now that i just taught you how to plug i'll be back. Oh i plug as much as i can, or am i being lazy now i plug that as much as i can, and now i cut the lace off and i'm just gon na like glue it down just a little bit and then see if i can put Some baby heads on this 4x4 because all right so for me this is all right, so i'm gon na start to lay my hair okay. So lately what i've been doing? I'Ve been pulling the ish out of each side. So that's what i'm gon na do. I'M just gon na put it down and just pull both sides. Don'T worry about the white. Even on my last video, i totally disregarded the white lace and had to put my trophy tees like off camera and everything when i was leaving. But at the end of the day i recorded the video like that, and it ended like that and you guys thought i left like that. But i didn't i fixed it. Alright life changing before we start to make the top flat and everything i'ma separate what i'm gon na make baby hairs and then we're gon na tie that down the baby hairs are separated. You know i'm only gon na do two because um you know that's what i feel like doing. I'M just gon na get my wax stick, and this right here is the key to making sure that your 4x4 is extremely flat. I'M just gon na put a lot. So i'm only tying down the baby hairs, all right guys, so my baby hairs is being laid so now we're just gon na push all the hair to the back. So i'm just going to continuously do this until i feel like it is as flat as possible, and also i have this product right here - um frizz, free and we're going to be using this towards the end. This should be able to get the hair flat too. So, to lay our baby hairs, we're going to be using our blue mousse you're, going to get your wax stick again and just go over the front right before you tie it down you're just going to tie this down. We are tying this down two times so the elastic being for the baby hairs and then this for the front period. Now this is where you get your hair flat, so we're going to comb everything to the front. You know so it's coming along. You can wear a puffy, but me on the other hand, i'm gon na go add some water and put some of this fresh spray, but i'm gon na do one side, so you guys can see like you know how it's looking. So this is the side that i wet and i put the um frizz free, curl mousse, and this side is still puffy. So there's two ways that you can wait and style, but you already know i'm gon na go with this one. So i'll be back. I'M about to go wet this side and put more of this and then we're gon na take this out and see how it's looking and it better look flat like this side. So guys both side is wet, i'm just making it as flat as possible, because that's the goal of this whole video. This whole unit is to get the 4x4 as flat as possible. All right all right now we're gon na conceal the part and the part is gon na look. So i'm gon na give you guys a little rehash on the wig. This wig is from. I show hair. It is 150 density, a 4x4 closure and it is 24 inches. It'S a highlighted, deep wave wig and i really hope you guys enjoyed this in store. I really hope you guys enjoyed me making this flat and making it look. So pretty you know everything that came with this video. I hope y'all appreciated it and all the information on this unit is going to be down below. Thank you guys so much for watching look out for more videos shout out to eyeshow hair bye,


Comments
Relaxation Hub - Sleep Sounds: It looks brilliant. Thanks for sharing. Have a lovely day, everyone.
Ndey Garjo: So pretty
The Bev Empire BEV: Beautiful
M K: "A wig and not a hat?" I'm here to take notes.
Ndey Garjo: First