How To : Wig Install (Bald Cap Method) Ft: Dyhair777
- Posted on 26 January, 2023
- Closure Wig
- By Anonymous
WELCOME AND WELCOME BACK TO MY MARIEBABIESS! THANKS FOR 17K!
i hope you all love and enjoy this new content i'm bringing into the new year!
stay safe!! #hairstylist #wiginstall #viral
BUSINESS ♕-
email : [email protected]
hair page : https://instagram.com/jaymariestylez?i...
tik tok : https://www.tiktok.com/@jaymariestylez...
SOCIALS ♕-
click the link to follow my socials➡️ : https://beacons.page/jadennmariee
SUBS ♕ -
sub count : 17,155
sub goal : 20,000
FAQ ♕ -
age - 16
height - 5'3
grade - 11th
camera - canon g7x mark ii
editing software - imovie
who made your intro ? @rashaadgraphics
NEW VIDEOS EVERY WEEK
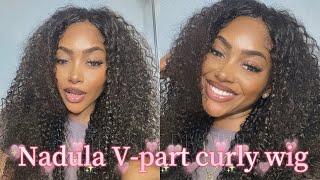
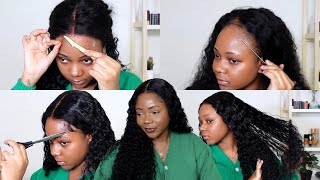
Okay, guys so today I'll be installing A Wig by DIY hair 777, except someone, that's my lucky number so inside the bag, it comes with a little hair care part, and this just tells you like you know what to do. Take care of your hair, wash your hair two or three times a week. This will keep the hair moisturized deep condition it comb. It would watch it comb and don't damage the hair with too much heat. So here is the wig. It is a 20 inch. Brazilian 100 Virginian hair and Virgin Hair, let me show you, I said verdina tripping. This is what the wig is. Looking like real nice, I'm cutting into some layers and we're gon na. Do the fish toe braid. You kind of already got some like little edges coming out. Whatever that's cute, that's cute, whatever that's cute, though, so we is going to bleach these knots trying to be how much time I got. I'M gon na have enough time to do right now, but when I get back home, we're gon na bleach these knots is it a 13 by 4 yeah, I'm gon na bleach these knots and we're gon na you know and get this week together for the install On Friday in school, I'm keeping it straight in layers, it should be cute, I'm excited so yeah. I'M gon na give you guys more details about the wig later in the video, but I'll get back with y'all. When I get to installing and bleaching and stuff like that, with the wick - hey guys, okay, currently you guys can see I'm in my cosmetology class right now, I'm installing or putting on my wig cap. Once I put the wig cap on, I'm gon na cut the ears out to make little ear holes for my ears to be breathable through the wig and then I'm gon na put a little glue around my edges and then cut the excess with cap off. For the install, so right now, you guys are just watching me know, get the wig cap over my big head and I'm about to cut the air holes and I'm chatting it up with my you know, co-workers as you guys could say, but yeah here. I am again there goes somebody, you know, that's her um. I have the ball cap on and I'm about to apply kisses 12. um foundation on my ball cap for the seamless melted, install we're gon na get this ball cap row ball. This is how you get the ball cap to the ball. You know we'll be looking ball for a little minute, so I'm just taking one side of the foundation and I'm putting it all over my head. Once I get to the wig, I'm going to combine both sides of foundation together to make it a little darker, because it's going to come off a little bit once I put the wig actually on my head, see my jewelry as you all can see. I just placed a wig on my head: I'm trying to make sure the part is in the middle, because I kind of pre-styled it a little bit. So I'm just - and I pluck the middle part, so I'm just trying to see if the parts in the middle - thank God it was in the middle hate this year, different colors, as you guys can see. I have the wig on and it's cut into four sections. That'S how I like to cut my lace to get it. You know the closest to being scalp. Okay, now I'm spraying this bowl whole skin protectant. So when I put the glue on my skin doesn't break out. Normally, when I install waste previously, my skin will break out because I didn't use any skin protectant, but now it doesn't break out anymore. So definitely grab that before doing your installs, I use full hold skin protectant and bowhole Lace glue. Now I'm applying the glue to each section. First, I'm on the left side, I'm applying the glue to that section. Then I will smear it in. I got ta make sure it's all smeared in before I apply the cold air, the cold setting of the blow dryer to it, to create multiple layers for the wig to stay. Once I do that, I'm going to lay down that piece of the lace and I'm gon na do that for the rest of the three sections foreign, it's important to blow dry on cold on the cold setting, because when blow drying on the cold setting that locks, The glue in place, if you blow dry on the hot setting there, the glue will melt and it won't stick. The wig won't stick to your hey so or the ball cap. So it's important that you blow dry on the cold setting. I learned that foreign, as you guys can see in this clip, there's a lot of people in my rogue getting their hair done. But right here I am melting. The lace I put the wig band on top of the glue on top of the lace after I put the glue and the layers on there. It'S just you know, make it make sure it stays, and after I take the wood band on, I will begin to cut the lace, can't remember in this clip I'm using a razor and I'm trying to get as close to the lace as possible. So there's no lace left, and so I could get the most melted, scalp skin. Looking install, I can possibly get foreign foreign okay, we're making progress. It'S looking like my hair. I don't see any lace. What what lace with the remaining lace? It'S going to be like a little lace left, of course, you're, not gon na get all of it. Put the makeup of your skin the foundation around the lace and melts again once you pull the edges down right now, I am pulling down the hair for the edges and once I do that, put a little Spritz on my finger Spritz in a lace melt and I'M gon na put it around the lace and I'm gon na reapply, my wig band level, one High School. I used to bus it to the dance, nothing nice back in high school today, while I'm letting those products simmer into my lace. I'M gon na you know re-flat iron, my hair and I have the fishtail braids in right. Now I'm gon na do a step-by-step tutorial on that. If you guys would like that, please comment down below in this clip, I'm layering the hair. I did not have the proper tool, the layering tool to cut layer, my hair, so it doesn't look as good as it could, but you know we had to improvise um right here. I'M cutting trouble attempting to cut it into layers in order to get the soft and curly Edge. Look, you must cut the hair and then curl the edges with a mini flat iron after I do this I'll be using the got to be gel. To lay my edges down, this is the finishing look. Thank you all for watching use my 10 coupon code. Jayden, you have to order 50 for it to work. This is a 180 density. Brazilian straight lace, frontal, wig, 20 inches, make sure y'all go shop, DUI, hair 7-7 and make sure you guys go. Follow me on all my socials and definitely follow my hair page and if you're in the area go book an appointment with Jamie Styles. I love you all so much again. Thank you for 17K and I'll see you guys in the next video bye in order to get the soft and curly Edge. Look, you must cut the hair and then curl the edges with a mini flat iron after I do this I'll be using. That got to be gel to lay my edges down.


Comments
Dyhair777: So prettycheck my email about description box's information❤️