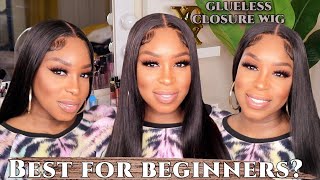
5X5 Closure Wig Install (Beginner Friendly) | Best Products To Use | Glueless Install
- Posted on 23 January, 2023
- Closure Wig
- By Anonymous
My first EVER wig install on someone! How'd I do? Comment below and feel free to suggest any other kind of videos you'd want to see.
Wig Details
24” MARSHA Unit- Use code “WELCOME” for 10% off your first purchase
https://poshbeautycollection.com/produ...
Products used for this install can be purchased here: accessories – POSH Beauty Collection
* HD WIG CAP ( releasing soon!
* Lace/Away Palette - Cream Concealer Tinting
* Melting Spray ( coming soon! )
* Silkening Mist
* Slick Stick
Other Products Used
* Liquid Gold- Bold Hold (used for bald cap)
* Eco styling Gel
* Garnier Fructise Serum
* Sebastian Shaper Holding Spray
Do you want to work together? Send an email to collab:
Let’s Get Social | Follow to Stay Connected⤵️
Business Instagram: https://instagram.com/poshbeautycollec...=
Personal Instagram: https://instagram.com/theeladyposh?igs...=
Tiktok: https://www.tiktok.com/@poshbeautycoll...
FaceBook: https://www.facebook.com/poshbeautycol...
New York girl. What because this is my real hair. This is my real hair. You don't have to love me. You don't even have to like me, but you will respect me. You know why you know why, because I'm a boss welcome to my channel aposh life. My name is Lady Posh and I am the owner of Posh Beauty collection. If you are a returning subscriber of mine. Welcome back. If you are new here to my channel, then welcome girl and, as always, don't forget to hit that subscribe button. So by the title of this video in the cover, you can see that I am doing an install and would you believe me if I told you that this is my first install on somebody like I've always done installs on my own, so for my own wigs, But I've never done it on anybody else. So let's go ahead. Get into this video all the products that I use will be linked into the description. So first thing, as you can already see, my client has already has her hair braided down by someone else, and I'm just going back and slicking her edges back and using my blow dryer on the cool setting to push those hairs back as well. I'M using one of my HD wig caps that are releasing soon so stay tuned. For that I did go ahead and make some slits where the ears were to pull her ears through the hole. So right now I just use the boat hole Liquid Gold from the hair diagram to lay that in front of her hairline and outline her hairline with that smooth that out and then again I spread that out and use my blow dryer on the full setting. So now I'm using my lace away palette, which is a cream concealer tinting palette. So that way we can tint her um, the wig cap to her complexion and so for this install for Marissa. I did use the colors Chestnut in tan so that way it can get as close to her complexion. So since the wig cap has already dried down, I'm just cutting that excess cap off and what I'm doing is lifting the cap up and getting as close to the hairline as possible. But we do want to remove all of the excess cap. And so there was a few pieces of the cap that was sticking up, so I just went right back in with the liquid gold to lay those parts down foreign. I do go ahead and go in with some alcohol wipes to get all of that excess residue off of her forehead, because we are going to lay the wig right in front of the ball cap. So we don't want any other product being there, because that will mess up the install and we want this wig to be. You know um Fleek, on scalp. That'S all we want to see. So I did notice when I used the liquid gold that it did create. Like a um kind of like a line, a white line, a white cast so since this is a water-based product, I did just get a towel and damp it with some water and try to rub that off and it seemed to do pretty good. So that's what I'm doing now in the video so now the fun part. The reason why you're here the reason why you wanted to watch this video is because it's a wig in style, so the wig. This is a wig for my collection, Posh Beauty, collection, and it is my Virgin body wave hair, the Marsha unit. I believe this one is a 24 inch. You see the 24 26, but I think it's a 24 and it's a middle part bust down. As the ladies love it so right now, all I'm doing is just using my lace away palette again to apply that concealer on the back of the lace and along the hairline. Doing so will make this unit look like scalp, so right now, I'm just applying the wig and again, like I said before we're going to pull this lace in front of their bobcat and it's already giving it's already given what it's supposed to give and we know It ain't even installed all the way, yet this is just sliding the wig on and that's it. So now I'm going to go ahead and section out those baby hairs. She did want two baby hairs on the side of the um hairline. So that's exactly what I'm doing now! It'S just carving those out - and I am also using a hot comb to try to flatten those out some more. So that's exactly what we're doing and now my little secret, the melting spray. This is what I use for this install new product that is coming soon, and this is what I use to achieve this effortless coming from the scalp. Look so with this product you're going to apply it onto the hairline, with the lace still on use your Posh Beauty melt band. If you don't have one go run to my link, the link is in my bio and purchase one ASAP, because when you're applying this Milton spray, you need to have a band on there. So that way it can melt. It needs to do what it needs to do. As for styling we're going to use my silkeny Mist as well, which is a polishing spray and heat protectant. If you want your hair to be butter, if you want it to be silk, you have to use the silkeny Mist. Okay, you can also get that from my website as well. This whole install is nothing but products that are from my collection, and so, if you want the best results, you need the best products, and since I got you, I got you for that. So back to this install video, I'm hot, coming again: hot combing, the hairline, because we want this hairline to be pressed. We want it to be flat because nobody likes no Humpty Dumpty weed it's 2023 and the girls don't like that yeah. So we're about to take this band off and remember y'all. The legs are still on and this is melted. Melted like it's coming from her scalp. Do you hear me so whenever you have the band on the hair is kind of crunchy. I guess you could say so. I am going to um comb out those baby hairs, so that way it is easier for us to mold them, but before I even get to molding them like, let's get into this latest, how bomb this lace looks, and so I tell her to get her phone And look at this and y'all: this is her raw reaction that I want y'all to see girl. What? Because this is my real hair, it is like she said this is her real hair, okay, so going back to doing the baby hairs. So before I do that, I am going to cut the lace and the main thing when it comes to cutting your legs. So you don't have no harsh line of demarcation. You want to cut in a zigzag motion, so I did cut straight down the middle since it is a middle part and then now I'm using my scissors and going in a jacket motion and I'm going to do that to both sides. So now I'm actually going to start working on the baby hairs um. We already had those sectioned out, so I'm going to use the eyebrow razor to cut those hairs in a diagonal motion. Whenever I do my baby hairs, I always like to cut them in the way that they'll be laying. So that's exactly what I'm doing now and just using that, I'm also going to use one of them small flat irons. I don't know the proper term for it, but yeah I'm going to use one of those flat, irons and curl it down. This is a trend at first. I wasn't a Believer but yeah, I'm sewed on it and going forward. This is how I'll be doing my baby hairs. So when molding my baby hairs, I did go in first with some Eco styling gel and then I just used my Nairobi mousse foam on top of it to mold them in place and doing that got me the perfect little soupy doops and so now we're gon Na have to tie this down again, so I'm going back in with the melting spray, applying that, on the front of my lace, you can use a comb. You can use your Edge brush, but you want to make sure that you press this product in so that way it gets in there. It melts the way it's supposed to melt. So after I got done doing that, I am going to put the band The Posh Beauty band right back on her, so make sure you have your client hold their head back help you lift the hair up. So that way, you can tie it on there securely and that's exactly what I'm doing right now here. So I did let the band stay on for about five to ten minutes. For this one most people may use a blow dryer. I did not use one at this particular moment. It'S up to you, your preference. So when I took the band off, I did notice that there was a little bit of residue, so I just went in with a wet paper towel to wipe that off and again I told her to pick up her phone look at her lace, and this is What she said, I still need more practice, but cool girl. This is this is my hair. This is my hair. You can't tell me and look at the line girl you melted bags y'all. Is it giving? Is it giving away the supposed? To give? Please comment. Let me know something: let me know what y'all think so I am going in with my guardian Beauty. Serum to um apply that onto the hair for just the extra Sheen, and I am going in and breaking up that mode of the hairline, because I don't want no crunchy hairline. Nor do we want crunchy baby hairs. So I always make sure that you go in with your comb comb out those baby hairs, comb out that hairline, and so now I'm gon na go in with my slip, stick which again from Posh Beauty, collection and we're going to polish this hairline polish, the top Of the wig, because again we want this wig on Flex, okay, we want it on flat and we're just gon na hot comb. This go back in with my lace away palette. I'M gon na Define the part and again, like I said I use tan and Chestnut on her and we're just gon na go straight down the middle of the part. I also found this product at the um Beauty Supply Store. It was like a defining kind of thing. It looks like mascara, but it's not. So let me show you what it is, so you don't think I'm using some mascara on her hair because it was not mascara, but I did use that to clean up her part. Just a little bit and that pretty much was it, I did spray the Sebastian shaper on it, and then I went back in with my silky Mist for just a final polishing and it's giving y'all for this to be my first install on somebody y'all. I am so proud of myself. Tell me what you think if I was to write this 10 out of 10, the Comfort level period, Comfort, level 10 out of 10. period. You tell me the smells 10 out of 10. Harriet and the looks so that's pretty much. The end of this video, I'm obsessed with this, install, especially for it to be my first time trying, I also went outside because you know the sun Just Hits different. So thank you for watching this. Video also make sure to subscribe and I'll see you at the next one. That'S it


Comments
LifeofAGirlBoss: You did an amazing job for your first time
LaTeisha Monay: Here from TikTok!!! I love it! New subscriber here
Michelle mcclendon: Can u do a video on wig making, bleaching knots , plucking and baby hair and how to customise
Kierra Capri: Here from TikTok!