Beginner Friendly (4 Bundle) Lace Wig Construction Tutorial | Ft. Sunber Hair
- Posted on 06 February, 2020
- Closure Wig
- By Anonymous
Hope the video was informative!!
●▬▬▬▬▬ ♛SUNBER HAIR♛ ▬▬▬▬▬●
10% OFF for all your orders, Sunber Coupon Code:sunber01
Hair Information: sold NO.1 Sunber Brazilian body wave 28 28 28 with 20 frontal
DIRECT hair link in the video➤ https://bit.ly/38miT82
Sunber Hair offcial webiste➤https://bit.ly/38iEyhe
★New Arrival Collections➤https://bit.ly/38ms2gU
⚫Best Selling Wig ⚫️
☑ NO.1 sold Curly Lace Front Wig ➤ https://bit.ly/2uW57ua
★ New Year Offer 20% off collection➤ https://bit.ly/2u9N6Zd
Best selling on Aliexpress store: https://bit.ly/2RAciQm
Sunber Hair on Social Media
Subscribe "Sunber Virgin Hair" on Youtube:https://goo.gl/PvpSX1 get the information of monthly giveaway!!!
Follow "@sunberhair" on Instagram:https://goo.gl/fSdGkV
FOLLOW ME:
Twitter: https://twitter.com/AlfredLewislll //
Instagram: https://www.instagram.com/alfredlewisl... //
Snapchat: wtfxalf
FOR BUISNESS INQUIRES ONLY: [email protected]
MY DISCOUNT CODES/LINKS SAVE SOME COIN!!!
The Cut Buddy | http://lddy.no/3rvz
code: "WTFALF" for 10% off!
Vanity Planet Groove | Scalp Massaging Shampoo Brush | http://vpwow.com/alf50
code: alf50 for 50% off!
Firmoo Glasses | http://www.firmoo.com/promo-free-glas...
code: "alfred001" for a FREE pair of glasses!
White With Style | Teeth Whitening Kit | http://www.whitewithstyle.com/Teeth-W...
code: wtfalf for 90% off!
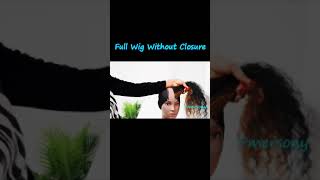
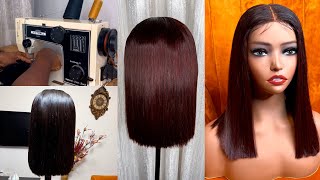
What'S up y'all, it's alpha and I'm back with another video, so I haven't done a voiceover in a minute, so I'm in STIs, so I hope y'all did too, but for today's video, I'm gon na be showing you all how to construct a wig. I know I did a video like this a while ago, but I just wanted to do updated one for any new subscribers or any new people on my channel who haven't seen that video. So I'm gon na be partnering up with somber hair and they went ahead and sent me over 4 bundles of 28 inch body wave and a 13 by 4 20 inch frontal. So I'm just gon na go ahead and start by putting the front two like a little bit before the actual wig cap, and then I'm gon na go ahead and pull it back and secure the back down and then secure the sides down. So it should just lie flat and then in the front it should be like a little M shape and then I'm just gon na go ahead and mark out the cap. I know this don't even show up, but I went ahead and marked it out with some concealer after this, so I went ahead and threaded my noodles already, so I'm just gon na take it through the cap and then take it through the actual thread. And so I made a little nut at the end. I'M just gon na take it through that knot and then I'm gon na take the needle through the actual bun. Do I only do it in the beginning and the end of the bundle just to secure those ends down, and then I'm just gon na go ahead and pull it through well, actually triple knot it, and then I pull it through to make sure that it's an Actual night and it's just secure as possible, and then I go ahead and triple knot. It again and then I pull it through just to you know, ask some more security to the beginning bundle and then I also go ahead and you know double knot. It and triple knot it and just do various different types of like knots throughout the whole entire wig, just to make sure no bundles are like falling out, and just you know, I just want to make sure the longevity of the wig is. You know as good as possible, so I'm just going to continue doing this and I want to show you all what I do to the end of the bundle to go ahead and make it flat. So I don't have to cut the end of the bundle and, if you don't know, if you cut the end of the bundle that can add more shutting to your wig, because it's just an expose, do you know well unless you go ahead and seal it with, Like weft sealer, then it's just an exposed. Weft she's gon na go ahead and fold it over and then just go ahead and do another double knot at the very end of it. Pull it through and then continue sewing my bundles down. So I'm just gon na go ahead and continue sewing my bundles down. This is how I fit for our bundles into my wigs. I just go ahead and fold the bundle well actually not for the bundle. I just go ahead and keep it. You know double folded. Rather than and go ahead and break it apart, the whole entire bundle. I just do this for all four bundles just to go ahead and fit. You know everything in there and make my wig as thick as possible. Cuz. I already know I love it. The cast weak - I love a big-ass wig, so also I'm throwing in the bundles before I sew in the frontal, because I wanted to go ahead and bleach my front suit before I sold in the bundles because I didn't do it prior to doing it. So this just saved me some time. If you do make a lace front wigs out there, then I would definitely recommend it to bleach your front Wow you're, showing in your bundles. So you could just wash the bleach off the nuts of your front and then just sew it on after you throw it in the bundles and then your wigs done. You know what I mean so yeah. That'S just another trick that I've learned another tip. I'Ve learned from making wigs and stuff like that gon na. Let you all listen to the music and watch me make this wig and so in these bundles. So I'll see you all in a little bit all right. So now that I have all the bundles sewed in, I went ahead and just saved one little piece of the track to go ahead and outline the top portion of the bundles all right. So now I'm gon na go ahead and start sewing down my front tool. So I'm gon na go ahead and reapply it. So I'm just gon na go ahead and line it up with the line that I made previously before I sew down my bundles and then I'm gon na go ahead and start at the top of the head, like in the middle of the front tool and go Down one side and then go down the other, it doesn't really matter if you go left to right, just make sure to start at the middle, because this will eliminate any lumps or bumps or anything like that, and also, if you go to like left to right Or right to left, then it might not be even, and you know you can't really ensure that it is because you're just pulling one side to the other. You know what I mean so yeah, I'm just gon na go ahead and continue sewing the front two on to the bundles. As you can see, I laid that last little track against the bundles, so that I can make sure I could sew the front two and the bundle together to go ahead and know everything together after I got done, sewing the front two on to the wig. I just went ahead and took the whole wig off the wig head and cut off the excess cap. That was underneath the frontal, because you don't want that black partial unmake, the frontal, because that would just like eliminate the whole entire illusion. So after this to style the wig, I just went ahead and straightened her. I just straightened out the body wave nosov it, but I want to go ahead and see if it curls back up or I like to see what texture that it gets. When I go ahead and rewedding but yeah, I actually installed this wig on my roommate and we did like a whole load of transformation, collab, so yeah that should be in the next video, so yeah. This is a two-part video with sunburn. I'M gon na show you all how I install the wig and that video. So I love you all so so so much and I will see you all over there and that one bye


Comments
ChynaMa’Rae: So glad i found this video. The wigs from the companies are always TOO small for my head and i hate that so im going to start making my own. It will save a ton of money too
Crystal Harrity: Excellent job Alfred! Thank you for your in depth videos I learn so much from you! Luv u
Michelle Bailey: Great video! The hair is gorgeous.
Boss Lady Lexi: Like #99 I really needed this I added it to my playlist
Madison Somuah: Do the wefts/ bundles get loose over time since They aren’t sewn together??
Nyle AC: Watch me do exactly what he did and still make a horrible wig lmao imma try tho
Zana Holiday: I need to learn how to do this :(
Dahmir Wilson: i need the lessons
Soun Baaby: what is the song track playing in the video ? thank you
QUENESS YOMy: DONT MIND IF I DO
Nikki Minach: When you gonna stop being greedy and share some talent
Amber D: Hiii-eeee Alf♀️❤️
Nana O: This tutorial is not beginner friendly.
emmanuel joyner: periodttt