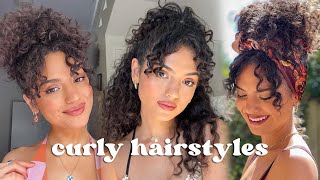
*The Ultimate Melt* Best Curly Hair Ever ! 5X5 Hd Closure Wig Install | Ft. Asteria Hair
- Posted on 12 July, 2022
- Closure Wig
- By Anonymous
Hey Family ! hope this tutorial was helpful let me know if you have anymore questions...
Direct Hair Link➤https://bit.ly/3A2v3Ux
Hair Info: HD 5*5 lace closure curly wig 22inches 180% density
❤#AsteriaHair Official Website➤https://bit.ly/3Nep02c
Top1 #asteriawaterwave Lace Wig➤https://bit.ly/3Nm1kJp
*Invisible Skin Melt HD Lace Wigs➤https://bit.ly/3NoIj8W
Glueless 5*5 Closure Wigs➤https://bit.ly/3QKOFCC
✨Win Free Wig In Facebook Group!Join Now➤https://bit.ly/3pcfZOo
#asteriahair30inches #asteriawig30inches
Wholesale or promotion? Contact Asteria Hair:
WhatsApp: +86 15238065852 Email: [email protected]
Instagram @Asteria__hair https://bit.ly/3Lobbxq
YouTube @Asteria Hair https://bit.ly/3m5EBoA
Connect with me
Instagram: Thedesione
Tiktok: Thedesiones
Business inquires: [email protected]
Hello, hello, hello and welcome back to my channel my youtube family, honestly, i'm calling on my youtube family for right now, but i'm definitely going to come up with a name for my supporters just so i can make y'all feel special, because y'all are special if you're Supporting me you're special um, so in today's video i'm just going to be showing you guys, step by step, how i install my closure, wigs and i believe, two videos ago. I showed you guys how to do a glueless closure install and this one i'm just going to be showing you guys how to do it with glue and without further ado, let's get right into this tutorial. Okay, so, yes, we are here with the syria hair. Today the wig i'm going to be installing is a 5x5 curly. Oh a 5x5 hd lace, curly closure, wig, the wig is 22 inches and 180 density. All the details about the products i use in the wiggling will be in the description box. So, let's get right into it. The first thing we're going to do is: go ahead and color our cap, the shade of our foundation. I will not be doing the ball cap method today, because it's not necessary for closure wigs. This is how the hair looks right. After i washed and conditioned it, it was so pretty. I went ahead and customized and bleached the knots off camera. The next thing we're going to do is: go ahead and tint our lace in the shade of our foundation. After that, just adjust the wig on your head and make sure it's in the right place. Before you put your glue down today, i'm going to be using bold, hold active. I use the um yeah both hold active because you know i sweat a lot and i'm going to go in with three layers after each layer i spread it out, then i don't wait for each layer to dry, but i do spread it out. Then, after each layer so that it's not caked up and gon na dry white after it's dry, once your glue is dry. What i like to do is place the hairline right before the glue so that when you cut the lace there isn't a sticky residue or the hair getting caught in that sticky residue after you cut the lace. If that makes sense. After that, you want to go ahead and put your elastic band on just to press the lace right into that glue and make sure it's super melted. After elastic band on after your elastic band is on. You want to go ahead and begin to style. Your hair with this in particular wig there isn't much styling. You have to do it's a very um, easy wig to install. So when i say style really, all i'm going to do is just press down the top of the lace and not lace, but press down. The the hair so that the the wig is flat basically and to get my wig super flat. What i like to do is go section by section and press each section down with the wax stick or after i've used the wax stick so and so after you're done flattening the top and making sure it's nice and pressed we're going to take that elastic band Off and we're going to cut our lace, but before we cut our lace, i like to go in and just comb out the hairline and you know, make sure it's not stiff before we move forward a key tip when cutting your laces. You want to go in a zigzag motion so that afterwards you don't have like a harsh line in a noticeable line of um a line. That'S separate, like you know what i mean a harsh line pretty much and after that we're gon na go in and take our baby hairs out. I was deciding whether or not i wanted a center baby hair swoop or not, but i ended up going in with just two swoops. So once you have your baby hair pulled out. What i like to use got to be spray to mold my baby hairs down and to make sure and use my elastic band to flatten them out after i sprayed on them, and so once you're done with that we're going to go in again and comb out. Our hairline, so this is not stiff and stuck comb out the baby hair so that it's not stuck in one place and then we're going to go in and cut the baby hair. I like to cut the baby hair at an angle so that, when i swoop them, it kind of has like a tapered effect. And today i'm going to be using the robie moose, but in the outro you're going to see that they look a little bit different. Because i went ahead and fixed them off camera and i used some got to be gel instead because i decided i didn't want fluffy baby hair because i essentially planned on combing the baby hairs out. But that's besides the point so and so once you're done with your baby hair, you want to go in with your water bottle and just drench the hair and after we drink the hair, i'm going to go in with some lot of body mousse to define those Curls, i love lot of body mousse. I don't use any other kind of mousse, because this mousse provides a lightweight hold after the hair dries you're gon na have these beautiful, flowy? Well, not flowy, but like the curls are gon na be very lightweight and it'll. Look like it's lightweight as well. I don't know like a lot of body. Mousse just does what it needs to do. That'S all i'm gon na say i recommend it to everybody with curly hair and once you're done, adding your mousse. That is the end of this tutorial. That'S pretty much it you guys! It'S super easy and i'll see y'all in the outro, hey y'all, so this is how the hair is looking at the very end. I love this hair i'll, give this hair a 10 out of 10.. I honestly, personally, you can't go wrong with curly hair. It'S super soft, very, very, very, very soft. Once you put some mousse and some water on it, i mean it will soft before that too. But once you add that and you just comb it through it baby, it's smooth very smooth, very nice, perfect for the summer time, if you're going on a cruise, i definitely envision this hair for like a cruise or something, although i envision a lot of cold hair To be cruise worthy, so maybe that statement doesn't really hold that much value, but it's always vacation here. I will say that any occasion during the summer time it's perfect other than that. I really hope this video was helpful to some of you all out there. I tried my best to get into detail and really show y'all exactly how i installed the wigs. I believe that if you watch this video, you should definitely have it down pack, even if you don't get it on the first, try anything that you practice and do over time. You'Ll definitely get good at that's how i got good at doing my own installs. Thank you guys for watching this video. If you made it all, though, if you watched it all the way through to the edges, i love and appreciate you guys so much from the bottom of my heart. You guys who watch it thoroughly all the way through, even if you don't watch it all the way through. If you, even if you just clicked on this video and like, let me see what she's talking about just know, that i love and appreciate you guys from the bottom of the depths of my heart, okay, okay, if you want to see more videos like this or Just see more of me make sure you hit that subscribe button, and i would love to know what you guys thought about this video so make sure you leave a comment below and i will see y'all in the next one.
Comments
Beautiful & Blessed TV :