Deep Navy Blue Wig Dye | Full Bleach & Watercolor Tutorial | Hd Frontal Wig | Kiss Colors Tintation
- Posted on 25 September, 2020
- Color Lace Wig
- By Anonymous
Hey y'all!! I am back with another coloring video. Watch this tutorial to get the perfect midnight blue color for that new wig of yours. Let me know what y'all think below and don't forget to LIKE & SUBSCRIBE!!
Products used:
Schwarzkopf Igora Vario Blond Plus (COSMO)
Ion 40 Developer
Framar Magenta Hair Foils
Kiss Colors Tintation: [2] Royal Navy [1] Blue Moonlight
#tutorial #watercolor #navybluewig
Follow Me
INSTAGRAM: @justraee
TWITTER: @justraeee_
SNAPCHAT: xoravenxo
Business Inquiries: [email protected]
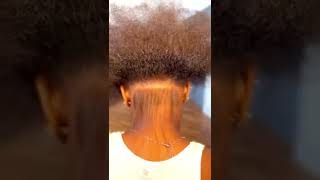
I didn't do nothing and it's you can't even see it like what where boom scout. You see that it's not even on my skin. You can see the scalp like look it's everywhere. It'S let everywhere, zoom in on the scalp for y'all, hey, y'all! Welcome to my channel for those who are new, my name is raven nice to meet you and for those who are returning welcome back. So, as you guys can see by the title today, i will be showing you guys how to achieve this perfect midnight blue for those who have been keeping up with my videos. I told y'all that i'm going to do the whole rainbow and so far i've done orange and blue um. I'M about to do a red next and i'm gon na show y'all all the colors i'm doing, but first make sure you guys hit that subscribe button down below. If you ain't subscribed, what are you doing sis you shouldn't be watching right now, if you're not subscribed, i'm trying to build my youtube game so make sure you hit that subscribe button and support your sis. If you like, this video, make sure to give it a thumbs up and make sure and comment below what you enjoy and what you don't enjoy, because you know your sis likes to hear everything. I want to hear what y'all thinking, while y'all watching my videos feel me. I'M gon na make this a quick video. Y'All know my diet. Videos are no more than like 10-15 minutes, so i'm going to keep those up because who wants to sit there for 30 minutes watching diet, video? You just want to know how to do it, so you could go. Do it right right? This is wanden, it's just so gorgeous like i just love how it reflects in the light um, especially like when i'm in the sun. It looks so good. I'M gon na insert some clips here on different styles that i did and some bomb pictures that i took, but it looks so cute and i can't wait to show you guys so stay tuned for the video. Alright, girls get your dirty wig heads ready because, as you know, we bout to get into the coloring y'all know i always use the same wig head to color just because it makes everything easier, whether i'm bleaching or whatever i'm doing to the hair. But i got this 18 inch hd wig and, as you can see, lace where's this. This is from my bender and i'm trying them out and look. I ain't do nothing. You can't even see it like what where so, we got to put this onto the wig head and use the t-pins to secure the lace so that that wig ain't sliding nowhere. Okay, so guys! This is actually my second time trying a blue dye. The first time i did it, i used the bw2 bleach and it honestly didn't come out as vibrant as i wanted it to so. I know a cosmo plug, because you know you need a license to go in there and shop and um. I got this swash kapoff, whatever igora vario blonde bleach and i'm using the ion 40 developer, because you're just gon na see in the end, like it just looks so much brighter so much blonder than what you would get from the bw2. Now that i know that this bleach is really good, i only use the bw2 for bleaching, my nuts, but other than that. I will get you a cosmo friend and cop this bleach, okay, so we're gon na get started with the frontal. I always tell you guys to do that part first, because it is the most tedious, but, as you can see, i have my bleach already mixed up with the developer and we're also going to use some pink foil strips. You know i love pink and purple, but basically the full strips is going to help the process go faster, so we're going to go section by section with this frontal just so that we can be nice and neat and even and i'm not going to be bleaching. The full wig we will be leaving the roots, and you will see me start about a quarter inch down. I wanted to leave about an inch of roots just to keep it natural looking. I never had all blue hair before so nothing that i want in the future. But for this time i definitely wanted the natural look. So, as you can see, i'm drenching this bleach in the strip of hair right on top of the foil, and though this is my first time using this professional bleach, i did get some tips from a cosmo friend and i also did my research. So please don't come at me in the comments. No i'm not a cosmetologist, but you know we could all learn the same thing most of the stuff that i'm showing you guys today. I learned by myself or on youtube not coming at anybody's profession. But you know i'm here to help everybody learn. Not everybody has to pay for a course to you know, learn some things in life, and here we are so after i'm done with that piece. I just placed the other piece of foil on top and went down folded it at the bottom and the sides and voila is pretty in pink and all ready to go to the next strand. So this was a pretty easy process. All you do is go through. Make sure that when you are doing the roots that each strand is even to the last one, just so that you don't have you know a freaking tetris of different levels of roots, and it just would look crazy girl, okay, if you're new to this, make sure You'Re using some type of measurement tool, so you can see where the roots are on each piece that you do and we're off to the next section. As you can see, i'm about to put a generous amount of the bleach on there, just so that i can make sure it's all saturated. You don't want! No, like you, don't want any strands of black. It would just throw off like the blonde when you wash it all out. If you still see some dark strands it just wouldn't it wouldn't look as good, so just make sure you're covering all the strands getting all up in there um pushing it all through. It'S pretty easy: it's like not that hard to miss strands um as long as you use the right amount of bleach, but enough of the talking y'all get the gist of what i'm doing. I'Ma speed it up from here and be right back. So we're all done with one side now we're on to the other and make sure you guys are in a well ventilated room just so that you're not breathing in all the fumes from the bleach, because it's just not good for you. We don't need all that in our body. I love how these foil pieces keep the bleach exactly where i want it to before. I discovered these literally. I got bleach on parts of the hair where bleach didn't need to be, and it really messed up a lot of things that i was doing. But these foil pieces are my savior. Everything is neat and collective, but i'm just about to go on to finishing this side of the wig and then we're gon na get to the back okay, okay, girl. So we are on to the back and i'm not going to be as tedious with the back as you can see. That'S why i have all these spots and blemishes on my wig head, because you know we get a little messy when it comes to the back. I'M only worrying about the roots on the frontal part, because this is not a full lace. Wig there are tracks in the back, i'm putting the bleach everywhere just to save time and as you can see, i'm generously putting bleach on and then i'm gon na use. My hands to rub through it and make sure that bleach is all through. Like i said girls, we don't need no black strings in this. I want all this color to come out so that my blue could be as blue as possible, filming so just watch as i do the back and we're almost done we're about to get to the coloring up uh um and we are all done so i did Let this process for about 30 minutes every 10 minutes. I did check by opening a piece of the foil just to see how the hair color was going. You really don't want this to over process, because if so, that hair will be fried and you'll be seeing some excess shedding, and we don't want that. Okay, that's just ghetto, but i'm just pulling off the foil, dropping it into the garbage and then we're gon na go ahead and wash this off, and i already see the color like i'm so excited. It looks so bright already, even though it's a little bluish but you'll see so i'm just gon na rinse it out, and it's just like this is just giving me rapunzel vibes like it's not as blonde as rapunzel, but that bleach bro y'all need to get that Bleach, i'm telling you it did wonders. I did tone the hair a little bit just because i like my highs and lows, and i just wanted to see how light it could get with the toning and it did do a little bit of a difference. But i feel like that bleach was the main factor in how light i was able to get this wig. I love it, make sure you guys cop it schwarzkopf igora. You know i'm putting down below, but i about to pronounce this out here for y'all. So here comes the easiest part: the water coloring. This is the same bucket that i used for all the coloring videos that you've seen in the past, make sure you guys check them out, but basically you're, going to fill it up about a quarter way for the colors. We have two of the royal navy and one blue moonlight of the kiss temptations colors or kiss colors temptations. I was aiming for a deep blue, but also like a little bit of a lighter blue. So that's why i use that one light. One um water coloring is very experimentive, i'm never sure about what color i'm gon na get until it's done, but you know i usually have a ballpark so once you pour it in you, just mix it up and then you're ready to dip. So i take a comb and just mix it all up, and then you just take the wig and start to dip. So i usually go a little slow and then i put it all in and get it all through, make sure all the colors in because you know sometimes the middle doesn't get the color. So you just have to make sure you dip. These don't got no feelings. They don't got no senses. I loved how the color turned out. As you can see, i had to pull out my phone and take a quick snap, real quick just because it looked so gorgeous like had i put too much water in the bucket and put the same amount of dye. It could have came out a lighter blue or the blue couldn't have gone on around. So i'm glad that i kept it to like about between a fourth and half of the bucket, but once i was done, i just dumped the whole bucket out. Let it drain and then it was time to rinse it out so that i can bleach the knots before i dip the wig. I did spray it with the yellow got to be holding spray just so that the lace didn't turn blue. I saw that online somewhere and it actually works so definitely try that out, but i just shampooed it just to get all the dirtiness out make sure after coloring, when you guys are shampooing and conditioning that you are rinsing, that out with cold water, cold water will Close the cuticle so that the hair doesn't run if you wash and shampoo in hot water, that color will run out just a little tip. Okay and now it's time to bleach these knots so that we can get the sleigh going. Okay - and this is the before now we about to get to the boom scalp - you see that it's not even on my skin. You can see the scalp like look it's everywhere. It'S everywhere like this hd lace is not come into play, cut it out, like i'm hyped now, i'm just going to let it sit in conditioner overnight, since i've been processing it all day. But this is the end of my video guys. I want to thank you so much for staying to the end, make sure you guys are subscribed, make sure you tell your friends to come to my channel for all your hair needs and etc, etc, but love you guys and comment like and subscribe see your next Video


Comments
letty: Pretty ❤️
Chanelle Bando Harris: Do we put the silicone after bleaching it or I can go straight to the water method
Miss Muffin: lmaoo BOOOM!!!