No Tinting! No Bleaching Knots?!! | 2 In 1 Water Resistant Lace Wig Grid Knot Concealer
- Posted on 07 November, 2021
- Color Lace Wig
- By Anonymous
Hey Beauties! I recently didcovered the 2 in 1 Water Resistant Lace Wig Grid Concealer and i instantly cound not wait to share it with you all. I believe this is a staple product in order to being your “ wig game” up a notch
Perfectline Swiss |
2 in 1 Water Resistant Lace Wig Grid Knot Concealer
BUY HERE : https://perfectlineswiss.com/product/l...
Connect With Me:
Facebook:
Instagram: https://www.instagram.com/chanellmeup/...
Twitter: https://twitter.com/ChanellMeUp
Hair worn in Video.
Hair Length: 28-30 Inches
Hair Density: Full
Hair Color: Jet Black
Hair type: 100% Virgin Hair
Hair Texture: Straight
Cap Constructions: Standard Size cap
Cap Size: Versatile ( BIG HEAD FRIENDLY)
* NOTE* - This wig does NOT come with bangs, but it is EASY to create some with this wig.
For business and sponsorship opportunities please EMAIL - [email protected]
*Disclaimer Notice* - This video kindly sponsored by Perfectline Swiss. ChanellMeUp provides complete honesty regarding this product. Some links posted above may be affiliate links which means ChanellMeUp make a commission if you purchase the item.
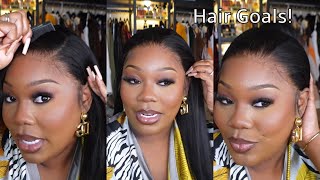
Hey beauties, my name is chanelle today i'll be channeling. You guys up on this amazing product that i have on today. I know each and every one of you guys that are watching here either have some wigs that have either holes in it and sometimes they'd, be the best ones. It'D be the best wigs that end up having like a tear and your lace or you either stained your lace from dyeing your hair or either over process and bleach, your lace or you don't know how to beat your lace. But you want to make sure that your part is popping well girl. Let me tell you something: you can definitely get the perfect line. Two in one water resilience, lace, wig, not concealer. I love this thing. This thing is a lifesaver okay. She is so bomb y'all. This wig was one of my favorite wigs. I had holes in it um it covered my house. I never bleached the knots because i did not want to bleach the knots. I love the hair so much that i want to prevent any further any like shedding. That may occur later on because i wanted to like last like for a long time, so i never like bleached the knots, but what happened was i'll get these little ant. Looking things every time i take pictures, even when applying makeup on it. It still would show so what i use i use this. I use the two in one water resilient face: wig, not concealer and girl bomb. You got to get it, you got to get it all right, you guys, so the product that i have here is by perfect line swiss, which is water resilient and a knot concealer. So this right here gives you the perfect perfect, like application of your part, which you guys can see here, i'm not going to show you just all that yet, but what i am going to say you guys is you: don't have to worry about sweating out the Product, usually, what i'll do is i'll use some concealer and kind of like conceal those knots or i'll either bleach. The knots i didn't have to bleach no knots here, and i this is the old wig that i got on today. I did have some holes. It did cover the hose, and it did give me like that natural scalp, looking appeal without me, applying so much makeup and it doesn't transfer onto my hair or like my cap, if i'm wearing a cap as well girl. This is like literally a life saver. I did get it in two colors, but i did use the color tan. I feel like the color tan matched me perfectly, not only that it hides the um actual nazi guys, but you don't have to do no tinting as well with nothing like you. Don'T need to tent y'all, you don't need to tent, you don't need to bleach, you don't have to worry about it like sweating off and having to reapply or it kind of rubbing off now, if you're accident, like okay chanel, i already bleached my knots, but i Do happen to have a wig that i think it would be perfect for am i able to still use it on it yeah you guys, you definitely can you can even use it on bleach knots as well, and it will still work perfectly fine say like if You have a 360 613 hair and you went ahead and bleached it. I mean we went ahead and dyed it all red or something like a bright color right and the lace got stained, but with the water resilient lace, wig, not concealer, you definitely could use it and it would cover up the stain lace and you don't have to Worry about, oh, i need to happen to get a new wig or just a standard. Third or the wig is not going to look good on me. I feel, like all my sis, you guys want to love this one. This is definitely a lifesaver for sure quickly. Speaking about application, so application can last from anywhere from one to four weeks, and then you can just go ahead and reapply again, um. One thing that is that i love about this is that, even though the application can last up to one to four weeks, i definitely feel like it's a great investment, because with makeup you reapply like every time you are going out or like every other day. So with this one to four weeks, i think it's a perfect time frame coming from reapplying like every day or every other day. Another thing that i should include that's really important is that it comes in five different shades. If you happen to get a shade that doesn't really fit you, you can go ahead and kind of alter it with your foundation and it will definitely stay that way. So i did love that as well, but the tan was absolutely perfect. I did went ahead and add a little bit of concealer to kind of like alter the shade and kind of get the perfect, perfect uh shade, but other than that i absolutely love it. I can't believe how beautiful my part is looking like um i'll, let you guys be the judge and y'all. Let me know down below in the comments, but i am absolutely loving her so far. It just took this wig a way up like 10 notches, and it made it look even better because y'all see how it looked like before speaking of which we're just going to roll onto the clip of exactly how easy it is to apply the water resilient lace. Wig not concealer all right, you guys jumping straight into it. So what you want to do is grab a cup of water and you can either heat it up or boil it up. I decided to boil up some water since i already had some water on the stove for some tea and i poured it into a mug, and you will see me kind of like letting the water kind of chill out for a little bit because you don't want The water too, too hot, so you want to make sure it's like the right consistency. When you apply it onto your wig, you don't want it to be too too hot or it's like liquidy. It seeps through the lace. At that point it will defeat the purpose and the application will not be successful. So you don't want to have your water too, too hot and you don't want it too cold. Neither um you just want like the right kind of warm temperature just so that it can kind of loosen up the product a little bit, so it can glide on to the lace super easily. When applying it. Once it's the perfect temperature, you guys just go ahead and dunk in the product into the water, and once it's in there, you want to make sure that you keep it in there for no more than two minutes afterwards. You guys you want to grab onto your handy dandy wig, so this is the work that i chose and i chose this wig honestly because i love this wig right here. It has so much hose um. There is a whole lot going on with this wig. I never bleached the knots and it looks like little little little tiny, tiny ants, but i love this hair. I really do i love the the texture. I love the quality. The quality is really really great, so i wanted to revive it, and this was the perfect wig, so we can go ahead and apply this product on what i did was. I went ahead and applied it on to the part, but i am going to go ahead and show you how easy it is to apply it um to another section. So i did apply it to the middle, as you guys will see me do here, and all you want to do is just of course, on top the product and kind of roll it on from the bottom. It'S just like a chapstick, and you want to just slowly kind of press on to the lace and glide it through. If your product is gliding on too too fast, then that's how you know your product is too like the product is too hot. It'S like too warmed up. You want to make sure that it's kind of cooled off a little bit. You don't want to you want to make sure it's not running too too fast, so that it don't seep through the lace, and you want to make sure that it's not like too stubby, where it's like nothing's not getting on as well. So you want to just go ahead and roll that on there back and forth onto the part that you would like to apply to for me, i'm going to be doing another part onto this wig, so i did um do the side already and right now, i'm Just doing the middle because i want to do a middle part with this wig as well. Alright, so after that i did grab on to my rat tail comb and i kind of smoothed it out just a little bit. I didn't really like forcefully press down the product, so it can go through through the lace because it was already sitting on the lace, but i did want to make sure that that product set it out like a smooth foundation. Next up, what you want to do is reverse your wig right back, grab a rat tail comb and what i did was i went ahead and start combing out the roots, just so that i can get the hair to be uplifted if there was any strands that Kind of like stuck down to the product, i just wanted to kind of lift that up just to give that more natural feel i did use the end of the rat tail comb to kind of like press onto the part. Even more so, the more you press onto the part, the wider you're making the part, so it all depends on how you want to make your part. The ball is basically in your court on how wide or how thin you want your part to be so again. If you want to have it like wider, you want to press on to you want to grab your wrap tail comb and kind of press on to your part, and then, if you want it like thinner, you want to just make sure that you just kind of Like brush out a little bit more and it'll, just kind of give you that more natural feel or more thinner, look. Another thing that i wanted to just point out was again, because this is like a waxed, um type of product. It did cover all of my holes that i had. I did have some holes at the part, and i did show you guys that earlier before and y'all see that i literally don't have no holes anymore. It just literally covered up those holes yeah, you guys. That was exactly how i applied it super easy um. If i missed any information you guys, everything will be listed down below the direct links to go ahead and pick up. One of your very own will be at the top of the description bar you guys. So i really strongly advise that you head on over there, because i know i see this. I know you got a hole in your lace. I know a lot of you guys are over bleaching, your um laces or some people. Just don't know, house of lucio lace. Some people got stained laces, it's okay, it's all right, we're in this together and guess what you got perfect line and got you cover you guys so make sure you go ahead and pick up yours, i'm loving the product. I literally would rate it. 10 out of 10 and all my base all my beauties, i know you guys are going to love it so definitely pick it up right now. Thank you guys so much for watching, like always make sure you guys go ahead and like comment and definitely subscribe. If you haven't done so and like always, you guys till next time later,

Comments
ChanellMeUp: So much of us, including myself, had moments where we over processed the knots in our lace and regretted it. Those days are long gone with the help of this product, definitely recommend✨
Katy The Beauty: Okayy I’ll have to get this! I’m really trying to step my wig game up!
An Adorable Wombat: And I love your braces. I'm 6 months into wearing mines.
An Adorable Wombat: You look like a human Barbie Doll! So pretty!
Chin926: What color did you use?
kila Dorsey: Ok now