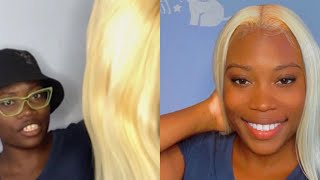
Dark Roots On 613 Wig/Hair
- Posted on 04 March, 2020
- Color Lace Wig
- By Anonymous
Hey guys. This really isn’t a detailed tutorial. Just watch me as i dye these roots on a 613 unit. I decided to do the install off camera because we were in a rush and it was HER BIRTHDAY. If you guys would like to see a detailed install video please let me know!!
Items used in this video
-Adore Honey Brown #48
Make sure you keep up with me.
-Instagram: @lacedbydej_
-Email: [email protected]
-Website: www.lacedbydej.com
Hope you guys enjoy this video. Make sure you like, comment & subscribe. See you in the next video
Hey guys welcome back to my channel, if you haven't already subscribed, make sure you do so don't forget to like and comment on this video and tell me what you think so today we're working with a 613 unit. My client brought this to me. She wanted her wig and star, and she also wanted me to add brown roots to it. So I'm just gon na work with this honey brown from a door number 48 and it was about five dollars. I only use one bottle, so that's all you need to do the roots. I'M just gon na show you guys really quick what I did and how I achieved this look. Okay. So what I'm doing is I'm just sectioning the hair off? I'M sectioning it like you. Just said separate the hair from the frontal in the bundles, so I'm just gon na clip the bundles back. So it's not in the hair, it's not in the way of the hair, while I'm dyeing the hair. If that makes sense, I hope it does. I hope I'm not sounding crazy trying to explain this, but you guys can just see what I did. I just clip the hair, the bundle hair back away from the hair of the frontal. So now I'm just gon na take my color. You guys can use like a bow or in this instance. I just use this piece of paper, because it was the closest thing to me. So I'm just gon na make sure I shake it up real good and I'm going to pour it out. I'M gon na only use a little bit at a time if this is your first time or if you're used to doing and still use a little bit at a time, because you don't want to stain the lace. That'S the most important part, don't stain the lace. So I'm just gon na take this column here and you guys can see how much I have on my comb. I'M just gon na take this come here and just work. My way on the roots making sure I don't get any hair on the lace, you can use a toothbrush. You can use a comb like this. You can use a tint brush. You can really use anything you want to, but this is the closest thing to me. So this is just what I use and it works really good. So I went ahead and finished it, and this is what the colors should look like, of course, is brighter, because if we wet so right now, I'm just gon na comb it out and I'm just gon na start plucking. There isn't any specific way that I plucked you know. If you you could pluck how you normally plug. I was in a rush, so I really didn't pluck as thoroughly as I should have on camera. I did it more on my clients head, so you could just watch and see you know what else to do. This was the finished. Look. I am so happy. She decided to go with this color. It was so pretty on her and it was our birthday. So you know she came to get laced about age. Let me guys know what you think about this video and I see you guys soon.


Comments
La'Joia Creary: Nice !! The color look so pretty on her !!