Diy Fake Scalp For Lace Wigs
- Posted on 01 May, 2019
- Fake Scalp Wig
- By Anonymous
Whats up slayers????
Today I have a very interesting video for you. It’s how to create a fake scalp on your lace wigs, frontals or closure. I Really wanted to try this ever since I saw it and I’m happy with the results and I decide to share it with you. This method was created and inspired by the talented Miss Precious Marie and of course the link to her video is below. This is a pretty in expensive project and the results are amazing its especially for those of you who want to take your wig off at the end of the or you just simply don’t want to do the long process when you are getting ready.
Anyways I do hope you find this helpful and Don’t for get to like, subscribe and share.
How to customize Blunt cut bob video: https://youtu.be/A9qP_ZxWRI4
Miss Precious Marie’s video: https://youtu.be/TkBkkDqZLsg
Raven Elyse’s video: https://youtu.be/rYabP3YhMwQ
Amateur with a few supplies if i can so can you.
Don't be afraid to try, instead fear not trying.
#slayer
Thank You so much for your support it means the world to me
Ig @kacyslaykeria
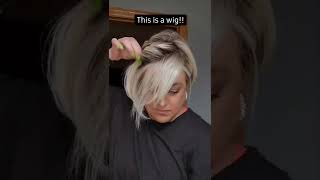
What'S up Slayers welcome to my channel if you are new here or just haven't, joined the family, please subscribe and turn on your notifications, so you never miss an upload and also for those who aren't new welcome back. As the title suggests, I will be showing you how to create a fake scalp use with your pre-existing wigs at home, or even you want. This method is pretty inexpensive and it's actually worth it. It is inspired by miss precious Mary Allen. The original video in the description down below, as I said this is convenient for those of you who are like me and at the end of the day, want to take a week off. As you can see, this method is actually glueless. You can move it around, however, you want, and it's actually good method. So if you want to see how I created this week's cap, keep on watching, the first thing you need to do is bleach your nuts and let the bleach sit for 30 minutes, but the time you leave it, it's totally up to you. You need to change the color of the stocking cap to match your skin color or your scalp color. I'M going to use this waterproof airbrush light spray. I first saw this from Ruben Elise and I will drop her video also down in the description, and you just need to apply this all over the stocking cap. You then blow-dry or air dry. I didn't have time so I opted to use the blow dryer. This part is optional, but the color I got wasn't as dark, as I hoped when I matched it to my skin, so I went ahead and add some face powder to get it a little bit darker. I also applied some to the list of the wig. Of course, you want to try this on to see how it's going to look before you make it permanent and also to see if you want to make it darker, lighter or just about any modification, and as you can see, it already looks good from here. This part is also optional. I still wanted to go a bit darker, so I use the darker shade of concealer that I have and I applied it to the stocking cap. You then turn your wig inside out and then you're going to apply the stocking cap over it and make sure that the part with the product directly facing their lace. You are, then, going to use your gut to be free spray and apply it all over the lace area which you'll be able to see through the sheer stocking cap. However, leave about half an inch at the end of the front. You don't want to cover that area blow dry on the highest heat setting. This is necessary, as you want the cap to melt on. The lace apply a second coat of free spray, then once again blow-dry to the highest setting. You just need to remove the excess cap that you don't need. There are going to be little roll ups, which we are going to use your gut to be glue to flatten those area and then use the tail of your rat tail comb to smooth the edges and once again we're going to blow-dry this. When all is done. The unit should look like this with all that free spray and gel the roots are going to be crispy, but that's an easy thing to it in degrees. I'M going to use a heat protectant because I'm going to flat iron the wick afterwards, but you can use hairspray or any other light. Grease are all that you have, and then you want to gently comb out the roots. If they're white marks from the glue you use a damp cloth to wipe it out and not a wet cloth, this will remove the stocking cap from the lace, assuming all the necessary steps were done correctly here. The inside of your unit should look like this, or even better. As you can see, the cap is completely melted onto the lace. This is the a pinch area. I was saying you should leave, and that is just to help. Do it to look more natural as it transitions from your skin to your scalp, as you can see? No, it actually look like scalp, and so you want your week to look or even better hands-down the best method. This is what the final product looks like and even on the mannequin head, it looks like an actual scalp by the way, if you want to see how I customized this unit, I will be dropping the link in the description. So that's it for today, thanks for watching give this video a huge thumbs up if you liked it also. Let me know your thoughts down in the comments and be sure to share with your friends until next time, bye,


Comments
Pocky Theif: I'm going to try this once I get a wig!
KaiManTubeHD: Why do I have to have real scalp :(