This Hair Is My Brand! | Curly Bob Wig Installation Ft. Luvme Hair
- Posted on 21 July, 2022
- Full Lace Wig
- By Anonymous
Hey Angels and Welcome back to Shawty Creations!
*Watch in 1080*
I hope you all enjoy this video, please do LIKE so that I know you’re loving the content and subscribe!
Hair details: Mix colour brown curly bob wig company 13x4 frontal lace wig in 12 inches
Hair link: https://shop.luvmehair.com/collections...
website link: https://shop.luvmehair.com
Contact LUVME HAIR
Instagram : https://instagram.com/luvmehair?igshid...=
Please also check out my teams production pages to see what we’ve been working on.
Instagram: https://instagram.com/newdawn.producti...=
Twitter: https://twitter.com/newdawn__p?s=21&t=...
TikTok: www.tiktok.com/@newdawnproductions
this hair is my brand! | Curly Bob Wig Installation ft. Luvme Hair
-----------------
Filmed by Shawty
Edited by Shawty
Filmed Using: Canon M50 Mark ii & iPhone 11 4K 60fps
Editing Software: iMovie
Ring light from Broadcast Lighting https://broadcastlighting.co.za/collec...
-----------------
Connect with me on the interwebs:
Shawty
IG: https://instagram.com/hey_s.hawty?igsh...
Twitter: https://twitter.com/hey_shawtyy?s=21
TikTok: www.tiktok.com/@hey_shawtyy
-----------------
For business inquires:
#ROADTO25K
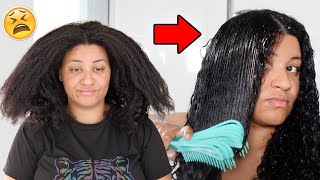
Up living my life me hey angels, and welcome back to shorty creations. If you guys are new to my channel, please don't forget to like and subscribe and if you're not new to my channel, then you already know the bad as you guys can see. We are trying some highlights. We are trying a little bit of color we're trying something short, we're trying something so curly and so bouncy and in today's video you guys are going to be watching me install this beautiful wig that i got from love me hair. So, thank you. So much till i've been here for sponsoring today's video and for sending me this beautiful, beautiful honey brown way gel guys. I am obsessed. You know what i am literally obsessed: the quality of this hair, the bounce, the tight curls just how this hair has been performing. I am obsessed this hair is a mixed color brown curly bob wig. It is 12 inches and it is 13 by 4., as you guys can see, we are giving lace, we're getting melted, we're giving edges and guys. I have said this, but i'm literally obsessed like the bounce of this hair. I think more than anything it's the bounce. It'S the way that it is flowing the curls and yeah, i'm just so happy with this wig and you guys are going to be watching me install this wig and guys. I just think i am made for this wig. I know people like to say with these color wigs like it's giving beyonce. No, i think it's getting shiny, like this hair is my brand once again, a huge thank you to love me here for sponsoring today's video. You guys can check them out on instagram and also you can check their website, which will be linked down below and the direct link to this hair, because i feel like this is something everybody should have so without wasting any more time. Let'S get into today's video, the hair came in this beautiful purple box that has the company branding and inside the box. They did give me a few goodies. We have the hair, of course, which is safely kept in a bag, which is also love me, hair branded, and i got a cute note from the owner of love me, hair, which says enjoy your hair journey from now on and then in this bag. They did give me a few extra goodies. We have two flesh, colored wig caps, an edges brush, it has a brush and a comb. They gave me a love me hair branded hairband and they gave me a love me hair branded card holder inside the box. They also did give me a pamphlet to give me more details on the hair, how to take care of it and return and refund policies. Now we are getting started, i'm taking that flesh, color wig cap that i did receive from love me, hair and i'm putting this over my cornrows just to make sure that my hair is protected even underneath my wig and now i am taking my foundation and my Foundation brush and i'm going to be applying some foundation on this wig cap. I feel like i have installed so many wigs with you guys. You guys already know my process, so basically we're doing this just to ensure the color match underneath the wig, because it is a 13x4 lace wig taking my got to be glued water resistant spiking glue. This is my go to girl. I'M gon na be applying a thin layer of this glue in front of my hairline. This is where, essentially, you want the wig to sit, and i try avoid my baby hairs as much as possible. Just to avoid that when i am taking off the way that some of the hair does come off with it, so i'm trying to put it in front of my hairline. You know the sides is always hard to get honestly. But yes, i'm applying a thin layer of this glue in front of my hairline taking my blow dryer on the cool setting, i'm gon na dry down some of this glue. I'M not gon na dry down completely, but once it is tacky, then you know it's time and it's ready for the wig to be installed. Now that the glue is tacky, you know that it's tough for the girl to be installed. So i'm just showing you guys what the lace looks like. I did put some foundation on the lace you can see. There are clips in the wig and there's also a hairband just to keep the wig secured on your head now. Basically, what i'm going to be doing is i'm going to put the wig on and move it forward until it's in the perfect position on the glue that i've already put, so i'm just going to keep moving it forward and adjusting where it needs to be adjusted. As you guys will see me do now, so i'm moving the wig forward moving it forward until i feel like it's kind of in the perfect place, but then i just continue pushing the hair back, brushing it back just to make sure that it is indeed exactly Where i need it to be once the wig is in place, it is now time to lay it down. So i'm taking my hairband and i'm just going to tie this around the lace and exactly where the glue was just to make sure it's laid down. It'S stuck down it's giving that to this given layers child, you already know what it is taking my blow dryer on the cool setting, i'm using this just to speed up the drying process and just to ensure that everything is laid down perfectly, because i've noticed that Sometimes the lace does lift, and this just ensures that you'll have a stronger hold. The next step in our process is going to be to cut the lace, so i'm just pushing the hair back so that i'm able to have a clear vision of the lace where it starts where it ends and just making sure that when i do cut the Lace, it's cut perfectly taking my cuticle scissors, i'm going to start off by sectioning off the lace. So when it comes to 13x4 frontals, it is a bit difficult to cut the lace all at once. So what really helps me is separating it into parts, as you guys can see me doing now, and once i've separated it, we start cutting the lace section by section i'm starting off by cutting off the lace around my ears. This was a bit difficult, considering the fact that the wig did have a strap already attached to it, which i later did cut off. But here in the video you do see me trying to cut off the lace by my ear, but that's as best as i could do and what i do on one side. I do on the other now for the part that i was talking about, i'm going to be cutting off the lace in sections, so, as you can see, i'm going in a zigzag motion cutting off one section. Then the next section, then the next as you guys, can see it's pretty self-explanatory, but just doing it this way makes it easier. Taking my got to be glued blasting free spray, i'm going to be applying this all over the lace. So sometimes there are bits and pieces of the lace that does stand up and that doesn't stick when you do lay it the first time. So i'm just going all around the lace to make sure there are no parts that are lifting because ciao the lefty laces look cute and i know i have been guilty of this, but i even know it's kiddo in the moment. So please don't come for me once i've done that i'm going to be sectioning off parts of the hair that i want to use for my baby hairs and you guys already know i'm into the temples and the sides of my ears, my baby hairs. So i'm just going to be sectioning off the hair that i want to use for that on both sides, temples and by my ears, do going in with my hairband we're going to lay the wig one more time we did go in with the carti b glue. Blasting free spray, so we're just making sure that that is laid. I also love to do this step with the baby hairs out, because it just makes it easier when it's time to do the baby hairs. Now it is time to make the curls say hello, so i'm taking a wide tooth comb and i'm basically just going to be brushing out the curls on the entire wig. Once that's done, i'm taking my mixture of conditioner and water and basically this just makes the curls be revived. This gives you that wet curl, look which i'm really into and just to make the curls tighter make the cross say: hey make the curls come alive. Best believe this is the best mixture for curly wigs. Now i'm taking a cotton pad and some rubbing alcohol just to remove some of the excess glue that might still be on my forehead. It does sometimes flake up, so you want to make sure that you've rubbed this off because it will start showing, throughout the day going back in with my cuticle scissors, i'm going to be cutting the baby hair. So i've seen this trend on tik tok, where there's a specific way you're supposed to cut your baby hairs kind of in like an upward motion, the hair that is in front should be longer than the hair at the back. I hope i'm making sense - and i hope you guys can see what i'm doing here. So, basically, what we do on the one side we do, one, the other taking my got to be glued ultra glued styling, gel and also the edges brush that i received in the lab me hair packaging. I'M going to be using the comb side for the edges on my temples, just to lay them down and then for the sides, i'm using more of the brush side and yep foreign, and this is the complete and final look with hair from love me here and Guys she is, i am so obsessed and one step that i did add when i was installing this wig is afterwards. When i was doing my makeup, i did add some concealer on the parting of the wig, just so that it looks more natural, it's giving more scalp it's giving more. This is my own hair, because baby this hair was made for me. I really hope you guys enjoyed watching this video, if you did, please don't forget to like comment and subscribe, do check out, love my hair on instagram and do let me know what you guys think of this hair, what you guys think of this color? What you think of the quality, just from what you see, because one thing about my angels. I trust you guys. Thank you guys so so much for watching and i'll see you in the next one bye, guys


Comments
feeeentse: The honey brown looks good on you ,it's actually givin' shawty vibezzzz❤️❤️
Fumani Baloyi: Colored hair for the WIN!!!❤You look good mama
Dee Luther: Great Video as Always Super Stunning thumbnail tho You Looking So Damn Pretty Makeup always on Point Nice Cheeks Structure EnJoy your Wonderful Day Too Happy Fabulous Weekend ahead Stay Bless n Be safe always
Shereen Peza: You look Amazing ma ❤
Tshireletso Manamela: I love it ❤️
Lona Stuurman: shawty you look beautiful sis❤❤
Life as Rosie: I love love this brown hair on you❤️
Nkhensani Tibane: this hair on you!!
Busisiwe AB: Look good on you❤️
Зульфия Минигулова: Alles sehr schön. Aber zuerst zusammen die Nummern 10 und 1. Eine warmthh.Online Brünette und eine anderee Blondine. Es wäre unfair, wenn ich 4 wählen würde