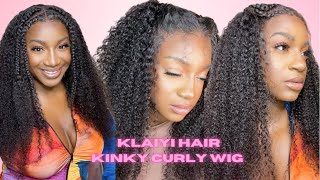
Start To Finish Wig Install + Full Customization *Beginner Friendly* | Klaiyi Hair
- Posted on 25 January, 2023
- HD Lace Wig
- By Anonymous
In this video I install a 13x4 24 inch Water Wave Wig from Klaiyi Hair.
SUBSCRIBE
♡ Sub count: 1,386
socials:
♡ instagram: @caydreams
♡ tiktok: @caydreams_
♡ buisness inquiries: [email protected]
Foreign, hey guys, it's your girl, Kate, James and I'm here with YouTube video for you guys today. Today, I'm going to be showing you how I installed this beautiful to 24 inch. Let me move back, so you guys can see water wave wig from clay hair. It'S transparent lace, 13x4, hey guys, so I'm going to be installing this water wave wig from Claudia hair, for you guys today in the package, came with a wristband lashes and I couldn't tell what this was, but it was a makeup brush. This is the wig. It was actually pretty soft and long. It came pretty bleached and pre-plucked, which is a plus with baby hairs. I'M gon na be taking this blue bleach. I prefer it over the white one and I'm pouring it in these plastic balloons. Um. You want to use plastic utensils for this and then I'm taking some leftover 30 volume developer. I used to use 40, but every time I used 40 I over bleached the hair. So I just wanted to play safe. Now I mixed it and noticed that the mixture was too powdery, so I added a little bit more um. I want to make sure that my mixture isn't too runny, because I don't want it to seep through the lace and then I'm just brushing the hairs back to make sure that it doesn't get on the loose and I'm spraying got to be sprayed to make sure It doesn't seep through the lace too much now I'm putting the little ball thing underneath I don't know what it's called just to make sure that it keeps shape while I'm applying the bleach and then I apply the bleach with a little bit of pressure, but not Pushing it in too much, I do want to say the mixture did thicken as I was applying it. So that's why it's like really thick here. I could have added some more developer. I would say to add some more developer, because this didn't end up bleaching. The knots the way I wanted it to, but it's all up to preference and now I'm adding a piece of aluminum foil, just to help it bleach faster and I'm pressing the lace down into aluminum foil, I'm leaving that for about 30 to 45 minutes. Now, I'm just washing the bleach off of the lace I forgot to mention. I recommend wearing gloves for this part, because if you have sensitive skin, the bleach could make your hands very itchy. So this is what the lace was looking like after I rinsed it out. It wasn't really how I wanted it to look, but I didn't want to mess up the wig anymore, so I didn't bleach it again. Now, I'm taking some purple shimelite shampoo. You can also use blue shampoo, I've heard and I'm putting it on the lace to take out that orange brassiness color. And here I'm just rinsing out the conditioner I like to rinse with cold water at the end, just to close up the hair follicles and prevent the wig from poisoning. Now I'm taking a t-pin, I have and I'm putting it inside my wig head to keep it secure. I didn't have another t-pin, so I used them in the C. Pin we're not going to talk about it, and here I'm spraying got to be spray just to get any hairs out of the way before I pluck and combing it back just to make sure it's smooth before plucking, I'm using my hands to smooth out the product And help it dry faster and then I'm using the slanted tweezers plug first highlights a part off the section. Before I start looking normally, I part off like any section right before plucking, but this install, I don't know what I was doing like my plucking explanation is going to be kind of rough, but all I can really say is make sure you pluck behind the hairline And Skip every other like piece like pluck, pluck skip, pluck, pluck skip, because if not you're gon na have a bald spot, and this is what it was looking like after. I honestly think I could have plucked it more um. I was debating on doing it while it was on my head, but I'm just doing my ball cap spraying some spray cutting some off getting any lifting pieces and I'm taking some Fenty powder. I like to put powder foundation because I find that liquid foundation makes my cap slide back, and I also cut off the side combs in this wig because I felt like they made it bumpier now, I'm just taking a red tail comb and applying some bold hold. This glue in about two to three even layers - I don't let it dry. First, I put all the layers on at once and I make sure I spread it evenly and let it dry down to clear this bottle was on the last little bit. Scott is like, but I was gon na, make it last because I couldn't go to the store. It was like 10 o'clock, and I was doing this foreign and I'm pressing the lace into the glue kind of pressing it in and combing it. At the same time and I'm using the wig band provided, but it was too long, so I ended up using another wig band. I had just to secure it better because the other one wasn't doing it for me, and then I cut once in the middle once on the side, and once I met the side to create four sections just so that I can cut off the excess lace better. I will draw this on the high heat for about 30 seconds to a minute and now I'm using a brow razor to cut off any excess lace that was still there. I find that this gives a better cut, because it's not like a straight line now my Edge my ends: normally don't really stick so I do have to go in and add some more glue. Sometimes now I'm parting, the middle and I'm going to be using my tree - be protected just to place over the top before I use my sheets bomb wax thick and hot comb, the top of the hair, to make it as flat as possible. I did hot comb in sections because I just felt like it was still a little puffy. Looking foreign off my edges, I like to start a little bit behind the Widow, speed foreign, my edges down and I'm cutting the shape of my edges. Now I'm taking my mini flat iron and I curl the edges going upwards because I just like the shape it gives better. I spray a little got to be spray or wonder lace on the edge brush, and then I like to start using C motions and holding the edges in my finger just to shape them. This part is totally up to preference. So, however, you, like your edges, you can do them that way. This is how I do mine be careful guys. I almost cut myself. My camera did die, so I ended up switching to my phone and I fixed my edges in the front off camera. Concealing my middle part not take up mascara, just to fix up any makeup that was just left over and that didn't make a straight line. This is a brown black mascara. You can use jet black but and I'm blending that concealer in just because it looked like a white line in person. I know you can't tell but yeah I'm using my makeup powder from earlier and blending that into the lace and then brushing out any tangles in the hair, I'm spraying the hair with water and I believe, tea tree oil. This is just some spray bottle. I had laying around, but it did really well for the hair, so you guys, when I'm doing my hair, I started making crazy faces, like I'm, not looking at my face. I'M looking at my hair so don't mind the crazy face. It'S like look at this, like what am I doing and I like to finger the tingle at the same time, foreign mousse, just two pumps and working that through the hair, okay guys. So this was the finished result. If you like, this video make sure you hit that subscribe button to see future hair installs for me and I'll see you guys next time you doing


Comments
Maniiiluv💗: U did so good !!! I’m gonna get a wig
Rita Danowski: You are so Genuine you Have something. But girl as natuarlly beautiful as You ARE u look So much better being your Natuarl Self!! But the Care you put into your videos! Keep it up!!