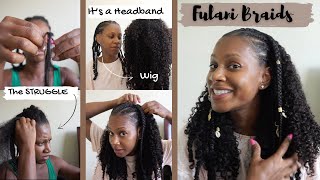
Watch Me Slay My Birthday Hair! | Fulani Braids | Headband Wig | Tiece Tv
- Posted on 24 February, 2022
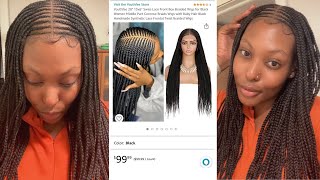
- Headband Wig
- By Anonymous
I really wanted too try this style for a while now and I am finally able to do it! I'll show you guys how I was able to achieve this look and give you some tips along the way!
WIG DETAILS//
Isee Hair
20" Kinky Curly Headband Wig
Direct Link: https://bit.ly/33SByvC
What'S up, you guys welcome back to my channel today i'll be about to try some? What is it? I think it's called lonnie braids tribal braids with curly hair. I don't know, i looked it up on pinterest and i was like you know what this would be. Really cute birthday, hairstyle and curl approved, so i'm excited to try it. I think it's going to come out really good, because i just did the cornrow the straight back, feeding braids um, just this past like week or so. If you haven't seen that video make sure you check it out after this, so you guys can see how i did the little straight back hormone, braids or whatever. So i'm thinking that this will come out good as well. I am starting off with my hair has been washed, like i washed my hair like two days ago, so i'm not gon na wash it again um. So i'm just gon na comb out my hair, i'm so excited my birthday's coming up. So i'm about to look really good. I'M gon na try this um hear us all out. Hopefully it comes out great. I think it will um so yeah. Let'S go to get into it, but before i do make sure you subscribe to tease tv and also notification button to notify when i post a video by the way, this is my very first time doing a video um, where i don't like do a voice over. So this would be interesting, maybe i'll add a voiceover like while i'm doing my hair, i don't know yet, but we'll see all right, let's go and get into it because i don't want to do a whole long, intro um. So, yes, i got some pre-stretch braiding here and then number four. This is a 20 inch right in here. Hopefully you guys can see that focus so yeah. I only got one pack because i'm only doing the front of my hair, i might probably should have got two now. I think one pink is good and then i am going to be using a headband wig. So i think this is like a 24 inch. Headband wig i'll link the info in the description box below. I bought this actually for my wedding to wear for my wedding day and i was trying to dye it. It was a long story, but anyway, i'm going to be using this. Since i haven't been able to wear it, and i went ahead and washed it and everything so it's still kind of wet, but i'm going to take off the headband, i'm going to remove the headband and then i'll probably keep it. So i can sew it back on later, but i'm gon na use this for the other half and then yeah. I'M gon na put it back over here because it's wet uh-oh all right, so we're gon na go ahead and get started okay. So i combed out my hair um and my hair is a little bit on the drier side right now, so i'm gon na just add some leave-in conditioner and some castor oil just to make sure that my hair is not over here being thirsty, i'm trying not To add, like any water to my hair, because i don't want it to revert back to curly and i need my hair to be stretched out since i'll be braiding it and i don't want to like blow dry, my hair either. So hopefully this will do. I just need to add just a little bit of moisture into my hair before i put these braids in alright so boom it has calmed out ready to go. I think i'm going to start off with sectioning my hair um, because i i know i'm going to be wearing the headband wig, so i'm going to probably just add some braids in the back of my hair since i'll be sewing. The headband wig on to my hair - and i don't want it to um - i don't want this hair to just be sitting out like in a wig cap, for i don't know how i'm going to wear this hairstyle, but for the duration of the hairstyle. I would like to keep it tucked away at least my ends tucked away, so i'm going to start off sectioning from ear to ear. Okay, so i went ahead and rubber band the front part of my head just a way. So i can work on the back. So i'm just going to be adding some braiding here and adding putting some cornrows in my head. I'M not really like. I don't really care too much about straight parts, but i'm just going to create some braids back here. Just so i can tuck away my ends. Um, i feel, like this part, is really optional up to you, but for me i know that i just want my hair to be like really protected. While i have this hairstyle, so i'm not really caring about part, i'm just gon na part. It add some clips. Oh my gosh, lord, i forgot to even pray father. I pray that this hairstyle comes out great. If i bless my hands, allow me to make a great protective style. Lord and lord. Let it be let it help let it help grow my hair and also um. Just look amazing guys, so thank you and jesus name. So if you had to pray, i always try to pray before. I do anything because i always come out better okay, so the back of my head is done. I'M gon na add my favorite oil to my braids. I'M gon na go ahead and add a little bit more castor oil to the top, because i know my hair is like sticking out since it's really short, it's sticking out of the braids, which i don't care about because, like i said it's going to be hidden Anyway, i just want to add a little bit more oil to the top of my braids just to make sure my hair is going to be moisturized, because we care about healthy hair over here, not length. We care about health, although length is great. So i was going to sew this in, but i think i'm just going to wrap it up. I'M gon na go ahead and bobby pin the back of my braids okay, so wig cap is on. Braids are good all right. I think i'm going to add the wig first and then i'll do the braids in the front last. So let's go ahead and do that all right, so i'm going to go ahead and take the um headband off. I want to save the headband just case. I want to put it back on okay, so i have my seam ripper here that i actually use for when i sew all right, i'm just going to go in and just take out the seams of the headband wig. So i'm going to be very careful and making sure i actually get just the same. So i'm going to start off right here. Just only make sure that i cut off just the part where it's actually sewn in. I want to be careful that i don't mess up the actual like wig itself. Okay, so got the headband off the wig, which is great, so i'm gon na put this to the side, because i will probably using that later now, this wig does come with comb. So i have two on the front and then it has one on the bottom, so i'll probably use the combs um and then i'm gon na sew it on my head just so i can make sure it's secure because i'll be going on a bow, and i Time for my wig to be flying off, that is not gon na be cute. Look how cute! Oh my gosh, we haven't been so idiot all right, i'm gon na sew it in all right y'all! So, as you guys can see, i'm just going to do like this little crisscross type thing, not crisscross, but like braids going this way and the braids going this way, i am trying to braid them a lot smaller. So that way, my hair is hidden a lot easier, um in the braids or in the weave, i'm honestly just parting them. You know the same exact way as i did in my last video with the um straight back braids, i'm just parting. It making sure that my my parts are very neat and then i'm making sure that the after i'm done parting it i'm just checking to see if the amount of thickness of hair or, like the part that i you know the part that i take out. You know what i'm talking about um that it matches up with the the other braids. So that way, i'm not having like small braids, big braids or whatever, and then i am doing a feed in the feeding method. So, if you guys have not seen me, do um the feed in type of braids, you guys can check out that last video, honestly, i've probably finished like most of my head and then i'll give you guys um a tutorial on how i do the feeding braid, But for right now i'm just going to see me. You know get glammed up for the 28th. Okay, not the birthday, my birthday's 25th, but i'm turning 28. So you know i'm seeing it's looking good. So far, all right, let's keep going so so. Okay, guys, i'm going to show you guys how i do the feed in um braids, because i'll probably end up doing the rest of these braids off camera all right. So after you slap on some of that shiny jam, i like to part um just a little bit in the front of the braid, so i can grab three pieces of hair or three yeah three pieces of hair like i'm about to start braiding. So i'm just going to braid um my hair first probably do it like maybe about four or five times so just a regular braid. So i'll probably stop at about right there and then i'm going to add a really thin piece of hair. So i'm going to use my thumb and my pointer finger to kind of make the loop i'm going to add it into my pointer finger my thumb right between there and i'm going to leave one piece out, i'm going to braid as normal and then i come Back around i'm going to add that piece back in to my pointer finger my thumb and then braid as normal. I'M going to do it again, i'm going to add another thin piece of hair, creating a little loop and hooking it into my pointer finger and my thumb i'll leave one piece out and i'm going to braid as normal and then, when i come back around, i'm Going to add that piece right back in and then just continue to braid. So hopefully that makes some sense. I feel, like. I don't be like giving you guys a really great uh detailed tutorial, but i'm hoping that you guys have seen how i braided this side and then um, showing you guys how to do the feed and braid. I mean it's very simple as long as you know how to braid um, that's a good start and then it's all about just adding the hair in between your pointer finger and the thumb and then just continue to braid. I mean it's really simple. At least, i think it's simple only because i've been braiding, my hair for so long. It takes a lot of practice, but once you get the hang of it, you get it. So at this point, as you can see, this strand of hair is like really skinny, and i don't want that to. I don't want my brace to end that small, so i'm just gon na add it once more. Add some more hair at the end of this braid same way as i've been braiding this whole time so and that's it, i think that's the amount of thickness. I want it to go to be yep, so i'm just gon na finish: plaiting the braid rest, the braid down and because i have short hair and i have natural hair, i'm like making sure that i braid really tight. When i get to the end of my hair, so that way, i'm like tucking it in to the braid, so my hair doesn't stick out. So, as you can see, i kind of get up close. My hair isn't sticking out of the braid, which is good, and i also think adding that jam to the ends of my hair, because i did not do that and when i did like the straight back, braids um, i didn't add jam to the ends of my Hair to make them like really slick, so i think that helped so i'll probably end up doing that for the um anytime, i braid my hair from now on, like maybe i found a heatless way of braiding natural hair um. It'S probably probably already been discovered, but i'm gon na say i discovered it on my channel because i didn't know that was a thing but yeah. So that's um how you do it. I'M gon na go ahead and finish out the rest of my hair. So i'll come back on after i'm done, braiding the rest of my hair and then um i will come back, so i can do my edges and set it and all the good stuff so yeah all right. So i am done. Oh. I think it looks so cute, so i'm gon na go ahead and dip the ends of the braids, and then i need to lay this down so yeah, but i just want to show you guys just looking like the front and the back side. Oh, this is so cute. I'M debating whether i want to cut off the braiding hair like cut it a little bit more i'll, come back after i did my ends and lay my edges and all the good stuff. So all right! Okay, guys, this is the finished product. I love it. I love it. It'S secure. I do want to add some some accessories to it, but i just need to figure out like what at first i was going to do beads, but i think i'm just going to add some clip-ins or whatever. So if you guys want to see how i accessorize and everything make sure you follow my instagram, because i will post it on there, if i do decide, i don't know yet, i'm still trying to debate. I got glammed up because i'm getting ready to do some pictures but y'all. I love this look so much like it came out way better than expected. The only thing that um i wanted to change was maybe like, because i cut the the ends of the braids. So they're not i kind of cut them at a jagged edge but um. They still kind of give me this blunt look again, so i might dip them in hot water again other than that y'all. I love it. I might need to add a little bit more product to my hair because it's getting a little poofy, but i i love the overall look. So thank you guys so much for watching um and i'm gon na go to close this video out. So i can be birthday ready all right so until next time you
Comments
ShaniSpeaksNow: You are so multifaceted in your skills Jatiece!! Loved this video and hope you had fun rocking your Bday hair!
ShaniSpeaksNow: You are so multifaceted in your skills Jatiece!! Loved this video and hope you had fun rocking your Bday hair!
J: This is going to be my go to summer style. I’m nervous about taking the headband off though lol.
leslie mays: You are very talent… love the hair style
Koils Natural: Turned out so good… I like the thumbnail as well, where did you get the original picture?
Talent Panashe: Wow that is so beautiful
lovestone84: Yasssss, most definitely prayer always makes anything better!!!
𝐂hristian 𝐰𝐞𝐝𝐞𝐲💖: Wow!!
Marlychard Ora: & to think you went and got it done!