First Attempt At Fulani, Tribal, Feed-In Braids With A Headbang Wig|| Full Process!
- Posted on 07 August, 2022
- Headband Wig
- By Anonymous
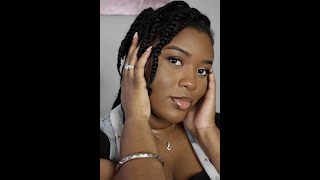
I finally attempted feed-in braids and I’m hoping I can convince you to do the same. It will be a struggle, but just get over that hump. If you know how to perform simple braids then there is hope. Be sure to plan ahead, have tools, ready and clear any task from the day, because you're going to need all the time available to yoy.
This isn’t a tutorial, but at least you get to see that its ok to have some failed attempts, but keeping pushing through and you may end up with great results. I'm glad I did. If I can do it, than why not YOU!!!
Don't forget to Subscribe
https://youtube.com/c/TamaraHOaTz
Headband wig
https://m.iseehair.com/iseehair-kinky-...
Hair length: 20
Hair Type: Brazilian
Hair color: 1B
Hair Tools
Rat tail comb
Hair Rack
Edge control- Shine and Jam
1 pack of pre-stretched braiding hair
Small perm rods- anything less than 1inch
Previous VLOG
Chicago - https://youtu.be/jhTQIuWhmEU
======================================
#FEEDInbraids #headbandwig
Love The HOaTz
Follow us on IG : @Tamara.Hoatz
======================================
Business inquiries
I'M just so impressed what's up y'all, this is gon na, be actually a different video for me, like i'm gon na, be doing a hair tutorial. Well, actually, it's not a hair tutorial. Take that back seeing this hair style go around a lot and i've been wanting to try it where you have like either the half wig or the headband wig, with some fulano type braids in the front or feeding braids in the front, i've been seeing it go Around for so long - and i keep pinning it to my dog on pinterest and i'm just like just do it - we just gon na hope it comes out for the best i'm starting off with freshly washed hair that i washed the night before and let air dry By using these elastic bands are pretty much stretchy, so the process here is that i wrap it along the shaft of my hair, all the way down to the ends to avoid using the heat as much. If i do need to use the blow dryer the next day, if it's not fully dry, i would do so, but at least i won't be having so much heat to my hair. I ended up blow drying my hair lightly and then section it off. To start my anchor braids, which is going to be very important because i am going to be using that half wig and i need those clips to be secured. Also, it's going to be sewed down onto these anchor braids as well too. So i started off with two just going off by the sides and then the rest of them just going straight back. It really didn't matter how they look in the back, because it's going to be under the wig and then from there. I'M just going to make sure i'll be able to just kind of slide them up into those grooves and then sew them down, so they'll be nice and flat. So here's the wig that i'll be using i'll explain a little bit more about what type of hair it is. But if you can see the headband is still on, i just wanted to see how it would look with those anchor braids and make sure that it is secured. So i realize i may not even really need the headband, so i'm just going to go ahead and razor it off, because i want this thing to be nice and flat when it is down onto those anchor braids. As i section off my hair, i make sure i take enough time to do this part and make sure the lines are clean, as i can get it. I knew that i was going to do maybe like eight braids, making sure that it's four on both sides. So i went ahead and pre-parted everything and then flat twisted it down, so that it makes life a little bit more easier. For me, the hair that i'm going to be using is from expressions and it is pre-stretched at a 48 inch. I will be also using the shine and jam edge control to pretty much make sure that these lines are clean, as i can get as well now, when it came down to sectioning the pieces of hair that you will need for the braid. I feel like this was the trickiest part, because there's no clear guideline on how much hair to use for a braid, it all depends on the size of the braid, and you may have to just start off with small pieces. At least you can gauge from there how much hair you would need versus using two bigger pieces and making your braid too bulky. So, i would say, start off with thin pieces and then keep going from there. It'S really all up to just practicing now, just making sure the lines are clean again, putting some edge control in each area, and then i will also put like a little hair pin to just make sure any flyways don't get into my braid all right y'all. It is time to get this first braid going, even though my face does not show it. I was nervous as heck, but i was going so slow on this first braid. It literally took me like almost five minutes to do, because i was really making sure that i did it as neat as i could. I think i did maybe like three to four turns of the braid before starting to add in the hair. Don'T ask me what technique i use i just kind of watched, so many different youtubes and just kind of did what they told me to do and try to feel for how i would want the technique like i said it's not a tutorial on how to put Them in it's just showing y'all how i did trial and error anyways, i'm gon na go ahead and speed. This up just know that i did use, maybe about four pieces on this side. Braid y'all. By this time i was seeing how neat the braid was coming out. I was like girl, look at you, you did that and put me back on my name and from there i was like. If you could do one, then you can do two and then two turn into three and then you know you get the point from there. So, just from practicing a little bit more, i was able to gauge how much pieces i would need for each of the braids and how small of the sections i would need. Listen. It was no stopping me at this point, but yeah i still was slow down. Slow as heck, but as you can see, i've tried so many different techniques. At some points i had to hold the hair in my mouth like you just saw there and then you know i just had little hiccups with hairs falling on the floor pick it up. Try to wrap around my nose, whatever i needed to do to get the job done. I was doing i'm doing the braid redoing the braid flipping the head over to make sure i can braid it down as much as i can listen. Y'All already know do what you need to do for most of the braids. I really didn't need to add any hair along the length of the braid, because i did most of them towards the scalp of the braid, but for this middle one i knew it was not going to be the same length of the previous braid that i did So i had to add it to the length. I thought this was going to be easy, but i don't know why i was struggling like i was putting the hair in, but then it was falling out as i was braiding it redo. It did it again and i was like what is going on right now. I really was about to give up, but i was like i don't came too far, so i i just had to breathe breathe. So here we are with the braids completely done. I pretty much struggled the same way i did on the other side, so y'all didn't need to see all that, but i went in with some edge control for the edges and then foamed it down to keep everything nice and neat. I was going to go ahead and tie my hair down at this point, but then i realized i forgot to roll these ends. So what i'm using are some perm rods, very small ones, because i want the hair to be kind of curly to match the headband wig from here. All you need to do is just dip them in some very hot water for about 10 to 15 seconds and the hair will be set from there. So after that i was tied as heck put my scarf on and baby. I was out okay i'll deal with this in the morning y'all. It is the next morning um for my first attempt. I'M actually happy about you know what i'm actually proud of myself about how the feed-in braids turned out. It was definitely my first time actually trying them. I kept starting and stopping and get through a bread and didn't like it. Take it out, hair falling out and it was just a struggle and i had to get over there at home. So what do they say? Practice makes perfect, i'm just gon na have to keep practicing. So this is everything, so this is how it turned out things. I would make sure i do next time is not have the water go so high up onto my hair, i just realized like i could be scaling my hair like. Why was i doing that? I would need to invest in a hair rack because having this hair pieces, every single wear was a nightmare, but i decided to do this hair last minute, so i had to deal with it. If this is your first time trying it uh, try it on a day that you know you ain't gon na do nothing, because i was out here taking breaks dealing with the kids taking breaks, making dinner plan ahead. Have everything you need as far as like pieces of hair for each braid? It was somewhere in between um, five and seven, or maybe like. I would say four because, like on the edges, i think i used like four pieces because it would have been too long if i started to add more, but the top ones. Of course you know the middle ones. I had to use like close to like six or seven just depending for the most part, i didn't add much to the actual length of the braid. It was mainly up into the beginning of the braids closer to the scalp every now, and then i felt like it wasn't going to be long enough to you know, match the length of everything else and i'll add maybe like one or two pieces in between here. If that makes sense, so here's the headband wig that i'm going to be using what i did last night is what co-washed it would not make the air dry. I'M gon na. Have it sewed down my sister's gon na. Do that, because i'm not that great at sewing, but i'm just gon na, let you guys see what it looks like with the braids and the headband wig on all right. So let's put this wig on um, i'm just going to try to find that anchor piece and it was very important to have those braided down flat as much as possible. Okay. So this is the entire look here hairs blending in, but this part here we just have to kind of like blend in a little bit as much as we can and then here there we go that, is it y'all, i'm actually, oh my god, i'm so proud Of myself but yeah, that's the look y'all, it's super cute. I love it. This headband wig is from icy hair. I will link um the product in the description box below uh. It is full, so it does feel a little bit heavy. It is a lot of hair. This is one way i can rock the hair, maybe just tie it back and just have it like down that'll be cute or you know, a very low, a very low ponytail, like kind of just scrunch back like that as well. I think that would be cute too so different ways, but the most part it will be made like this. So another idea that i have is, i have this long single braid that i sometimes use to wrap around the base of the ponytail, and i figured maybe i can try it to make. It seem as if it was like another braid that was coming off of the wig and that'll at least hide it a little bit too or just kind of make. It seem as if like one of these braids was just kind of flipping over. So that's one of the ideas i have, but i am going to probably try that so i'll, let y'all kind of see it. So i just kind of went ahead and put the braid there all right. So here's the final look, i would say um adding the hair jewels to it. Um i got these from the local beauty supply store near me. It just gives it more of that goddess. Looking i'm here for it, these are what i am wearing. I have that design there um, i have the leaf and then i also have the seashells, like kind of stuck there, all right y'all. So i hope you guys enjoyed this video. I hope it gave you the confidence to just try it like i've, been wanting to try feeding braids for like over a year, and i keep pinning stuff to my pantries. I keep watching youtube videos of how to do it and just never found the confidence to just try it and i'm so glad i did like look what i was able to achieve just by trying i mean it did take me a long time to complete it Because i kept stopping restarting trying to figure out was the best way for me to be able to put the feed in braid in, like it's trial and error, so just try it if it comes out bad, try it again, like you saw, i kept dropping stuff Or restart in the bread, restarting the part you just got ta try and if it comes out great, like this you'll be so happy that you did it and if it doesn't just give it another, try, it doesn't hurt to try um yeah. That'S all i have for y'all. I i'm just so impressed it ain't like a hundred percent like with the braids and the parts and stuff but baby. We can work with this honey. We can work with this all right y'all. So, thank you guys for watching my video. I hope you enjoyed it. I hope it gave you the confidence to try if you could be so kind subscribe to my channel. I do a lot of content around my lifestyle dealing with my family and kids self-care health. Some fitness videos as well traveling, but this was my first time doing a hair video and i hope you guys enjoyed it to see how i styled my hair during a recent trip watch. My recent video and here are some clips to show as well. Thank you guys for watching and i'll talk to you guys on the next one. Bye


Comments
Isha-Mar: I LOVE THIS SISSY!!! Great job!!!!
La Belle Vie: You did good. Looks amazing and like you said practice makes perfect.
Nikita Saunders: I’ll be scheduling my appointment soon!