How To: Diy Kinky Straight Headband Wig | Easiest Wig Tutorial Ever
- Posted on 03 December, 2022
- Headband Wig
- By Anonymous
How to: DIY Kinky Straight Headband Wig | Easiest wig tutorial ever
I had fun creating this wig, it’s so simple and lovely… not to talk of the fact that it’s so light weight and super affordable to achieve.
Will you try out this wig? Let me know in the comment section
Please Like, comment, share and SUBSCRIBE!
Thanks for watching!
Other videos you’ll love
- DIY braided closure-https://youtu.be/Gmc3W1Kj0qQ
- DIY French curls with braiding hair - https://youtu.be/IojzwFQtqXA
- How to make closure net yourself-https://youtu.be/a_u66DpixBI
- DIY Afro kinky wig- https://youtu.be/vTKH6LFqM9Y
BUSINESS EMAIL: @[email protected]
I own no right to song played in this video
Artist: Nana Kwabena
Title: Find Your Way Beat
Let’s socialize on
~IG-@Favourrr_Ike
~ TikTok
http://www.tiktok.com/@favourrrr_ike
Don’t forget to:
like,
Subscribe,
Leave a comment,
And share to friends and family
See you In my next video
This is an easy hairstyle you can achieve in few minutes,it’s really beautiful, simple and elegant. I really hope you enjoyed the video and hope you’ll try it out.
Please Like, comment, share and SUBSCRIBE!
Thanks for watching!
Other videos you’ll love
- DIY braided closure-https://youtu.be/Gmc3W1Kj0qQ
- DIY French curls with braiding hair - https://youtu.be/IojzwFQtqXA
- How to make closure net yourself-https://youtu.be/a_u66DpixBI
- DIY Afro kinky wig- https://youtu.be/vTKH6LFqM9Y
BUSINESS EMAIL: @[email protected]
I own no right to song played in this video
Song: Pierse - Miss You
Music provided by Vlog No Copyright Music.
Video Link: https://youtu.be/4pgxz7AX1cE
Let’s socialize on
~IG-@Favourrr_Ike
~ TikTok
http://www.tiktok.com/@favourrrr_ike
Don’t forget to:
like,
Subscribe,
Leave a comment,
And share to friends and family
See you In my next video
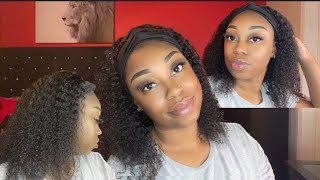
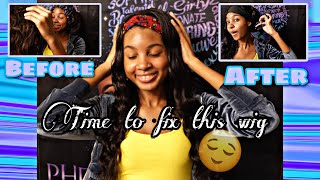
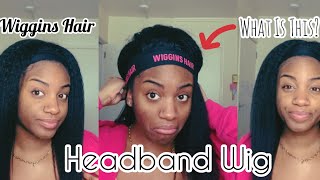
Hey favorites, welcome or welcome back to my channel, so if you're new to this channel do not subscribe to this channel to join the family, so first things first we're going to prep our braiding hair. So you want to call your braiding hair into three different parts. Okay, three equal parts. Thank you now, this combing part is not really necessary. You can go ahead to feather your braiding hair, but I like doing this because it makes the process easier for me. So go ahead to feather your braiding hair. Trust me. This is one of the easiest ways you're going to see like it's very easy to make, and it turned out beautiful. When I say beautiful, I mean beautiful. I fell in love with this wig. So after doing that, you go ahead to brush out your wig. You can either brush or comb it so for this tutorial you're going to need a rope either a rope or a thread or Brazilian or whatever it is you have. You can tie it on one end of a table and then, on the other end of the table for the purpose of this tutorial, I had to like tie it to my dummy head and then to a nail close to the other side. So we're going to be working in sections, take out a big section of braiding hair and place it on the Rope. Then you go ahead and braid. Now a mistake I made was not twisting before braiding yeah. Yes, I went ahead to bridge when I was unraveling. It it was difficult for me, so what you want to do is to twist the top just once just do like a Twist on top and then start braiding. Yes, as you can see, I went ahead just wait and when it was time to unravel it was a bit difficult to separate at the top. So these red ones, but the next part you're going to need hot water and then any conditioner of your choice. You can make use of a deep conditioner or a leave-in conditioner, and then you go ahead to add any hair oil of your choice, stir with your comb and I'm going ahead to dip the braiding hair into the hot water, make sure every part of it touches. The hot water foreign, even as it's braided, so I went ahead to loosen the braiding hair, make use of a comb or if you can use your hand to loosen it gently, you can go ahead and do that. Yes, it's very easy to lose yeah now. This was the reason why I said you should twist the top. I was finding it difficult to know how to separate it, so you want to twist it once and then braid go ahead to brush your attachment, or you can now call it a kinky straight hair you'll be needing a wig cap or a weak net. Anyone you choose so yeah. I went ahead to start crocheting, the braiding hair to it. So I started working with little sections. I made sure I crocheted close to each other to enable it look full and nice before we get to the front. I didn't really make use of a headband like that black headband they use for headband wigs because I couldn't get it at the moment. So I just left a little space in front, so I can tie any scarf or use any headband of my choice. That was exactly what I did, but if you are to make this week yourself for yourself, you can make use of that black headband. I'M going to look for a picture and leave it at this point and the good part about using that is after using that at the front of the wig, you can still use your headband, your colorful headband or whatever it is you want to use. You can still use it in front yes, but since I didn't have that, I went ahead to use a headband. I made some time ago, foreign. So let's continue with the crochet. I continued everything and at this point I gave too much Gap in between the two I've done, so I have to like, go over it again and add some hair. So this part it depends on the size you want. If you like, full hair, you can go ahead and add more and more so it's going to come out full because remember we brushed the wigs, so we made it puff out a bit it made it look bigger you understand, just have to like add a lot Of hair to it, and if you don't want it to be so bouncy or much, you can make it up your conditioner on the week. The conditioner is actually going to shrink it. A bit not apply so much just apply a bit and it's going to reduce the size, and this is what it's looking like right now yeah. I was really done at this point. I was not yet feeling the vibe, so this was what I did in front. I told you I left a little space in front, so you can go ahead and use this method or you can add a black headband in front yeah. So go ahead and brush your wig brush it out to make it Fuller foreign, like with the headband on. I went ahead to add headband, so at this point, hey guys, hi hi right now, I'm showing you how to wear it wigs. So you can use a wig cap on your head first and I went ahead to put on my headband because I was going to wear makeup and I didn't want it to get stained. So I had to wear this first and then go ahead to do my makeup. So after putting on the headband, you go ahead to put on your wig and then use your headband to cover it or your scarf. Even one style scarf, you can go ahead and do that so I'm going to be laying my edges using a gel and then an edge control. This is how I lay my edges and it lasts for a long period of time. So I'm going ahead to use my brush to style it. After doing this, I went ahead to do my makeup at this point. Everything was just coming together and I was like okay. I can't wait to see the finished look and after everything I was like wow wow. I really really loved this. It'S so full and nice, it's very, very beautiful. So you can style this anyhow, you want. I went ahead to show you guys how to style your own. If you want to rock it in another form, so you can do like a half up, half down kind of style. Honestly, this is my favorite style. Out of all this is my favorite style. I kept working this after that day, so this one is like a side part and then for the next one just follow up what I'm doing it's very easy and it came out beautiful. I really hope you try this out. I really really hope you do try it out, it's so beautiful and I believe you're going to love it as much as I did so after this style. You can go ahead to rock the second style as well from that first Style foreign. Once again, if you're new to this channel do subscribe to the channel to join this family, we do lots of week tutorials here lots of affordable week, tutorials and different DIYs on this channel. So you can solve through the channel and subscribe to the channel to join the family. So this is the final look. I really hope you try. This out, can't wait to see you in my next video bye foreign

Comments
Nana: Wow, it look so beautiful. Well-done dear.
Tyra Lamptey: How do you keep it from tangling or how do you maintain it
Exotic Beautyy: Nice job
Jefferson Osadebe: Damnnn