How To Customize & Construct A Frontal Wig Ft Beauty Forever Hair | Sam Iam
- Posted on 27 March, 2020
- T Part Wig
- By Anonymous
USE MY CODE “YOUTUBEHR ” for $$$ OFF
▬▬▬▬▬ ❤#BeautyForeverHair❤ ▬▬▬▬▬●
328 BIG SALE ON Beauty Forever Hair AliExpress UP TO 51% OFF( 27th March-31st March)
Hair Details: Malaysian curly 4x28' bundles with 20' frontal
Add Cart/Follow Store to Get Free Coupon: http://bit.ly/2raFAeO
Malaysian Curly Hair Bundles with Frontal in the video: http://bit.ly/332tTEk
Malaysian Curly Hair Bundles with Closure: http://bit.ly/2OzIjXA
Malaysian Curly Lace Frontal wig: http://bit.ly/334f8Rw
Malaysian Curly hair products: http://bit.ly/35nwH0f
Top Selling in our store: http://bit.ly/2KCX7Dj
New!!! Wigs: http://bit.ly/2pyHmpM
Aliexpress Beauty Forever Hair Store: http://bit.ly/32X1yPS
Beauty Forever Hair Official Website: http://bit.ly/2KF75UZ
Amazon Beauty Forever Hair Store: https://amzn.to/2KSGkyB
Social Media:
Youtube: http://bit.ly/YouTubeBeautyForeverHair...
Instagram: https://goo.gl/dR2g8z http://bit.ly/IGBeautyForever
Facebook: http://bit.ly/2jqoBNP
what's app: +86 15090267865
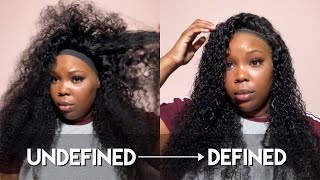
Pammi ice we got ta feel me before they trying to kill me to cut him loose. Some choice: hey guys, welcome back to my channel. So today, I'm gon na be showing you guys my way of bleach and plucking and customizing. My lace fronts was yes drum roll. It is here this video is here today. I have four bundles of 28 inch of Malaysian curly hair from forever beauty, forever beauty forever, hair, with a transparent, 20 inch 13 by 4 lace plenty. So now we're gon na get started in the bleaching process. So when making your bleach solution, you want to make sure it is as thick as pancake batter, but not way too thick. So, just like a fair amount of thickness, because it will, if it's watery, it will run straight to the lace and bleach your roots, and you will have blonde hair in the front. And it's going to be like pulling teeth to dye it back to the onion. So what I do is, I make sure it's really thick not too thick just you know a good amount of thickness, and I start from the very top, as you can see here and then work my way down as you will continue to see as you watch This video, so when I'm finished, this is what it looks like this is what it should look like when you're finished as well. No bleach running through so I like to do is any hair that got smushed down. While I was bleaching, you just want to go ahead and run your hands through it and pull it, pull the hair, the hairs that got stuck on the lace. While you were bleaching cuz, if you leave them there, they will turn blond and, like I said nobody wants that. Okay, so you will know that your lace is properly bleached when you take it up to look at it and it looks blond on the other end. Like this, like these little, I didn't really catch it too good. I apologize for that, but that's how you're gon na know that it's properly, but you won't see any more black dots, the little black dots you see before you bleach it. Those will be gone. They will be blond. Oh, this is just me doing a body check, but anyways, so you want to go out, go ahead and get some steamy hot water and just rinse all the bleach out. We rinse all the bleach out. So after that I went ahead and I got my shimmer highlights: Shemin light shampoo SH, my shampoo and I rinsed. I bumped it up. You know the guys a little scrubbed of settled up soaked up and I sound crazy, but I went ahead. I live in my lease and for like five years. I left it on for like five minutes and I went ahead and rinsed it off and when I say left it on, I mean like. I went ahead and scrubbed the lease for about five minutes. You can either leave it at a sit or you can scrub it yourself either or so when you're all finished. This is what it should look like that little light, brownish blondish, look, I'm showing it looks like scalp. This is what it should look like when you are finished. Look at this. It just matches so perfectly with my skin and it's gon na look like that on any skin complexion. It'S gon na just look like scalp. All the black dots are gone. It'S perfectly evenly. Bleached and you good to go so now we're gon na start with the plucking process. So this is what you want to do. I'M gon na slow this part down a bit and then speed it up, but when plucking you never want to pluck from the very very very front of the lace, you want to go back a little. So I can't really explain so. I'M gon na make you guys just watch and learn so now that you got the flow of things around here. I want you guys to go slow. It may look like I'm going fast like this speed up a bit, but I was going really slow. You will rip shred and tear holes through this lace and it won't feel like it because you're going so fast, but when you're done you're gon na see like 30 little holes under the lace and it's just gon na irritate you and it's like. If the lace can still be good with holes in it, but it's annoying and just knowing that it's there is just annoying. So just take your time and go slow and you want to go like in a zigzag back and forth side to side motion like, as you see everything you see, I'm doing here feel free to do exactly what I am doing. This is my way, I'm not saying this is the only way or the right way, but this is my way and the best way that works for me every single time. So this is plucked side. Do you see how nice and natural that looks versus unplug side? Bachchi Wiggy not bocce, bocce Wiggy, so you want to keep this motion up going straight across when you get to the middle, where, like it's gon na, do a middle part or any part you decide to do your part on and any side you decide to. Do your part on be careful with the middle of it, because you don't want to pluck it too much and it's like a really big gap there so like just be careful when you're going when you're plucking the area that you're going to have a part on. So when all is said and done, this is how your list should look. I didn't go over this side a little bit more because I wanted it to be more realistic. As for this side, but when you're all set alone, this is exactly how your knees should look. I love this technique. I'Ll, never go wrong, as you guys can see. It'S always something and yeah. Now it's time to construct this wig, oh here, I'm just showing you guys what it looks like um after its plucked and customized. When I parted - and you know different size, everything just looks so natural and clean that is teeny and natural, clean hearts, clean sections. Everything was just perfect after that wonderful plucking technique. So now what I do clearly here, I like to use mesh: don't cats, because when you get the hair wet it dries faster and drives better, because the cap is mesh, asked for like a regular spandex dome cap. So here now you can just watch me line up the frontal, so what I like to do is for the perfect fit. You want to bring the tippy-top of the front to this little area right here. As you see, I'm lining up bring it just that much over the cap. That'S it right! There bring it that much over the cap and the other side you just want to line up and make sure in the back is very flat, and that is gon na give you the perfect, perfect fit you, your frontal, won't be too big. It won't be through small, so you want to go down the sides left and right and just pin it as you see I'm doing here, and this is gon na - be a flat tight, secure fitting front. So I promise you so I like to start from the very top, and I just so I do my sewing technique so and not technique straight down in one side and then, when I get to the end, I just make my way half way back up. I don't cut the bread, yet I just make my way like a little up the sides, and so I know it's secure and I cut my string and then go ahead and repeat the same techniques for the following side. So, as I make my way down to the end, what I also like to do is wrap the string around my needle three times and I pull it for a tightener. I do this like once or twice probably even three times, but this just makes sure that your front to the thread won't come loose and unravel and you know lift. So what I do is I do this, like. I said a little a little way up, not too far up just up the sides with where I fit last so, and this just gives my front to the good security that I'm looking for just to make sure the ends, because I'm gon na do some cutting Over there, you guys are guys you guys soon, just to make sure the ends don't lift. So after you all finish, and you follow my techniques, this is exactly what it should look like. A lat seamless. It looks a little crooked, but trust me. It'S not flat. Seamless and everything just perfectly positioned and now it's time to make make the wig you know, though the bundles in the back. You know a lot about you, guys I'll be talking foolishness sometimes, and it's like got this understand me because my words, because I all crumbled and stuff and y'all get me. I love you guys so much cuz y'all get me you get me you understand. So this looks like on my head exactly where I want it. I promise you it's tight and it fits perfectly like. Do you see that wait till I saw the bundles in the back and I get the little tension on it. So everything lays even more laughs. Okay, this is what you want when you're making a frontal wait so now for the first bundle, I am going to be doubling it. Yes, I double my bundles, but sometimes I double it like one bundle cuz. I don't like for curly hair to be way to a full, because you feel me I don't wan na be out here. Looking like Chaka Khan now I just want it. No offense like a car - I don't gon na, be for two girl, I'm just saying but yeah. So what I do is this is what every hair, though I don't like for my wigs to be way too. Full laughs like that, just crazy, like I don't want to go my way I look like mine, is mine gosh. So what I do is out double one bundle and I follow that same technique. I saw the same way. I saw the front room, so this is how I started off, so I'm not really good at explaining, like I'm a visual learner, so hopefully you guys can like understand the way I try to put my words together for you to understand how to construct your wig, But kudos to you, if you can just watch this video, you know grasp it so now, as you can see here, I'm one buddy number three so, like I said I don't double these bundles. As I make my way up, I open the bundles up and I space them. I do a great amount of spacing, so the hair can look just the right amount of fluffy and just the right amount of not too fluffy. If you pick up what I'm putting down so I'm gon na go ahead, and I'm gon na continue to sew to the top as you come and make your way to the top, it should begin to form like a u-shape like, Oh as you see right here, Then you just want to go start from the very bottom of that you or V looking shape and go side to side until you close off the top of this week. So when you're all done, this is what the top of your wig should look like. After it's all closed up - and you have no more hair left, no more space left can't see any tracks can't see any lace. You can't see any stocking cap, I mean wig cap and you're good. So what you're gon na do now is remove the pins and remove the wig off of your blockhead and cut this little piece out. You do not need it. It is just access cap. You want to be careful how you cut in, though don't cut too close to the thread, because everything will unravel away. You don't want to fight. You can't fight nobody, but yourself so be careful now time to style this week, I'm going in with my Caracara back. Stick and I'm gon na be doing the middle part. I'Ma start switching it up, though I want to do different styles. I always give you guys the middle or maybe the side. I need to do something different. I'M gon na be more open to different styles, but now you're, just gon na watch how I style, if you want to do this exact, look that I'm doing today. This is what I do. I part out my middle section where I'm gon na be wearing my hair. I go in with the wax stick to flatten down the top, and then I also go in with the last thing on the edges, because I want that pushed back a nice big look and then I take my hot comb and I just get busy when that's All finished now I take my cream foundation in level nine by Ruby kisses and I go ahead and I just coat it all over the lace, and this is the same color I'm gon na use on my stocking cap. I believe I mixed it with level 9 in Tendo, because it came out a little too light, so you want to go ahead and rub it all through the inside of your wig and then, if you're gon na do the meltdown process, I mean well even if You'Re not gon na melt your cap gun, I'm going to do like that as well. Without me, men turned down my cap because I come up with all of that before and it was still a melted. It was perfect so after that you're gon na put it on your cap as well and get to your melting process. So here now, I'm going in with lace cream cool. As you guys know, this is my favorite glue in the whole wide world. Yes, that series isn't that much of my favorite, so I'm gon na go in with your four layers. I four layers of the screen you're gon na, go in with four layers. I don't care what videos you saw. I don't care who told you always right. Do not lay your lace down and do not go on with a second coat until the white is completely clear. You will know the school is dry when it goes from white to clear. Do not lay your lace on no white glue, please. I don't wan na. Have to fight y'all, please cause it's not gon na look good, please! So you want to go in and smooth it out. I did four layers just smooth. It out really really really really really really really really thin and make sure it is clear and you're good for takeoff. So after you fan it and your final coat dries you're gon na go ahead and lay the lace into the glue. I don't recommend using your fingertips in your hands cuz. It could turn right, but I just trust this glue so much just don't smudge it. If you're gon na use your hands, I need to use my nails as well, but if you're gon na use your hands, please don't smudge it cuz, it will kind of turn white and you don't want that. So just take the rat tail comb and use the teeth of it, or even don't even use the tail for your the teeth of it and do exactly what you just want me do so now here, I'm just gon na be cutting off my lace and I'm Gon na proceed to the styling after this video, or should I say the beam or should I say, the melting half of this but anyways so after I cut my legs off, I went ahead and I put out a section for around where I'm I'm gon na. Do my baby here like this, is the section for my baby here. Of course they ain't gon na, be this long I'd be up. I'D, be a fool now alright, so this is what I'm gon na be using for my baby years. I then went ahead and I sprayed my, I believe my spritz my pump it up. I sprayed it across my edges and I took my elastic band and I tied it down and I I wasn't in the shop so I couldn't go under the dryer, but normally I'll go onto the dryer. But if I don't have a dryer around me, I would blow dry it for a few minutes or you know, for a little and oh I'll, just walk around and do other things in the house until I feel like it is completely dry. Okay. So now this is what it looks like after about 20 minutes. I had I kept it on for 20 minutes of it being dry. This is how it came up and it's completely melted. So now I'm gon na use my spritz to do my baby hairs. For this video so now you're just gon na stay tuned and just watch me lady videos, so we went from dry to define so now, I'm going in with the same cream concealer that I used on the list. For my part, so I went ahead and I drew my part like I, you know, define my part a little and then I'm going to go in with my intense high-beam spray in the color jet-black and I'm gon na Chris. This part up alright honey you're about to see some magic y'all know. I love that spray so that at the Partizan sharpen ready, I'm gon na go over some biosuit. Just so, you know liven up my edges liven up my curls and then I went in my first Buster by Fantasia and you know running it through my hair, just so that the curls don't get super frizzy. I wanted to contain its little nice silky look but still like when it dries is gon na have that little frizz to it. But here we are now you just combing out the curls a bit, and this is the final look you guys this hair was wonderful. It gave me little to no shedding and for curly hair. That was really amazing. Cuz, you know crazy. Here is a mess sometimes, but I didn't get any shedding. It was very soft, very full. Once again, this is beauty forever hair. The link to this hair will be below in my description box and I want you guys to stay tuned and I love you guys and I will be posting more content. I peace come on over, come in, don't forget to Like comment and subscribe and turn on that. Your patient beg them to see what I'm droppin content. Alright, what do you know about?


Comments
M.01: This is the best detailed video ever. What most hairstylist don’t show us is from the start to finish ! You done an amazing job. That lace is fire
BbyGrlRaine: One thing I noticed with plucking is that the quality of your tweezers is so so important I previously used some $1 store ones and wondered why I couldn’t get it right but now I got the tweezerman ones and baybeee
Kristina Lenora: ok ok sis rona got me ready to do this on my own so can we get a melt down tutorial without baby hairs ?! baby hairs and I DO NOT get along lol great video gonna definitely keep practicing
Dreamy: This is the MOST detailed video on YouTube most people don’t show all this, I love it
Lymm: girl the detail you go into when explaining what to do helps so much! your the only girl i watch who takes her time to explain for the ppl trying to learn x
Niya Hurst: Fun Fact: the mesh dome cap is also easier to use when making a wig , the holes in the mesh cap help you sew faster❤️
Melissa Good: Girl your patience is beautiful, this looks like it toook mad long! I’m so lazy this will definitely take me a few days BTW that jet black spray changed the game for me.. MAGIC
Jamie lee Camacho: this is literally the best wig tutorial I ever watch. thank you sweetie .
Yanna Teira: Definitely finna try out that spray trick next time I love learning new techniques & this the first time I see somebody do that. u slayed boo
C C: Very instructional video for us beginners. I love this look and appreciate how thorough you were step by step. Thank you for sharing your knowledge I’m definitely going to be practicing bc the way them frontal install prices set up I’m gone end up with cornrow dreads long as I keep it in
Beauty with Nae: I’ve never seen a install like this before but this has been the BEST EVER. I love it and will definitely be doing this the next time I install a wig
Kennedy Viser: This video was amazing ! Very good instruction ! And very satisfying to watch . It wasn’t too much talking and like you said I’m a visual learner also so the fact that you incorporated that into the video as well !
Karly Swift: Thank you this was VERY informative and give me so much confidence to construct my own wig
Azja Rene': you make it look so easy it looks bomb sis!
Londa Love: You did a amazing job, I’m starting my journey HUGE THANK YOU!
Kheyana: This was so detailed and came out so pretty
Heyy It’s Chrissy: Girl ! I loved this video , you did a great job. I wish I could do as good as you just did. Just need to practice. But the wig looks absolutely amazing ! I’ve had that hair for about 3 years and it’s still some good hair. I only use it for sew ins but I love the hair , maybe I’ll try to turn it into a wig... ♀️❤️. But good job !
Angel B: Great video, detailed, clear and concise. Thanks a bunch!
Melanie Whitely: You did an AMAZING job!!! The BEST tutorial I ever saw!!!
Shellian Daley: OMG such a good tutorial. Just got my lace wig today and I’m definitely going to be watching your video while I slay in install for my bday. Thanks so much for posting.
abigail ewusi: You made it look so easy
Naomie Lukunga: Love this video so I much . It was so detailed and really helped .Really nice job ❤️❤️
Rayla Bee: Love this video you slayed this down!you got me feeling like I might be able to lay my shit for my birthday due to this quarantine crisis ♀️ can I ask what product you used to bleach the roots ?
Tamon Rollins: Your a bomb teacher !!!! Can’t wait till I get my hands on some bundles.
Britanniã Blair: hey , literally just discovered ur channel , and girl you are too good at what you do , dont stop !!!.....lol your video actually helped me out a lot so thank you x
Sosa & Maiya: Now I wanna make one so pretty!!!!!
Odedra Scrivens: I loved how this video was very detailed thank you beautiful
Callima Munro: I watched this video like 100 times. Very detailed I love it
Ki Banks: This gotta be the best video ever on how to lay a wig thank you girl
Destinee B: I loveeeee how you show everything step by step. From the bleaching process to plucking & sewing!!!! I love it girl, thank you!!!
Yensy Costly: I love it... even how you explain everything, I had learn A LOT, you’re the best!
Tianna Allen: Gooodie, yuh always delivaaaa!!. But naa nfs you did a bomb ass job frfr. The plucking was everythinggg, the sewing was everythingggggg, the end result was everythinggg. Keep it up♥️♥️
Ashton Dansby: I’ve been up for literally 3 hours watching install videos and yours is by far the best one I’ve come across... now imma try this it might not come out as good....
Versatile Kee TV: Okay so when you get to the end of the frontal sewing process (where you loop the knot 3 times), do you sew all the way through the elastic band or just the top layer ?
Life with Taylor Tay: Thank you for this video, people hardly show these steps anymore!
MeGan Jenkins: loved how detailed this video is!
Mirriam Mutambo: Wow! Amazingly done-thank you!
Hair & Nails By LeN’ee: I love this it’s so perfect
Ajah Enjole’: I really wish I could slay my wig like this ! laid this to the gawdsssss !
Janasia Derouillere: This was literally SO FREAKIN helpful!!
Eudes Adams: Woow gurl u nailed it. .. ur video is just too detailed, thx for taking out time to do this.. the best so far
Eudes Adams: Woow gurl u nailed it. .. ur video is just too detailed, thx for taking out time to do this.. the best so far
Fatima Bah: This was really helpful and detailed! How do you size your head to know how big your wig should be?
Chiamaka Ibe: I tried your method and it works perfectly. Thank you. My question is, pls where do you place the elastic band on the frontal wig for maximum flatness?
tosan akpojivi: Very detailed information and very helpful to me, really honest and not selfish unlike others who would not want people to fully understand the step by step process...
Dammy Aderombi: Well done girl ! Loved it
P R I S S Y: this frontal wig is banging i love it
Yvonne: Thank you so much sis.. u really went into details and I loved it.. u got 1 sub
Tania Taylor: Girl yes! The best tutorial I’ve seen yet!
ItsVonnaJoi: Girl you snapped. So glad I ran across your page okkkk! I will be using your technique on my next install
Alicia Symone: Dropped so many gems definitely a game changer thanks sis
Rydaha: You did a GREAT JOB! Your commentary was amazing. Keep up the good work mama
Asia Knight: Literally the purrrfect install
Marnay Sylvester: You did an excellent job. I really want to make my own wig too. Can I use glue instead with this technique?
Winnie Not Pooh: I really want to try this but I don’t even know where to start y’all make it look so easy
Shelby Gordon: You just gained a new subscriber ❤️ this technique and outcome is fire sis . Also where did you get your elastic band that you used to tie down over your edges ?
Arrogant Nailss: I’m using this method!!! I’ll let y’all know the update on it Tuesday morning
minknae: I loveeee your personality I lowkey act the same way. But you slayed this wig!!
KAYISLAVISH: This was sooooo helpful!
christabel: hey! i’m about to make two wigs (1 closure & 1 frontal) and im going to use this video to help me!! can you leave the link for the wax stick please? thank you
Michelle Williams: I’ve got to know what did you use to hold down so you wouldn’t get black spray on your part line ??? Great idea I’m doing that for sure
Big Ang ‘86💅: This was the best tutorial ever❤️❤️
James Naas: Looks beautiful!
ariabtw !: gettin my wig and doing it myself, this is so clutch rn
The Duchess: This was a really great video!!!!! Thank you!!!
Ginelys Melendez: Ok ok ok you slayed that shit best video I’ve seen so far explained everything and showed everything AMAZING
Beauty Defined: Love these edges
Janeya Maclin: By far the best hair video I have watched! I need to know what was the black spray called cause that was magic forreal
Mrs Concepcion: How long does it last? (I’ve never wore a wig and the one time I had a sew in I took it out 24 hours later cuz it itched so bad. It was hella expensive hair but I didn’t know I was supposed to wash it before installing it) ♀️ over $500 spent just to take it out 24 hours later
Puhnaani Beats: Highly appreciated boo! ❤️
JessicaJNV: Girl u hilarious!! It turned out
Leticia: I didn’t think I needed this but bishh I really did
Dreenie Darling: Awesome video and so detailed. thank you. also can you tell me the name of the hot comb used? it looks thinner than the rest.
Vibe With Kay: Love this video so bad thanks for this one
meeca scantlebury: I be excited everytime you post.. Keep up your work. I be learning so much
38baby: This was so helpfulll
Ayauna Taja': Thank you for this video. I've been waiting patiently for you to post. Love love love your content
K A L I A: Thank you gorgeous! ❤️
alexandriaberea: This is hands down the best lace frontal tutorial on YouTube like arrogant tar good. I was about to buy a hella expensive wig and pay hella high to install. Nah I’m finna slay the fuck out my hair. I do a good job now imma bout to kill it now!!!
D'Andra Smith: What level ruby kisses do you recommend for a nc45 skin tone x
Pamela Sontsi: Mad skills! You rock ❤️
Alayjah: Love this video!! You did thaaaat♀️♀️
Latoya Smith: Wow, that melt is serious honey! Love It!
tannimola ayoola: Thanks for the tutorials, you explain everything well, well done, please what hair lotion did you use that make it look glossy and beautiful.
Jackie Burns: How long can you keep the wig on?
Kayla Norman: How long do frontals/closures last?
Dazzled_876: Best video I’ve seen in a while ♥️♥️♥️♥️
Geovini So2: Lindo amei
Krystal Gentle: all i got to say is that you bawdied this
Alyssa Antionette: Yeessss !! You never disappoint
freh: girl ur so talented some day ill definetly have u do a install on me
Michelle Asonye: Do I have to do the bald-cap method even though I have a 4x4 closure? The side of my edges (near my temples) also stick out it the wig, and I was gonna leave my edges out just to blend it in more cuz it couldn’t be hidden
elise robertson: please do a video on installing your wig without the melting down!
DiorLondon’s: you layed tf out them baby hairs ❤️
Cleyree Dyce: Girl this is some talent.. anyone know what glue she is using in this video ? Oh and you also got yourself a new subscriber ❤️
Kamani Kerr: You’re the best. You prefect your craft❤️❤️❤️
moniquedenisee__: Did you go through the elastic when sewing the frontal down ?
Rose Pie: My boyfriend spent 175 dollars on my lace and I messed it up tryna rush to see if It looks natural on me or not so hopefully this video teaches me something before he buys my next one
Humu-Hawa Karim: This is the best plucking I’ve seen across YouTube.
Umi Zu Jinsui: Yes boo you slayed love this