Tip Tuesday- Budget Friendly Wig Not Working For You? Let'S Work On One Together & Try A Few Th
- Posted on 27 September, 2022
- T Part Wig
- By Anonymous
This video is like a stream-of-consciousness video not exactly a how-to... I have some experience working with wigs to fix them up but am not an expert by any means!! I have been told OVER AND OVER again that it is helpful to just watch me try things and play with wigs, so that is what I am doing here.... some things you will try in the beginning won't always work the way you hope, but the point is to just DO IT! Budget-friendly wigs like this are PERFECT for practicing on and learning. Each time you try something you will learn new things and get better, so get in there and practice!!
This wig is a Lemonwigs BUDGET FRIENDLY wig- under $30! Here is my original review of this style in 3 colors: https://youtu.be/0JGqGCPDMvk
Here is the video I did cutting bangs into a wig: https://youtu.be/HjHNkzFK-og
Review of The Hair Grip- my favorite wig grip: https://youtu.be/Fq2xyBv0xdY
Links to products I show:
➡Texturizing Razor: https://amzn.to/3r0HavG
➡Hot Air Brush: small plastic one: https://amzn.to/3r2I9LT
➡Hot Air Brush with metal: https://amzn.to/3xL9GFd
➡Round Brushes (I have 3 sizes, the Extra Small is good for bangs): https://amzn.to/3QZ85Ta
➡Steamer: https://amzn.to/3f5U4FT
WAS THIS HELPFUL? Consider contributing to my tip jar- all donations help support my wig ministry and allow me to purchase more wigs and products to review and use for education and support: https://bit.ly/DonatetoHeyWigSister
Here is my Amazon Store where you can find ALL my favorite styling accessories: https://www.amazon.com/shop/deniseshee...
Other ways you can support me:
Like, Comment, and Subscribe to let YouTube know my channel is worth recommending
Add me to your prayer list ► Pray that I honor God in my videos
Purchase from my Amazon Storefront- I only list products I have personally purchased and recommend ► https://www.amazon.com/shop/deniseshee... (Note: As an Amazon Associate I earn from qualifying purchases)
Donate a wig (to be used for tutorials, giveaways, donations, and other things related to supporting my channel) ► email me at [email protected]
Share my videos with others!!
IMPORTANT VIDEOS AND BLOG POSTS:
➡ New Wig Wearers Series: https://bit.ly/NewWigWearersSerie
➡ Trustworthy Wig Retailers: https://heywigsister.com/resources/f/t...
JOIN ME ON SOCIAL MEDIA:
➡ My Website ► https://heywigsister.com/ (I sometimes list wigs for sale here!)
➡ My Email ► [email protected]
➡ Instagram ► https://www.instagram.com/heywigsister...
➡ Facebook ► https://www.facebook.com/heywigsister
__________________________________________________________________________________
My measurements
○ Circumference= 22" (average)
○ Front of Hairline to nape of neck (over top of head)= 12.75" (average is 14.25")
○ Ear to ear over top of head= 13" (average is 13.5)
○ Temple to temple around back of head= 14.25
○ Hairline to eyebrow= 2.5"
○ Hairline to tip of nose= 4.75"
○ Hairline to bottom of chin= 8"
○ Neck= 4"
________________________________________________________________________________
My opinions and recommendations are 100% my own and as honest as I can make them. If you find value in what I am doing please consider supporting me by purchasing from my Amazon store or even making a donation via the PayPal link above to help me with expenses related to these videos. Thank you so much and God bless you. Denise
Produced and Filmed in 2022 by Hey Wig Sister and Denise Sheets
ALL RIGHTS RESERVED – COPYRIGHTED MATERIAL
#heywigsister #wigs #DeniseSheets #wigreviews #hairloss
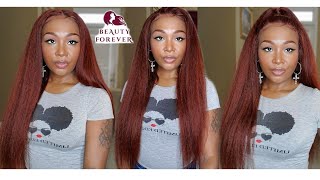
Hey everyone. Thank you so much for being here today. My name is Denise. I'M also known as hey wig sister on Instagram and Facebook. Today, I'm here to bring you a tip Tuesday we're going to work together on a wig. This is a lemon wigs, budget-friendly wig. I just recently reviewed three bobs with bangs. This is the copper bronzy kind of one and in my review I talked about my challenges with the curl pattern. I talked about my challenges with the bangs and I talked about my challenges with this top here. So we're going to try to work on this together, I'm not sure if I'm going to be able to make this look great or not, but we're going to try and I'm going to show you some of the things I'm going to try, and hopefully this will Be an encouragement to you to work with your wigs and not be afraid, keep in mind, budget friendly wigs can be challenging. They can come with some things that aren't perfect, that you may need to work with. So, if you're operating on a budget, it's really important that you learn how to work with your wigs or, if you just want to try some budget friendly. Wigs, maybe I'll give you some tools for your toolbox. Stick around we'll do this together! So I'll put this on for you guys and we'll talk about the things I'm hoping to, if not fully transform at least improve, but before I do that I'll tell you that I have on my head girl model by Ellen Villa this is in the color saffron Red rooted, I absolutely love, grow mono, one of my favorite all-time curly wigs and since it's fall, the reds are coming out again. I absolutely love this. It is just one of the best curly wigs ever so one of my favorites, but let's put this one on and actually I meant to grab a wig grip, because this is really big on me. I'M going to stick these Adjusters in. I may have to pause this and go get myself a wig grip, because if I'm going to do any work on my head with this, I'm going to need something to hold it on all right. So you can see it's not super out of the box. What I'd like to transform? First of all, the Bang's not an issue, those will be easy to trim up and then take a hot airbrush and give a little lift too. But it's this curl pattern, I'm struggling with it's just really really not great and the other two that I got in my review if you've not seen that yet I'll link that below the other two had Great Waves. So this is just an unlucky thing now, if you order a budget-friendly wig like this and they offer returns, you can return it and get another one and see. If maybe you get a better curl pattern. You know sometimes wigs come with box hair, cold crimping. This looks like cold crimping to me, cold, crimping or cold, setting that they're the same happens sometimes to wigs when they live in a box and they go through lots of temperature fluctuations. You don't know what the life of a wig that you got has been. How long has it been in the Box? How many places has it been, you know, has it been in a hot truck and then went into an air-cooled Warehouse or was it you know in a truck in the middle of winter, and then it went into a heated Warehouse. I mean it's just really hard to know so. Cold cramping can be challenging, but I do have some videos where I show you how to handle it with just simple styling tools, and so these, luckily are heat friendly. So I don't have to be as careful as I would with a regular synthetic and I have a video where I dealt with cold crimping on a regular synthetic, so I'll try to remember to link that below, so you can go check it out. It just helps you on your wig journey to have some of this information. The third thing I want to deal with is this: so all of these wigs come with this plastic piece up here to mimic part because it doesn't have any type of monofilament. I mean these are around twenty dollars between twenty and thirty dollars. I don't know how much we can really realistically expect, and I think you know Bravo for trying to make it look like a part, and so one of the things I want to do is see if I can get this to be less pointy, maybe to just Flatten out a little bit and to do that, I'm actually going to use a hot comb which I've not really shown before so we're going to use a hot comb to try to get that flattered. So we'll see what we can do so. The first thing I want to do is trim the bangs and that I need to do on my head, because I have to see if I put this on a mannequin head, they really are just poking me in the eyes I run the risk of cutting them Too short, so I need to adjust my camera, get a wig grip and then we'll trim these bangs together. So hang tight. Okay, so for those of you new to the wig wearing Journey wig grips can be really helpful to keep your wigs securely on your head. This wig grip is going to make it so I can style it. I can mess around with it and it's not going to slip and slide. I personally don't like the extra bulk and I don't like something extra squeezing my head, so I don't usually wear wig grips, but a lot of weak sisters swear by wig grip. So if you don't know what I'm talking about, I have a review of something called the hair grip. It'S my favorite wig grip, because I do use them with my headband wigs um I'll, try to remember to link that too. But if I don't just search Denise sheets, the hair grip and you'll find it so when you're going to cut bangs, it's really important that you pin the hair out of the way that you don't want to cut. The last thing you want to do is accidentally cut, because none of this is growing back. So that's going to be critical now, another tip for you guys. If you haven't seen my video, where I show you how to cut bangs in a wig that don't have bangs, I do that with the other lemon wigs wig. I have reviewed it's a long wig and I show you how to cut bangs and there were no bangs in that one. So please check that out. If you want to know more, but for now this one has a template which makes it a little bit easier. So my goal is just to make them a little bit shorter, so they don't poke me in the eye and quite honestly, I want to be careful because I'm going to, I want a little bit more lift in these bangs they're really flat and lifeless. So I don't want to cut them too much, because when I take heat to it and I try to fluff them up a little bit, they might wind up too short. My favorite tool for dealing with bangs is this. This is a. I often call it a razor comb, it's not a comb, it kind of looks like one, but it's a razor. It'S a handled razor, it's for thinning and texturizing hair, and I love love, love this. It really makes it easier to deal with wigs if you aren't good with hair, if you're not used to cutting hair. This helps a ton. I highly recommend it. I will link it in the description. I think every wig wearer needs something like this, and so what I like to do because - and you know what I didn't and grab anything to put these fibers in so just kind of stick them on the counter here and hope they don't go down the drain. This is my kids bathroom. They have one much bigger bathroom than I have, and so this helps me. Okay, so basically you're going to take this and you're just going to kind of go down like this, and I actually don't want to see the hair I got. I actually don't want a blunt cut. If you wanted a blunt cut, maybe you would use some scissors, I'm closing my eyes so that I don't get fibers in it because that hurts. I actually got a little bit extra hair in there that I didn't clip up, which is okay. It wasn't very much so I like the way this sort of texturizes the ends too. It doesn't make them blunt and it really really helps it to lay more realistically. These blades dull super fast on synthetic hair, so it comes with 10 extra blades and you can buy extras and I did buy an extra 10., and so, if you do this, it's hard for me to look at you guys. While these are hanging in my eyes, if you do this - and you find you have to saw really hard, it shouldn't take too much to go through the fibers. Then change your blade because that's an indication that it's getting dull and these dull very fast on these fibers so for that matter, do regular scissors. I think that's why some stylists, if they know anything at all About Wigs, they won't work on synthetic wigs because they don't want to dull they're super expensive shears or they have a separate scissors for that all right. So what I'm doing, as you can see, is I'm just sort of going through little bits at a time and then I'm letting it lay to see how it's laying keeping in mind. I am going to take a hot airbrush to this and it's going to get a little bit of lift. Hopefully, and I don't want them too short, I think we're getting close and I'm also looking when I lift it up like this and drop it. I can see if it's kind of even a little bit with the layers, because this is putting some texturizing - it's not really layers, but it's texturizing the ends. So it's not blunt, which is what I want. So when you work with your wigs, it's just a work in progress. I think we're getting closer and you guys you don't already know how to skip ahead in these if you're on a mobile phone just double tap forward and it will skip ahead 10 seconds because I will sometimes speed these things up and sometimes I won't - and I Usually have at least a couple people who don't like them to be sped up: they don't they. They need every comment every second, so I'm choosing not to speed this one up and just to talk to you guys through it. So you can skip ahead. If this part, you would you've just seen all you need to see all right, you guys, can you see how much better that is? Let me show you how much I took off that's what I took off more than it seemed like I needed I would have, but you can see much better now obviously looks silly, because I have this back but much better. I still have to work on the the lift and all of that, but there we go okay. Next, I'm gon na grab a hot air brush. So let me get that set up all right. So when I use a hot airbrush on a wig, I like to spray it with a little bit of water. It just helps, I think, create more of like a steam environment and I think it works a little bit better. So because I'm going to use water, I'm not using a heat protectant and because I'm using I have some hair on me, I'm using my hot tools, plastic barrel, hot airbrush, it's very low heat. This is actually really safe on regular synthetic. Even so, I'm going to start with this and see if it's enough, if it's not enough, I do have this hot tools that has Boar's Head bristles and metal and it gets really hot. I may have to go to that. I try to avoid using Boar's Head bristles on synthetic wigs if I can, but I haven't really found a hot airbrush that gets super hot and doesn't have those so it's kind of a trade-off. Another option would be to use a hair dryer and get yourself a round brush that just has plastic bristles. I just recently bought these three different sizes um for that purpose, but I'm not super great with using both hands the hair dryer in one hand and the round brush in the other. So it's really not something I'm going to do on video, because I'm really awkward and maybe I'll get better, but we're going to start here, because I think this is something everybody should own and everybody can use. I really think everybody can do this now. I have two of these they're different sizes. As you can see, this is the 0.75. This is the 1.25. I think they have a one inch too in the middle of these two. I don't have that one. So I like to use this. This is the smallest one they carry. I will link these below. I get them on Amazon. You can find them potentially at Walmart. I just give you one place to go and then you can shop around see if you can find a better deal, or maybe you don't like to shop at Amazon um. But that's easiest for me and I do get a bit of a commission if you buy. I am an affiliate with them. It really just helps my channel. That'S why I set it up, so any money I earn gets put back into this. I mean that's, why I own so many of these. That'S why I bought so many of these. I don't really as a wig wearer need this much stuff, but for me to help you guys, I need this much stuff, so your purchases on Amazon help me, and I appreciate it so much all right. Let'S get going on this, so I'm gon na do the bangs, so I've got my water and I don't want to get them sopping wet, so I'm just gon na well. I was just gon na. Do my fingers but I'll spray. This, if you have a mister, even better, because then you're not going to get your hair so wet. It will take too long for that hot airbrush to work. Um mine is not a mister all right, so I'm going to turn it on high and now I'm just gon na hold on for a second I'm gon na clip. Where do my Clips go? Some of this hair is just gon na bother me. So I'm just gon na clip this out of the way to begin with and then I'll pull it back down, because I want to make sure it's all Incorporated together. But I really need to get started with these bangs and I have got I'm just going to cut some of this long hair that got wrapped in that, because I don't want to bother trying to find it okay. So now I'm just doing what you think, I'm doing, I'm just going to take the round brush and I'm gon na try to get some lift out of this because they're very flat. Now, normally you want to keep the heat moving on a wig and I will but I'm holding it because this isn't very high heat, and these are, I have a little bit more hair here. Normally, I think you'd want to pause and try to find where that hair came from and incorporate it back in, I'm not that worried about it. So that's why I'm doing it this way um! This is really low heat. As you can see, I can hold my hand on it and it's not burning me. So that's why I'm holding it in place a little longer, because these wigs can take Heat, see that guys already getting some lifts um, it's important that you hold your post-synthetic waves. These are kind of stiff fibers, as you can see synthetic wigs in order for them to change their Style, you have to hold it until it cools, so I want to make sure that I'm keeping some of that lift in as it's cooling. Now, once I get these the way I want them, I'm probably gon na have to trim them up just a little bit more remember in the beginning I had said I didn't want to trim them too much and then have them be too short all right. So I am going to take a little more heat to it and start trying to get some lift in these parts too. But I want to cut these a little bit and I'm trying to figure out I'm going to use regular scissors just to do some little tiny trims. Let me see I need to be able to see in this mirror, and I don't know how to do this. With you guys, so hopefully you can see what I'm doing, but I have to pay attention. So I don't want to cut my eye now. You could keep going with the razor if you wanted to, but I'm doing like cleanup work here and I really find that easier with the scissors. Just go slow, be careful. I'Ve got fibers all over my face. I hope you guys are seeing a little bit of this. I guess I didn't look over to make sure I was in the camera anything else you guys can do with a scissors like this. Is you can do some point, cutting I'm not great with scissors. So I'm just going really slow and then, after I cut some I'm playing with this trying to see how it's gon na lay because nothing will grow back. Synthetic fibers are very, very uncomfortable when they poke you in the eye. All right, I need to get a makeup brush and get these off my face hold on all right. So next I want to try to work on some of this and I want to work on this curl pattern. So I am going to use a bigger hot airbrush and I'm just going to kind of see what happens and if it's starting, what it's gon na. Probably end up happening is I'm going to straighten this a little bit? Um relax this curl pattern and this wave a little bit and it's really can't be avoided when you take heat to a synthetic wave, that's just what happens! That'S why I'm not a fan of curly or wavy synthetic pieces. I like straight because they're easy to maintain. You do have to take heat to heat friendly, wigs periodically. You really can't avoid it, and I haven't really figured out how to do that without altering the curl pattern, which you know. If you get a curly or wavy piece, you don't really want to alter the curl pattern, all right, so I'm just getting like. I said earlier boy I haven't had my work cut out for me with the hair in this bathroom um. Like I said earlier, I want to get it a little damp because I think that works better, alright. So now - and I do want a little bit of lip here and I may actually need a hot something that gets a little bit hotter and I'm probably gon na end up feeding some of this up, because I don't want this video to be an hour long. But let's just see what starts happening over here and then we'll go from there and see these don't get very hot. So I'm trying to make sure I'm warming these fibers up over here so that I can get some lift they're. Definitely moving nicer now, yeah, I'm afraid that this is just not going to be hot enough. So let me switch up my hot airbrush and then you can watch me at a little bit of a faster speed and get a sense of what I'm doing all right. I'M in a voice over this part, it's so complicated to find music that doesn't get you in trouble with YouTube. So, instead of putting music here I'll just talk to you guys so, like I said earlier, you can use a hair dryer and a round brush. If you don't want to purchase a whole bunch of tools, if you're good at that, that will work just fine hair dryers can get quite hot, but here I'm holding it up. You need to hold the fibers till they cool a little bit and I'm probably not holding it nearly long enough. Just because I'm trying to manage my time with you guys, can you see the other side, it smoothed out some and it's got some lift. So this is absolutely working, it's just a matter of time and learning techniques that will get you what you want so now, I'm flipping it to the other side. I'Ll talk about that here, I think in just a second okay. I wanted to come back and tell you guys something that I was just starting to do so, because I want a little bit more lift over here, which I also think will help on the top. Here I want I'm going to take the hot airbrush, I'm going to do it the opposite way that it lays so that when it comes back I'll, have some lips a lot okay, so the fibers are hot, warm and I'm gon na just sort of let it Kind of cool going this direction so then, hopefully, when I come back the other way, they will have some lift. Another option would be to take your hair dryer if you have a cool shot and spray put the cool shot on that fibers and cool them off faster, all right, so now get them back the other way. I definitely have some left over here. You know what just occurred to me. I didn't take it before picture. Oh darn, oh well, that's! Okay! It is what it is. I'M really upset, though that's okay. So now maybe I can get a screenshot from my review now. You can see it has straightened a little bit, but that's better than the curl pattern that it has so now, let's take this side and try to get a lift. So I'm going to take some of this hair and I'm just going to redirect it the other direction with the heat, so I'm just gon na speed it up real quick here. So this is only one example of what you can do. You can take a flat iron to this there's all kinds of ways you can take heat to this. Whatever works best for you is what you should do, I'm just giving you one idea here: okay, so I'm still in the cooling process here I don't know how to speed up a part of a video, so I had that you saw me reach to the camera. I had to stop it and then start it again, so I could speed up a little bit of that section. We'Re going to be here forever, you guys, if I don't do that, all right now probably could have left it sitting there a little longer, but for the sake of time, if it were you guys working on your own wig, I would really make sure that it's Cool all right look at that. I think it looks so much better. I mean it's definitely still has work to do. I still have to kind of manage these bangs. It'S like I don't know. What'S going on. I have them right and then suddenly they're too long, but I really think it's looking a lot better. Don'T you guys think it's looking a lot better and it does shed, which I did I think I talked about in that video um budget friendly wigs just shed. That is just the reality. Maybe some don't but most of the budget friendly wigs I've ever gotten do with some measure of shedding. I really don't think it's excessive shedding, but it's a fact: okay. So I'm trying to decide if I even want to take a hot comb to that top section or not, because now that I've gotten a little bit of lift here, this doesn't look as poofy. The problem is, there's a big plastic piece in here, and that makes it a little poofy, but because I was able to get some lift on the hair around it. It'S not so bad. Can you guys see him getting all sweaty it's getting hot in here? Okay, I really think it's doing a lot better, so what I would do is, I would just keep working on it a little bit until I think that it looks natural. I think it's pretty close to Natural I've relaxed those waves a little bit, but that but they're more symmetrical and they're, not as funky and nobody's hair, is perfect on both sides. So I think that's a huge plus the bangs are the one thing that I think I just have to keep working on, which is really hard to do on camera. So I'd prefer just to kind of call it a day, and hopefully you guys saw some of the things you were hoping to see. Let me just talk about the hot comb. Maybe I'll demonstrate it just a little bit. This one was going to be an experiment. Anyway, I didn't know if it was going to work, I'm just uncoiling it um, because I'd never done it before, but I do see um in the videos done by uh the kind of the women of color community. They use hot Combs all the time to to make the top look really flat, and I don't know if it is anything because of something like this or if it's just to make it look more natural. You know our hair tends to be a little poofy around here. Like we often look Caucasian women, I'm really trying not to be offensive. I hope nobody's offended Caucasian women um. You know like to get lift they round brush their hair. They try to back comb their hair and get a little lift on top and I think in the African-American Community, the more standard style is a lot flatter on top, so they use their hot air, their hot comb, to get that flatness. So that's what I was thinking might work on this, so this hot comb has a temperature setting on it. It'S not it's just uh. I think it goes from 1 to 20.. I'M not really sure what the numbers stand for. So I try to keep it around. 10 and see if that'll work and then it's got an on off button and a little stand and that's basically it so some ways and it's still heating up, because it's still flashing but some of the ways people use it. You can just use the comb side of it if you want to, and you just sort of press down or you can use the back side as well. So if you don't have a hot comb and you have a curling iron, try that with a curling iron use, because that's essentially what this side is like and just you know if you've got some wigs that have some poof on the top and you don't like It just try that now, because this has that plastic piece there. I can press on this and I'm not. I don't feel even warm on my head, so this is working just fine, it's not going to burn me. I mean I can't even feel the warmth, but all I'm doing is this little poofy plasticky piece, I'm just pressing on it, just trying to make sure that if there's any way, I can Tamp down that poofiness that I I'm doing that. So I think, between getting some lift on the sides and potentially I'm not really sure if it's doing anything, but I do think it looks so much better and I really think it's because I got some lift on the sides. But those are all techniques that you can use to try to work with your wigs, whether they're more expensive name brand or budget friendly wigs. If you're struggling with something about them, I really think there's ways to fix it. Cutting into bangs using hot airbrushes to relax to you know, do something with the curl pattern, with the wave pattern. If it's straight, you want a little bit more of a curve under higher brushes. Can do that for you um steam. I didn't show you steam in this video, but I do have my steamer just in case. I needed it and I don't think I'm going to, but if things are really challenging, you can always take steam to a wig. That'Ll, really uh fix some fried ends, it'll straighten away. Let'S say you have a curly wig and you don't like the curl pattern or it's an old wig and the curls are starting to look really bad and you want to see how it would look as a straight wig. You can straighten it with heat that'll, be something I'll do in a future video, but I don't know if you guys can tell. Hopefully I can get a screenshot from my reviews, so there could be a side by side, but I think it's looking so much better. It'S definitely moving better, that heat really helped and to move a lot more naturally as well. So that's it you guys. Let me know if you have questions I'll link everything I can link in the description below, including some of the videos I mentioned earlier. Don'T be afraid to play with your wigs if you are on a budget especially learn some of these things, so that you can get some budget friendly wigs and make them look fantastic. At the end of the day, though, if I'm not, if I wasn't able to get this to look the way I wanted it to look, this is a perfect wig for headbands bandanas hats. You can wear it as your hat wig in the winter and put your winter hat over it. You can wear it with a baseball cap. You can tie a bandana around it. I showed that in my review, like kind of like the biker chicks, do you know like a uh? I don't even know what it's called Uh do-rag um. You know, I think you can make them work. So don't feel like All Is Lost it's if you've got room to store a few wigs put them in a plastic baggie, and then you've got some wigs for times when you don't want to damage one of your really good wigs. If you're going to be out on a boat or something - and you don't want to take any of your regular wigs, you could throw a hat on this one and go out on a boat. You don't have to worry about it, so go to a bonfire with it put a hat over it. I mean, I think, there's some ways to make it work. If you can't, if none of these get it the way, you want it thanks for watching you guys I'll talk to you soon, foreign


Comments
Gingeroo: Excellent tutorial. We feel SO much better and learn, when we do things “TOGETHER”☺️ Thank you (again) Denise
Stephanie McWilliams: Gorgeous curly wig you’re wearing in the beginning - totally suits your gorgeous face and dimples! Loooooove!
Katherine Mattox: Both of these shades of red look so pretty on you. Thank you for the tips.
Cindy Small: Thank you so much for this video. I learn so much from you. I’ve got several wigs to trim up so this was very helpful! Hope you have a good rest of your week.
Janis Huey: Girl, you are stunning in Girl Mono! I’m blown away by the color and style for you! The tutorial? Priceless! Thank you!
Jean Jacobs: Greetings Denise! Thank you for showing us the process of fixing her! It was so helpful. Love and blessings, ♥️
happy 1: You always do a fantastic job. When it comes to showing color of hair...the best.
Di Hinegardner: Excellent excellent tutorial! I simply love watching your videos bc I learn so much. I thank you from the bottom of my heart. PS. I’m a lipstick addict. So many colors you wear I really like. Any chance I could find out brand and color. The pink color you wear a lot and the bright color you wore in the recent video you were reviewing the dark red short cut. Thank you so much!
R Q: You Look absolutely beautiful in that color! Thanks for all your help videos
Anita Ward: That wig on your intro is gorgeous on you. Beautiful just beautiful.
Skye Diona: Thank you so much for ALL your videos! You're so informative and helpful for us newbies
Clara: Looks so much better especially with the lift you could put some spiral type curls in it using bendy foam rollers in different sizes I think that would look gorgeous
Jacalyn Squeglia: I honestly liked the waves on the 2nd wig!
Karen Fiddy: Great job, love your personality .. thanks for sharing
LucyEatsPlants: I really appreciate this type of video....so much real practical advice and guidance. You are looking very well!
Michelle Diekman: Both are Beautiful on you, they are so real and Natural. Of Course Girl Mono Is my Fave!!❤❤❤
Charlotte Forrester: Great tips! Love your videos.
Jacalyn Squeglia: You look beautiful in that color!
Tamara Kieper: Looking adorable!!
Marcia: Thank you for this video. I think you have some scammers commenting on this video. Idk why they have nothing better to do but try to scam people.
Mary Pink: Hi can I ask you a question as I’m very new I have bought two top billing pieces and the lace front keeps fraying after a few weeks even though I’m being very carful is this normal as there not cheap..thank you Mary from England xx
Gingeroo: These solicitation/ai comments (lower below)are ABSURD and I am SORRY you are forced into dealing with them Denise. There should be a law….
iLura Gen: Good grief that wig looks real the one you're wearing right now at the beginning I thought that was your real hair
Carlie: The curly wig that you have on, looks great with that lift. I did watch your video on how to get that lift with my steamer, but it did not work. Why does your wig look so good?
Angie T: it falls 2 much in your face. Maybe u should trim the 2 sides shorter.
DontStartwMe: You look like Elizabeth from The Waltons .. grown up version tho ... I would never have guessed you could fix that wig soo much. !! Wow. It's sooo much better !! I would totally wear it.. but when you first put it on .. I would have chucked it.. really makes me rethink wig styles.. well done !)
Victoria Lang: How about using steam ?