How To Make An Invisible Part Wig With Asymmetrical Bob 1St Part On The Cgtv Hair Review
- Posted on 09 September, 2012
- T Part Wig
- By Anonymous
Learn how to Complete Your Invisible Part and See the Final Look of this Style Here:
http://www.youtube.com/watch?v=JALlwrD...
CGTV
CG TV
CAROL GLOVER
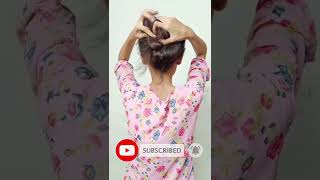
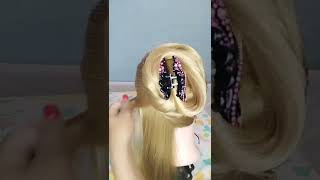
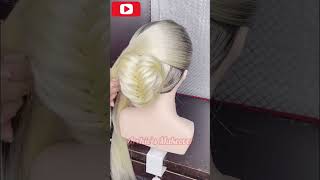
Hello and welcome to the sneak corner here review. My name is color top and I announce one all of curls new, her reviews, British Li. What we host long about today is the true and real, invisible part. Wig boo, boo, that's right here! It is right here. I'M going to show it to you guys, if probably going to the video tutorial, and it is salt beautimous. She cut it into like this bob that has one shot short one side, long with some deep layers and look at this. It is an invisible part. On top of a week, which means you ain't got to worry about no glue gun on got her okay under her. Does she used? Was the executor number one by Milky Way and she lifted it, and it basically looks like a number two with some number four highlights. This thing is a beauty must, and it is the best way to go now for doing your invisible horse. Okay, so, like I said my name is color tops. If you want to see more of me and more, what curl is doing check out the C corner top show you guys means and wellness trust me. You will enjoy it now. We gon na gon na edit video tutorial seikar bye-bye. Alright, we're gon na start out doing they're quickly put in a shower cap, make sure you put on your fitted cap over that. I prefer to use the proclaim fitted cap, we're going to use the bandha wheeze by liquid gold. I'M going to be trying this today so you're going to make an outline of where you want to put the stocking cap, and this is the only part that you're going to use the rest of the excess you're going to cut. So if you're familiar with full lace, wig if you're familiar for silk top, it's kind of like what you're creating you're kind of doing like you're, a homemade, silk top you're going to blow-dry it so that it'll stick to it. If you need to put more on just do that, you can put it right on top of it because it'll see-through and then the little spout or the tip for the liquid gold is easier than the brush, but this stuff is still so sticky and messy. Sorry, I thought I was recording that part, but you see what I did so all you're gon na do is just cut around cut around with that stocking cap is and just cut out all the excess. The part that's not glued down. Now we started doing our tracks and you're just gon na layer, your tracks as usual bit by bit, I'm not showing you the cutting process and the gluing just for the sake of time. Only what you're not seeing is me cutting the track and putting glue on it, which you probably don't want to see: anyways and you're just gon na layer, your tracks, as so these the hair that I'm using it's the XQ it's by it's the x-cubed brand by Milky Way - and I honestly it worked for this, but I wouldn't buy the execute brand. I did another wick with the rain by Milky Way, and I really liked that my favorite hair, if I'm ever gon na, buy it from a beauty supply store, still is bobby boss. I love the bobby boss hair, but I wanted to try to use something different. A little bit cheaper, just as I experimented with this way, because I've never done this before so this is my first time doing a look like this with an invisible part on the wig, so I wanted to get good hair, but I didn't want to he's like $ 300 for two back there, I'm probably being that the excuse double is not single left, I'm think I'm doing like an inch and a half apart, probably for track and as you can see, I'm just going from the part I'm just going kind of like from The back of the ear, I'm purposely not doing the sides. I find it better to do the back more so and then fill them with the sizes. I need less hair on the sides than I do on the back. I think I have a bigot. Some people say I do some people say I don't, but I find that when you're filling in from the back of the head, it takes way more hair and so, instead of bringing those tracks all the way around and just having a whole lot of hair. In your head, I figured that for me it works that I feel in the back part first and then fill in the sides. If you would like to try this method, i suggest should give it a try. It may work for you too. It gives it more of a natural look, it's still it's still as full, but it's not like a head big. It'S just not full of wheat. Like a pat on your head now, I'm gon na start shaping it. You can either wait to do your do all of your tracks and shape it, but because this is my first time doing this, I want to shape the back first without any excess hair in the way. So I wanted to start getting my angle and everything, because I'm doing it one side long and once that's short and I want the short side to kind of be rounded into the laws. Now I know with this. It does take time. I mean this video I've sped it up quite a bit, but this does take time. So take your time we are cutting. You know. I tend to think that I do pretty good hair and pretty good weeds, but I'm still not a you know beautician, but it doesn't weather if you're a beautician or you're just naturally good at hair when you're cutting on your own head. It takes time, and it's not that easy at all, so take your time, you know and just get it to your liking. This is just an example of the way I did it. You know you may want to cut like this. You may not want to feel like this, I'm doing layers and everything, but you have to find out what fits best for your head shape. That'S one thing: I've learned for your head, shaping your body type. You have to figure out what works best for you. I really like using razors. If you are familiar with using razors. I suggest you do that it gives it more of a sharp look to me at times. Some scissors does and it's quicker than scissors, because that razor just just zap it away, but you have to be familiar and good with razor. You still need your scissors to trim up and help you, but if you're good with the razor, I would say, go ahead on and do that. I love using the razor I'm just trying to get a formation in a shape. Just to kind of you know get an outline and then from there I'll kind of create the final look, but I'm also using the razor for thinning the hair, the razor comb presenting the hair out. What I figured out later on this episode is, you can do the same thing with the other razor the motor razor or the electrical razor. As you can see, I'm just adding layers to it to my desire with this type of style layers, just seemed to add more of an edge and make the style more fierce and I'm not doing light layers, I'm doing pretty deep layers. So that way, when I curl it there, the layers are very defined and it just shapes the hair like perfect, and even though this video is sped up, you can see like how much time it takes. It took me a little while to do this stuff, but it was worth it so now, I'm going to the other side now, on the longer side, my layers are not going to be that heat. So let me clarify that my layers are more deep on the shorter side, but on the longer side, as I get to you know, my shoulder on the layers are more light, but from the short side, all the way to the back there it's deep layers, but The long hair hanging is more light layers. Now, here's the thing and the great thing with doing it and weave you can even see vinas my first time my layers aren't that even I think, if you look in the back, but once you curl it, you really won't be able to tell I just like. I said did another wig and I did a much better job at doing it in the back just with using the mirror and also using the electric razor, but, like I said, if your layers aren't perfect and if they look a little choppy, you don't want them To choppy, that's why you want to use the razor comb, but you know if they don't look too perfect, it's okay! Once you curl it, you won't be able to tell a difference. Excuse my bra strap! You guys I'm just saying that right now, because they're going to reveal themselves throughout the video they just want to be seen, so I apologize for their rudeness. Now I'm going back and filling in the sides and if you look even though this video is sped up, I you can see like. I don't need as many tracks as I did in the back like in the back. I used several tracks on the sides and not as many as all, and I love that I've figured this out because it gives it more of that natural look and it's kind of like the way it is with care. It always seems like the crown. The back area is so much more thicker than your sides in the front for several people. So it's just. I guess it makes it look more natural and not heavy. As you see, I'm using my scissor some with this liquid gold cause, it's so sticky and messy. Oh my gosh, so sticky and messy. I like it cuz it's clear but and I'll just say this in this video I would prefer to use. I prefer to use just the regular black, the regular black bonding glue. I also found out that it holds just a little bit better. Ironically, I'm looking cold and maybe it could be. It holds better because of the cap. Maybe the liquid gold does better on a scalp and a cap, but for a cap I think I think for me it seems as if the black bonding feels better. Now I know there's the white bonding glue. I would have to experiment and try to use that on another style and see how that works cuz. I know that dries clear as well, so I'm getting to the end of layering my tracks before I get to the invisible part, and so in order to see how I do the invisible part and finish styling, my hair, you have to go to my new talk, Show the secret talk, show airing now on YouTube and you can see the final product and how to do an invisible part on a wig without cutting the stocking cap. All right check out the C corner. Talk show to see the final product
Comments
CGTV: I just looked at your vid, and your wig is very nice and natural looking!!! I was so excited when I thought to do this to my wigs, and just had to do a tutorial. I will always do my quick weave wigs like this:)
Mark Mino: how long does the glue last? do wefts ever come out from the cap? Thank You :)
CGTV: I just checked out your vid, the wig you created is very nice and natural looking!!! Yeah, girl when I thought to do it, I was like I have to post a tutorial. Because this method is sooooo convenient, I'm sure you agree:) This is the only way I will do my quick weaves from now on:)
CGTV: Hi, Im glad you are excited, I felt the same way when I figured out how to do it!!! lol There is a link at the end of the video and there is now a link in the description box. Thanks, and Blessings:)
Pana_Montana RN: I loooove this method I def will try it!!!
CGTV: Thanks, and I most definitely will! :)
Monique Blaker: I could not stop laughing at the start of this video lol lol. Great video tutorial. Keep them coming.
So SoftlySpoken: Thank you for this!!!
CGTV: Thank you!!!:) Check out some of my other vids if you haven't already, just did a Parody video, and there are more episodes to come soon, Blessings:)
mrsmyles1: Awww.. do you make them for other people?? Lovess it!!
CGTV: My local beauty supply sells the liquid gold in a tube. Go to 1:23 and you will see what the tube looks like. If you can't find the tube the regular bottle it comes in will work to. I just liked it because it was clear. Hope I answered your question, comment or message me if you have more.
Mone Foote: How any packs of hair did you use? Also do you think that it would be a good idea to use white hair glue, I cannot find the one you used?
ladeesunshyne78: You are so silly! I love it!!!!
Ria: OK. Once I fast forward, things got better...thank goodness! Lol
CGTV: Thanks, Let me know how it turns out for you:)
HeKilled Me: I make my own wigs all the time!I think ur Dope and funny so F the haters!
Unknown: Can you PLEASSE do something for natural hair? Like I want to start wearing wigs but idk...
Hands of Hunny: how do you lift a synthetic wig
Lannie Thomas: Lmao. Love it...
kennedee w: You talk just like my cousin she makes me smile
terria smiile: Thank you
Sarah H: okay...I got excited but now can't find the second video - I'd like to get a clear look at the part and how it turned out :-(
Zouniia: All that fuss for hair! just let it grow let it grow let it grow!
Carolyn Brewster: I hear this song in every hair video( the one in the beginning)
GhettoNubian1: sooooooooo I just set here for 13 minutes and never saw how you did the invisible part ooooooooookay
ChassyDime: The video was good but i just spent 13mins eaiting to see her do the invisible part...waste of my time.
emetovia: The c coner is ozone
CGTV: Lol, thanks:)
sarajay jones: beautimous lol
Chanel Cheadle: Thanks
BlackBerri CanBraid: lol...really...hilarious
earline Smith: Your are so cool
Mutima Wange: lmao you crack me up...with that lip smacking hehehe
Elexuas F: I've just wasted 13 minutes and 51 seconds of my life -_- but the good side is that i know how to make half of a wig :) (sorry but a waste of time)
Brooklyn Nadine: color top hilarious
michelle strickland: Lose the voice...please! !!!
Dymondzzzxx: Work it color toppppppp
aw heck: TAKE CURR, BUHBAI. i friggin' love you. i bet you'd be so fun to hang out with, all the time. hahaha.
Laura Pascal: you are so funny
Britt: She too funni
Lylaknowsbotique Danyiel: how is color top carol glover
Britt: Heck nawl she said "color tops" was her name
Tionna Armstrog: bold
Ria: Why are you talking like that? Lol. What!? You are going over board with it! Sit down somewhere..you are doing the most!
Lia Kearney: Why did you block me on instagram I am real sorry
Carolyn Brewster: And throught out the whole video
Ashley Brown: Why so ghetto I couldn't get past 1 minute of this
Legacy28: i find weaves and tracks and stuff stupid
Audrey Neal: We want carol not you color top
Scorpio Goddess: She is so ghettoo. Reminds me of people in my high school. Ahh...
Tar Sha Hickmon: yo voice had me laughing at work
Santana SexMachine: i dont find the voice funny at all
Lps Mako: R u bald ??
earline Smith: I luv u
Marlysha Narcisse: heyo
Cedric Hale: Hey. Im. Liberty
Nyah Edwards: Hur