Bohemian Wig Cap Tutorial Part 2
- Posted on 21 June, 2010
- T Part Wig
- By Anonymous
http://www.barbaydian261.com/ visit my New website for unique glass loc beads and other trinkets
THANKS FOR SUPPORTING BLACK BUSINESSES
the Closure and results
PS I GOT A FRIEND TO MAKE THE EARRINGS FOR ME ABOUT 3 OR 4 YRS AGO NOW
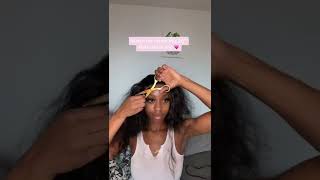
You forty-three minutes in and I'm at the crown is basically starting to shaped like a horseshoe, so I'm just gon na keep going around in this circle. Half circle all the way to the top, and I went back to look at my old one to see exactly how it was close. This is precious right here, so damn so fuzzy. I can't even make it out so what I did with this one. I basically I just put two tracks and I bought them against each other, and that was that so I'm just gon na continue to lay my tracks in a horseshoe, I'm probably not gon na bring them all the way up to the front. Until I get like halfway through and this song closed up, so I'm gon na, do it like right back here, horseshoe going back alright, if you guys can see um so like right back here and have the horseshoe going back untied get in the middle and then I'Ll bring it up to the front and close it out, so I'm gon na get back to my music and get back to my music and finish this up. Yeah, nobody gets rich without me. You talking about me, you, okay, so now that I've done in my entire head, I'm up to the crown - and I am pretty much ready to do my closure so pay attention. This is gon na go kind of quick and I'll. Try to walk you guys through it right now, I'm going to measure back how far I need my track to go, I'm measuring one side and then I'm folding it over. So I can double up and I don't have to measure each side because it's going to be the same length on both sides. So once I measure - and I double up I fold - I cut that and then I fold that part in half and I cut it to separate the track. So now I have two tracks. One for each side is going to be the same length because I folded it and I measured it against itself. So now I have one track for each side of my closure. All I need to do now is apply some glue onto the tracks and I'm going to be ready to close up the top of my bohemian wig cap. I'M just making sure both antrax have sufficient glue on there, because I want to make a mistake and have to go back and apply more glue. So it's always nice to make sure you have enough, but not too much good one there right now, I'm just putting on both the tracks. At the same time, that's gon na make sure that I have it centered and everything is just gon na go quickly and smoothly. It'S going to put a little bit of pressure on there and to make it dry a tad bit faster, I'm using my blow dryer to speed up the process, so pressure and heat is gon na make your closure go, run really fast and really really easy. So now I'm just blowing it to make sure it's nice and dry. Once I press on there, I can feel if any of the glue is coming through and touching my fingers. That'S pretty much how I closed up the two weight caps that I wore in most of my videos. So that's my closure, you guys in the tutorial, because I had to go to my mirror, um, how I got it to be shaped like this. What I think was to do now is hold your head off to the side and cut straight across when you do that you are basically creating layers, so whatever here is a pair that you're cutting, why should cut it straight across the higher up? It goes when you shredding your head up. Is gon na come down any later. It'S pretty simple! Okay, so once you're all finished with your wig cap and you have it all so anyone in cut - i suggest sleep in it once lord i'm of mind, when i think for a couple of days, i didn't take it off. I did that just so, it can form to my head fully and i have a lot of dread like bundles back hair, so I needed it to form exactly to my head. I left it on, like I said for two days um. It was very easy to pull off to peel off with the shower cap, underneath once you take it off, and you have the shower cap, it's going to be stuck to the inside of the wig cap. All you have to do from. There is rip the shower cap out: it's okay! If you still have a little bit of plastic stuck to the cap, it's not gon na harm or bother, interfere with the way you're all done and you're good to go. So you should be set with your new wig cap and I hope you guys are enjoying it um. That'S the technique that I use. You might have a different way to do it, but that's what I use. I hope you guys enjoyed this tutorial and it's been a long time coming, but finally, it's hair now I'm going to just show you some pictures of this weight cap and the other one that I had the other one that I had over the time. So hope you guys enjoy. Let me know what you think leave any comments questions. I hope it's not different questions, but if it is I'll, try my best to answer them for you and um. Let me see what you guys do it you end up doing a video, I'm actually a wig cap like this. Let me see what it looks like. Let me see if you have any other techniques or tips that you know I probably didn't use in mind and we can learn from each other. So until next time you guys keep rising is beyond me.


Comments
C Boone: Absolutely loved it! Thank you for posting this because this is exactly what I wanted. I did it last weekend, howbeit without the shower cap and it came out great! Got a lot of compliments too. But--- YOU look absolutely gorgeous!
Latasha Jadtar: Loved it! When I made the first one I made the mistake of splitting the track which I won't be doing with the next wig because I love the fullness and the curl definition of yours. As far as the closure I like it. I was wondering how you got that parted down the middle look. If everything goes as planned I will be making mine tonight.
Qweety Lox: Hi! I would like to thank you for posting this video. Because of your hair I went out and bought this hair and made my own Bohemian wig cap. I just combined your method with the semi weave method in Twingoddesses video and it came out beautiful! Thanks again!
Dollydagger Lioness: Beautiful! I am natural and the style is the same as my natural hair,but I want to do this style as a protective style this weekend! Thanks for sharing....Be Blessed!
9th_Child: I always wanted to make my own natural looking wig and this tutorial is great for me to use because I nave never made a wig, but i wear them.
314gail: I loved the video- great idea while my 4 inch locs are growing out- Thank-You!
sandra jay: the finish result is beautiful, love it. thanks
JKawarr: Thank you for sharing... I know I'm a tad late, since you posted this video nearly 2 years ago!!, but I am about to start on my natural hair journey and looking for all the inspiration I can get for those 'insecure' days!! Thank you :0) Stay blessed
LaTonya Hudson: I made mine & everyone loves it. I can't beleve how easy it was. I used a different brand & it worked great. Thanks.
Chocolate Thick Diva: Lemme just say THANK YOU for showing start to finish and not leaving anything out on this tutorial very beautiful job just earned yourself a new subbie :)
suzieqshair: love it. came out great . wonderful tutorial. may try it and let you know how it turns out.
dadivajr: I went out today and bought two packages of hair and made this wig. I absolutely love it. I did not video myself making it but I did the crown a little different. I am not tall and you would be able to see those two pieces in the top of my head.
PCHYSWEET: Girlie, that is sooooo darn it cute on you, i love it im gonna give this style a go! I hope mine looks as good as yours! lol
Sonja Alexander: You do this better than anyone I've found on Youtube. However, when I did mine, I did my part as an invisible part on the cap and it looks a lot more natural. Thanks for sharing your technique.
suzieqshair: love it. wonderful tutorial. will try it and let you know how it turns out.
classicallyjazzi: Giiirrll!! Thank you so much- you just don't know how much you helped me lol! I'm going through the severe fuzzy stage LOL!
danniedimples: You fooled me, I swore this was a sewn in weave! Loved it!
Princess Leah: i really like your tutorial. i have tried making wigs in the past for myself but always never get the closing right. Thanks this vid is really useful.
Hair Valley: Looks great. I made one. I hope to find time to put it up soon.
barbaydian261: HEY ALL THANKS TO THE COMPLIMENTS ON THE EARRING!!! I HAD THEM FOR ALMOST TWO YEARS NOW AND NEVER WORE THEM!! I CAME UP WITH THE DESIGN FOR THEM AND GOT A FRIEND TO IN LA TO BRING THEM TO LIFE... I HAVE BEEN TRYING TO PUT HER ONTO SELLING CERTAIN THINGS AND I WOULD HELP HER IN ANYWAY I CAN BUT SHE DECLINED ON SEVERAL OCCASSIONS!! :( THANKS FOR WATCHING!!!
blkwoman11: Thank you for this video. Im going to try this style out it look so cute on you.
SoulfulChaos: I like your tutorial the best! Yours looks really nice. Thanks! ^_^
MzBluTrini: love the wig cap.. the style looks great on you as well.
barbaydian261: aAwesome...... cant wait to see it! im debating whether i want to do another one now or not
Nina E: That looks too cute...you go girl!
soulsistahla: Thanks so much for sharing. Luv the cutting technique for the layered effect.
Chastity Loveless: i love love love love love (one more time) love this!!! I'm going to try this!!
EnchanteChante: omgsh. This is so awesome that someone with dreads can change up their style so dramatically. I need to go get me some hair & a wig cap & some blue & try this outtttt. :D
D Row: hey there! i just discovered your video because im starting to train myself on making wig caps, thanks to u!!! so, my question is what type of bohemian curl brand do u use? in the video i still saw the shower cap as you went along. How did you cover that up in the end?
monicaRocksLocs: Hey there! The wig looks great! Might sound silly but I didn't realise it was possible for anyone to make a great looking wig cap so easily - I thought you could only buy them *blush* I noticed in one of the slide show pics you had your photo taken with Mario and Luigi! Question: where was that? :) I have a similar photo actually - taken at the London Expo a few years ago when I was wearing electric blue hair extensions xD I'll have to put it on my videos one day and dedicate it to you!
moody2k7us: Thanks for this! Two questions, 1. Can I use the black wave cap if I am getting a blonde or dark brown hair? 2. What glue did you say you used? Did I miss it because I watched it again and didn't catch it. Also(okay so three questions) how do I cut the back to layer it? Tilt my head back just like the sides or spin it around?
barbaydian261: thank you i had them specially made like 3 years ago now.. wow it has been that long
Ayosjoy: Thanks for the tut! love your earrings where did you get them?
dadivajr: Hi, Watch this every time I make a new wig cap. I love the bohemian look. I have made 3 of these. You do a very good job of illustrating. I could not find the exact brand of hair that you use but Outre Premium Indian Hair, Bohemian Curl works great. I tried the Outre SOL and did not like it. It did not look as natural as the Indian hair. GREAT JOB
lisa2550: Great job!!! I'm going to try this.
barbaydian261: the method i used had to work for me because i have locs.. the density of the curls cover a great portion of the tracks and on top of it and like i mentioned in the vid Im tall so Most people dont see the top if my head to inspect for such details.... ( this closure might not work for short or super conscious people.) I also pull the tracks forward to create a bang which works to cover. They are a few tutorials on here that give great alternatives for closures, invisible and center closures
dadivajr: I really like the look and I enjoyed watching you. My hair is natural and sometimes I like to change up and I started making my own wigs. I have to look for the hair that you used. Thank you
CocoBijoux007: thanks for this tutorial! I will be trying this soon! By the way, you are gorgeous! Your skin is like whipped chocolate or something...lol
barbaydian261: the method i used had to work for me because i have locs.. the density of the curls cover a great portion of the tracks and on top of it and like i mentioned in the vid Im tall so Most people dont see the top if my head to inspect for such details.... ( this closure might not work for short or super conscious people.) I also pull the tracks forward to create a bang which works to cover. They are a few tutorials on here that give great alternatives for closures, invisible and center closures
KnottyAuthor: awesome! this is fun....will have to try one day. thanks for your hard work and your 'fly' earings, lol!
MsNatualTee202: Your vid was in my recommeded videos and I am glad I clicked on it. Your hair, make up, eyebrows & of course all the earrings are..........Fabulous!!!
Sa Lee: This was an awesome video. One of the best tutorials that I've seen...Thanks
Shananty Haynes: U did a good job teaching me how to make the wig Thanks
septemberlove04: You are fabulous girl.. being so creative with other hairstyles and still rockin' your locs. Do your thang girl. It looks so good. I'm glad your showing this... great way to give your locs a break.. But I doubt I can do this :o\
Barbara Davis: Did you cut an open at top between the two top tracks? Love it ! You did a wonderful job
barbaydian261: @chocolatehoney3 it took about an hour to make and the wig lasted over 3-4 months... i wore it on and off during that period.... it was nice to know that since it wasnt sewn in i could go back to my dreads in between and give the cap a break when ever i wanted to
woodenshoelane: Just lovely young sistar! I am an older woman ( my daughter about ur age). I did a big chop few months back, but my hair is so slow growing in. I have bantu knots right now, but sometime I want a different look, so I will be making this wig . I didnot want a sew in, braids, and I am allergic to some of the latex glue products, tired of buying expensive wigs. You are very talented, Creativity is prevalent in black culture which is why we are so hated on the planet. Peace
TwinGodesses: Will be trying this! Thanks sis
MsPatsy20: You hair is very pretty. Thanks for the helpful tutorial. Where did you find your earrings?
Mzchin Lee: @barbaydian261 I'monly 5'3 I like this method because it's easy and simple to do. I'm still going to try this method due to fact I have curly hair for summer, so I hope the curls can cover the track. Thanks for your response :)
SEXYPHILLYMOM40: FABULOUS!...THANKS FOR SHARING!....I CAN'T WAIT TO TRY THIS!....YAY
Dee Renee: I really enjoyed part 1 & 2 of ur video. The sound was fine because I still got the concept. I also have locs and for about the same timeframe. Thanks for sharing.
VintageFlamingo: Hi gorgeous im going to try this as a projectie style. Use to wear my hair out alot
Verlene Howard: Love the fullness of the wig.
Gemtrendsetter: I love this wig!
whoiamisme: That was awesome. The only thing I didn't like was the closure, I'm going to have to shop around for a vid that shows how to hid it. Love your locs too, by the way. :)
ajthemodel84: ur so beautiful. and i love yor tutorials. thanks for this idea. and plus its easier to watch someone close to my complexion and face structure to see how a style will look. good job.
barbaydian261: Girl... you just dont know how many people want to take these off my hands...lol thanks for watching.. dont be a stranger!
tishushu: This is gorgeous!
chocolatehoney3: how long does that wig/hair last? How long did take you to do this from beginning to end?
4theluvofcandy: i dont know how to do hair but u make it look so easy am going to try that! thanks
barbaydian261: yes! i think i broke that down in part one!
SEXYPHILLYMOM40: AND THAT WAS A GREAT IDEA FOR A CLOSURE SHARING ON FB LUV IT THAT MUCH!
diamondsnPEARLS: This helped me alot! THANKS
barbaydian261: you are sooooo welcome girly... let me know how it turns out...PICTURES!!!!
Alvie EK 143: @barbaydian261 thanx so much girl! I've been waitin for this but I won't complain cuz I luv ur vids n ur channel so I really appreciate u even doing this tut! <333 keep em comin much love pece
Tiffany5: Excellent job on the bohemian hair wig
barbaydian261: @jayyny1 Aww man that is wonderful to hear!!!! I wanna see it when u done
Beauty by AnaBel J: dahlin! its about time u did this tutorial! lol veeeeery well done. im def guna make one dis wkend. i have a suggestion for the closure. u cud do an invisible part on the cap itself & make a slit in the cap where ur natural part is and add combs on each side so it looks a lil more natural or u can use the technique that MakeupMaverick used. either way u still did an excellent job. wen u go to BIM tek nuff pictures! lol
Nyala Nan: So pretty!
Ash Wednesday: Thanks for the tutorial!
Ash Wednesday: Thanks for the tutorial!
Linda Silver: Very pretty hair. Do you use any kind of pins to hold the cap onto your own hair for safety purposes??
jJoNah916: I love it! GReat Job
TheRealVanityRose: You are soooo pretty. I love seeing my fellow darkskinned women. You are gorgeous hun. && that hair looks wonderful on you.
Clove Robbins: best tut! i about to try a weave too and hope it turns out perfect. Thanx 4 posting, this helps.
Time_is_fire: can you sew on the cap once you remove the shower cap?
Karm La’Quinn: love it!!
Twondonedidit: Wow great closure idea
TphiG: I need those earrings in my LIFE! @Barbaydian261
Lupyzboo: 5'11? Me too! Good to see a fellow tall sister doing her thing :)
barbaydian261: @laydiiblessyd thank you doll!!
barbaydian261: @ken21don1 lol.... thank you!!! I cant wait to see the outcome!
hellohey000: her skin is too gorgeous!!! i liked the hair too
My_Guy_Ty: When you did your closure, how did you hide the fact that you glued the last two pieces so close together? Did you have to cut the cap at that closure? I like the way you did the closure, just wondering how you hid the glue.
IncpetionKickJutsu: Flawles wig tutorial. Thankyou
Keisha Diane: Love it.
chynagurrlchalise: I have a question about cutting into layers: do yo lay you head to the side in about a 90 degree angle, and then cut straight across? (I hope that this is not a crazy question, but I don't want my head to look crazy, lol!)
barbaydian261: thank you... i wonder if i can still get into a new one 3 yrs later
barbaydian261: thanks i got a friend to make them yrs ago
Sparkle LaBelle: yes it looks great!! but you can do a lot of different closure parts that are invisable. especilly with curly hair!!! I dont know if itll work with locks but I use a swimming cap instead of shower cap. LOL its wierd but it works great!!!
barbaydian261: i used to do sew ins but these lasts soooo much longer
Sonja Alexander: @blacklily624 No, I didn't cut the cap. All of my hair was hidden and it looks natural and great. Make sure you have the strips for the part really close together so it looks like its coming from the scalp.
AKIYIAKELLY: You looked really pretty :-))
Lovely Sunshine: lol, i was so confused for awhile because sometimes i saw you with locs and other times with curls. i never thought it was a wig. :) you look good rocking both styles!
natasha Irby: i love that look im gonna be trying it today ...do you like brush it out or some thing? i hope some one didnt ask this question already
AKIYIAKELLY: great video thanks for sharing :-))
barbaydian261: @1KITTYC I get this lady to make them for me!! i had the ones in this vid for about a yr now and never wore them... thought they were a bit much!
It's Simply Yanna: Love this! And u r so beautiful! :)
barbaydian261: its been quite some time since i did this... check out part one cause im pretty sure i included it in that vid.... let me know if you dont find it and i will try to recall!