Razor Pixie Wig | Tutorial
- Posted on 10 January, 2023
- T Part Wig
- By Anonymous
Felicia Inspire
Purchase Your Shears Today!
---$50 OFF Signature Shears set---
Coupon Code: Cutup2023
https://www.feliciaslater.com/product-...
Shop Wigs www.directorscutstudio.com
Scheduling Contact 803-766-0980
Location
Atlanta, Ga
South Carolina
Let's Connect
Instagram @Feliciainspire_
Facebook @Feliciacosmetologistslater
Facebook @Feliciaslater
TikTok @FeliciaInspire
Business Inquiries
Items Used
Empire 27 Piece
Dome Caps
Mannequin Head
(Comes with T Pins)
Wig Making Tripod
30 Sec Bonding Glue
Razor Comb
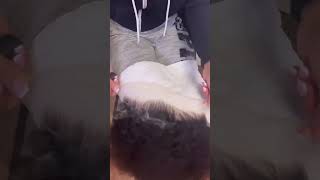
Hello, you guys we are back again today with a razor cut. Pixie wig stay tuned; okay, so I'm using Empire 27 piece, quick, weave, hair and I'm using two boxes to achieve this style. I found it in the beauty. Supply store, okay, so a lot of y'all be asking me about how I get these tracks flat like this. So what I do is I flat iron the tracks I flat ironed, all of the one inch in the 27 piece hair. You don't have to flat iron. The third bundle or the second bundle, but you will flat iron all of the one inch right now, I'm going to use the plastic cap that came in the pack to protect my mannequin head and I'm using a size, number 22. you're going to get the size. That'S going to be suitable for your head, okay, I am using a dome cap and what I've done is I have combs sewn on the inside of it, because y'all know that don't count don't come with Combs. So all you have to do is get the comb attachments to go inside of the Dome cap. You don't really have to do this, but this is a you know. Another way that you can secure your wig on your head, but most of the time I don't use them, but I like to have them so now all I'm doing is taking my t-pins and I am securing down the wig so that I know where it needs To stop and start and make sure that you line it up where your natural hairline will be so honestly, this takes being able to eyeball where you think that your hairline would be. Because, honestly, you know you have to make sure that when you put this on, it's no going back so make sure that you put it on there in a position where it lines up as if it was an actual human head. Okay. So now I'm going to start laying down my one inch tracks. Remember that I am using two packs for this, because this Empire hair isn't the best of quality and it's thin as ever. It'S so thin y'all, I'm not used to using this topper hair that I don't usually use the empire for any 27 piece Styles, because it's so thin. But I love this color, so much so just kind of have to wing it and see where it goes. So. Yeah go ahead and lay down those tracks. This is a new. How I'm laying these tracks! You can go visit any of my other videos, I'm going to speed up the video and I'll be tapping in. Please make sure that you like comment, share and subscribe to my YouTube channel. If you love this content, please make sure that you come back and support okay. So right now I'm going to be creating The Sideburns for this and technically at this area you would be at your temple so on a human head that will be your temple area, you're, going to use your two inch tracks for this area because you don't want It to be too short, then, when you get ready to do your sideburns you'll be out of luck, so all you're going to do is just do maybe around two or three, maybe two or three layers of the longer inch and then you'll convert back to your One inch foreign identical thing on this side, and maybe you can see it better on this side so again, this is where your ears would be normally on a human head. So all you're going to do is just use your two inch track to put on The Sideburns, so that it'll be long enough. I would like to thank all of my loyal subscribers and welcome to all of my new subscribers. Thank you guys so much for making this possible okay, so now that you're done tracking both the sides. This is how it's going to look, and that is your two inch on both sides. Now you're going to track from side to side using your one inch. Okay, so now that you're done tracking, all of that, we are now using our two inch and this is going to cover the temple area. Well, right above the eyebrow. I put it that way and all you're going to do is go from side to side as normal. You can go up as far as you want with this, but make sure that you keep it. You do enough so that you'll have room for your three inch, where I'm putting my thumb is where I'm going to close my quick weave. Okay. So now that I'm done here's my three inch and we are going to begin tracking it. So this is how far I went up with my two inch. So this is how it's going to look in the top you're just going to go from side to side, and this is pretty much where your eyebrows on a human head, where the eyebrows are so just go from side to side. Okay, now that I've done all of the tracking for the front, this is how it's going to look so you're, going to end up going in a circle and again in the back, is where I'm going to be closing it, where I want it to kind of You know start to close and this I am double tracking, with the three inch. I am double tracking so because y'all already know that this hair is really really thin, so go ahead and double track in the top and on the sides. So I'm going to be using my ion one stroke, flat iron to flat iron, the closure, and you guys I love this flat iron. The plates have like a bevel in it and it works wonders like this is like one of my all-time favorites like I use this flat iron for everything I use it for curling. I use it for everything, so I will link that information to this flat iron. So you will be using the closure, that's coming in the pack. Now you can. You know you do the closure. However, you want to, but I'm here to make your life easier and you know utilize all our resources. So I'm going to be flat. Ironing this closure and y'all noticed a little old way, so you got to do what you got to do flat iron it out because again like I said this isn't the best of quality hair. But you got to make it do what it do so go ahead and flat iron that thank you now, I'm going to begin razoring it down and I'm going to use the bigger razor comb for this and I'm using the longer side and the reason I'm using The longer side is because it's going to leave some of the hair on there. You don't really know how much you're cutting off well, you know how much you're cutting out, but you don't want to cut too much where it put gashes in the weave and you're. Also blending it as well, so that you don't have any harsh lines, because whenever you do this you're going to notice that it's hard and like it's just way different than cutting a human head. So it's better to be careful, cut off a little and not too much so that you can always go back and correct foreign shears, and this is the packaging. This is how it looks it's real, nice and sleek, and it's very good quality, and this is how the thinning shears look. They are custom, crafted and like they are very good quality. As you can see, the shears are engraved with my logo on them. You got to get y'all a pair and I promise y'all. You will not be disappointed, so I'm trying to show you guys the details in these. When I tell y'all you will enjoy these sheers and these thinning shears you will. This is definitely a pair that you want to add to your collection and they are a lifetime warranty. So I will stand behind these products and I also will show you the shears, like you really want to use these when you're trying to cut it up real good, so yeah, the design of the blade is really really nice, they're, very, very sharp. So you want to be careful with these as well, but this is a unique design very feminine and unique, and they are very, very good quality. So make sure that you go to my website and check these out. I would love for you guys to have a pair. Yes, there you go, I told y'all, I was gon na bring it. Thank you all right. So now I'm going to use my thinning shears to add some texture and you can add as much texture as you want. You can use this to thin the hair out and, like I said, you want to be careful and make sure that you do enough and not too much, because you don't want to thin it out too too much, because you will be able to see everything whenever You put it on the head, so I will show that process in a little bit, but right now, I'm just adding some texture, adding layers making it really really soft, and this helps a lot with layers as well. Adding layers and making everything look really really soft and natural. Thank you, foreign razor and I'm going to trim down around the back and around the sides, because I want it to be a little bit lower and I told y'all, if you're going to do this, make sure you're really really careful with this. But I can say this is the best way to practice if you're going to take the blade. Take the guard off the best way to practice is to practice like this, but don't go too deep, because you will expose your tracks and you will caught up cut off too much whenever you go in to um, you know cut it when you put it on Your head, okay, so all you're going to do now, is go in and take out all of the little strings. I'M going to use my Aunt Jackie's frizz Patrol to mold down the size of it, just to make sure that it's laying down really really flat, because when I put it on my head, I want to make sure I see everything and I want it as flat As possible, if you are enjoying this content, make sure that you like comment, share and subscribe and make sure that you come back to the channel and support okay. So now that it's done drying, I'm spraying it with my essations shine spray and all you're going to do is just comb it out, and it is a little bit hard because I did put a little too much foam wrap lotion on it, but it is what It is all you got to do, is just comb it out, and this is how we are looking so now. I'M going to use my pencil flat irons to flat iron. The ends of the hair, and all this is going to do is make sure that it's tapered down and none of the edges are kind of fraying up and with the foam wrap lotion on there, it's going to help it to lay down really really flat. Okay, so now I'm going to remove the unit from the mannequin at this point, I'm like hey, it is what it is, so I'm getting ready to take it all off and all you - and this is the reason I put the plastic cap underneath because it comes Right off and your mannequin head won't get damaged, it won't have any product in it, and all you do is just pull the cap out. It comes out really really easy. Okay, so now I'm going to put the guard on my single blade razor and I'm going to attempt to razor this down some more because it isn't flat, as I would like it to be. But all you're going to do is just take your time and cut it down to how you need it. So all I'm doing right now is just kind of trimming it down and then making sure that it is really really flat. Then I go in and I get my mirror to do the back, so I'm going in with my Andes T outliners to trim it up and honestly right right around the ear. You can just follow the cap because it's going to come all the way down behind your ear. Okay, so when you are doing this, make sure that you are being really really careful because you can mess this up real, quick and I'm just kind of winging it. Like this is so hard to try to get this straight like this, because I already got the cat showing some, but it is what it is. But um yeah just be careful with this and take your time and try to line this up right or either. Try and find someone that can do it for you. I didn't have anyone to do it for me, so this is why I'm uh going through what I'm going through with this okay. So right now, I'm going to use my Y2 comb just to kind of style. It up and see where everything is laying this is your finished product and all I'm going to do is kind of frame it around my face. Thank you, foreign. Thank you.


Comments
beautifulonekg: Love it ❤️
Dorothy Smith: Absolutely beautiful
Raven Williams: Slayed ❤
Slim Jenkins: ❤️❤️❤️
Jahlisa Diamond: ❤❤❤❤
Jamilla Worsley:
Dee R.: