How I Made The Most Natural Kinky Curly Wig With Bangs| Ft. Isee Hair
- Posted on 13 May, 2020
- T Part Wig
- By Anonymous
This is how I made a kinky curly wig with bangs that mimics my natural hair pattern. This video (part 1) shows how I constructed and cut the hair.
Lengths
16,16,16,
16 closure
Isee Hair Mongolian Kinky Curly
Beats by MAL GRIFFEY
https://m.iseehair.com/isee-hair-9a-gr...
isee hair, curly wig, kinky curly wig, honey blonde wig, bleach curly hair, highlights natural hair, highlights curly hair, bleach isee hair, summer wig, honey blonde, jordi b, 16 inch wig, 16 inch curly wig, mongolian kinky curly, curly wig with bangs, natural hair with bangs, curly bangs, blonde on black girl, blonde black hair, blonde on black hair, brad mondo, diy highlights, diy, diy highlights curly hair, balayage curly hair, diy closure wig, blonde closure wig, diy closure, diy bangs, diy curly bangs,
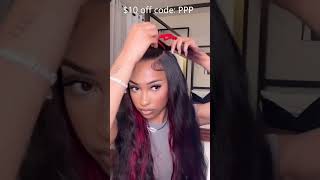
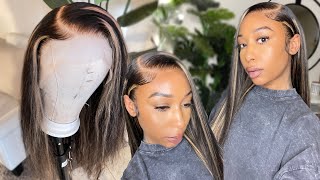
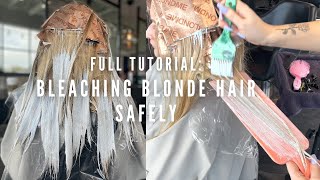
Jordan - and I am here with a two-part series on how I got the most natural kinky curly wig, with bangs featuring icy hair, so here is all of the products I used to achieve this. Look. This first video is just going to be me. Constructing the wig and cutting the wig, I ordered the Mongolian kinky curly hair from icy beauty or icy hair, and I got 316 inch bundles and a 16 inch closure I'll be doing a review on, like my opinion, for of the icy hair, because I have some Mixed thoughts about it, but here are some closure. I had to go ahead and bleach the knots because the knots were not bleached, so I used some bw2 mixed with a dirty tongue developer and just mixed until I got the perfect consistency, as you can see you just have to like you know, pour as you Go you just eyeball it when you're mixing your bleach, you want the consistency to be thicker. It'S recommended you ganger, like your brush, to stand up in it or something like that. But I made sure mine was thick enough and I am tapping lightly onto the lace to make sure that the bleached residency through, because if it does it's gon na lighten the hair beneath and it's gon na, create a whole mess. So here I am just like putting it on. You know, making sure that it's good and I'm leaving that on freely. I left it on for like 15 minutes, but I kept unchecking it so give or take for two minutes. So I rinse out my hair with the shimmering lights, purple shampoo, till a tone down the brassiness of the knots, and I also wash the hair with the ISO plus shampoo that just stops the processing of the hair and it just bounces out the city but yeah. I didn't want to over processing my hair, so that's just just an extra step. I T you can see that I'm pinning down the cap. I got this mesh cap from actually the wig head that I ordered on Amazon. It came with it and it was like the perfect size for the wig head, so I decided to use it, but you can get something like this. I, your local beauty supply store. Well, a little trick. I learned is to fold a closure in half and line the hair on the closure up with the edge of the wig cap. That just makes sure that everything is centered and perfect. The worst thing is pinning your closure down and realizing that you can did too far back or too far up or a little bit crooked or whatever. So I'm going to make the first stitch to sew down my closure exactly at where the hairline begins on the closure and I'm going to pull my needle through the thread once I'm pulling it through the lise, because this creates a little bit more security. And it's just you want the bad piece to be secure. The first stitch should be secure, always after that you're just gon na show your closure, so I will be using the same sewing method throughout the whole wig, which is to pull the needle through the wig and then to wrap the thread around it twice. That just creates a little knot, so if I do mess up, I can just cut it and the whole wig won't unravel. I'D. Also, like prevent your wig your tracks from coming loose, and everything like that, so I will show you guys are close up all my friends say that it's hard to make wigs whatever it's literally, not that hard just pull the needle through the whatever and then wrap It around twice and pull that through and you have a cinch easy, so another trick that I picked up was to make your first track go underneath the wig cap. That'S so if the wind blows your whole tracks and everything won't show kind of be like a little like protective little flap, you got going on also, if you have an elastic band at the bottom of your cab, do not sew through the elastic part that will Make your wig not stretch so, as you can see, like I'm pulling my thread around the elastic band. If you have a thicker elastic bands, if there's a part that covers the actual elastic part with like a little fabric, a little piece of fabric, so only through the fabric, and once you get the hang of it, it's like literally so easy. It doesn't really go. Quick, I'm telling you guys like it takes a little bit of time. This thing is really tedious like making wigs, but it was worth it at the end, so I'm just gon na show all the way up using the flip over method. I don't like to cut my my tracks, so I just flip it over and keep on sewing you ee, the west up until I get to the top. This is what the wig looked like after I was finished. Sewing gods is a lot of hair with this wig and it was kind of intimidating at first, but I just started cutting it. I'M not a professional is my first time ever even cutting or bleaching hair, so yeah, I just got it done - is a lot of look in the mirror and just eyeballing things. So I made sure that everything was lined up cuz. I didn't want to start cutting from like if my closure was slipping back and I made a cut on my bang. I didn't want my bangs to be like you know, wacky, so I got these tools from a beauty, supply story of this little combing tool and, like my scissors and I just kind of went for it, the little combing tool wasn't really that great, with a large Amount of hair, a massive hair, so um, I used the scissors a lot and I tried to make sure I cut on angles and you know just made sure I was sectioned the hair right it was. This whole process was a stressful. It'S like honestly, one of the most stressful things I've done with my hair, but we got it done so here I am just you know. Looking clueless, I literally like just look coolest the entire video, but I just started chopping chopping. I wanted the layers at the top to be shorter and the layers underneath to be a little bit longer. This was very much giving jheri-curl, so I wanted it to look more less. You know less jheri, curl more natural. You know free-spirited. I just wanted it to frame my face right and just you know how the right looks. So this is me just going at it, ignore my facial expressions. The entire time like I was so focused. I wasn't even focusing on my face but enjoy. This is a moment where I've realized that I need to take his whiz off my head and put it on the mannequin, because it was kept on slipping off my head, and I really did not want the scissors in the way to win this battle. So it was kind of easier to see, lay where I need to cut when I took it off my head, but I didn't want to over cut because, like the mannequin head is not my face, I wanted to frame my face, so I touch up the bangs. A little bit and I tried to add more layers to it and it came out really well I'm proud of myself, okay, so here and just touching up my bangs. This is the end of part 1 to the part 2 series. If you will like to see how I achieved the color and my styling process for this wig then go to part 2, it's really close to it. Thank you guys so much for watching, and I really hope you enjoyed this video and learn something from it.
Comments
ISEE HAIR: the hair color is amazing
MAL GRIFFEY: