Affordable Honey Blonde Highlight Curly Wig Ft. Nadula Hair!
- Posted on 22 February, 2023
- T Part Wig
- By Anonymous
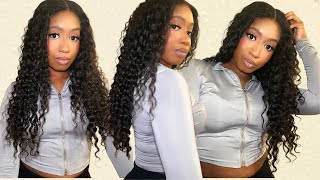
Hey everyone! In this video I’ll be installing and reviewing this curly honey blonde highlight wig from Nadula hair! It’s deff one of my fave units purchased to date and was super affordable (I checked and I got this for $99 on Black Friday!) and easy to install, this unit is beginner friendly! I’m wearing 18” 130% density, hair is linked below!
Be sure to like this video and let me know in the comments how you’re feeling this wig! Subscribe to my channel for more weekly lifestyle + fitness content!
https://www.nadula.com/nadula-honey-bl...
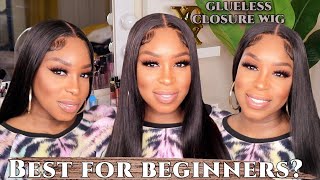
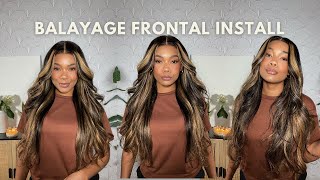
Hello, hello, everyone welcome back to my channel and thank you so much for clicking on my video today. I have another wig install for you guys from nadula hair. I purchased their 18 inch. Honey blonde highlight wig and 130 density. Of course, you know they had to get me right with the free gifts, so I also received a band lashes makeup brush and a bonnet. So this is what the wig is. Looking like straight out of the pack, it's super natural at 130 density and the colors are Blended, pretty perfectly. In my opinion, I did my best to bleach the knots and did a bit of extra plucking, but the wig was honestly very beginner friendly. The inside of the Cap, Construction is fairly standards, there's Combs located at the back and the sides of the unit. So here's my wig on the stand, so I can get to customizing and I don't know about you guys, but the curl pattern on this unit is honestly to die, for I love that it can be worn as a curly wet look or you can fluff it Out when it's dry to make it look fuller, I'm gon na, let you guys watch me do some of these customizations. I honestly didn't have a ton to do so I'll speed up through some portions but I'll make sure to let you guys know exactly what I'm doing. The very first thing I did was just hot comb, the edges and the parting space. So I could get everything as flat as possible foreign I did after I flattened the edges was add mousse, so I could get everything slicked out of the way I just used some painting from the drugstore. You don't need anything fancy. It'S just helpful to have something to have all the hair going in One Direction. I will say that this mousse did leave my hair a bit crunchy, so I might try to find one that doesn't leave your hair feeling crunchier than a lace, potato chip because y'all. That is definitely not what I was going for once I got everything slicked back. I went ahead and pulled out some edges to make myself some baby hairs. This was actually my first time doing baby hairs, while the wig was still on the stand, as opposed to doing it on my head, and I can personally say it's much easier for me to customize BB hairs once the wig is already installed. For me, it's just much easier to be precise and know exactly where the edges are going when I do this later on in the install, as opposed to when I did it during this time. Thank you, foreign. After I got the baby hairs I wanted out. I went ahead and kind of Twisted them so that the individual pieces would stay together. Foreign. I also went back in with my hot comb to really separate the baby hairs from the rest of the wig, and once I was happy with that, I went ahead and cut it foreign now before I show you guys this customized wig on my head. I just wanted to go back really quickly and show you guys what it looks like without any customizations or release cut, as you can tell it looks super pretty right out of the pack, so that was definitely a positive indicator for me and I really love that Nadula'S hair tends to come with BB hairs in a bit of pucking done already. It makes the install process go a lot quicker in a definitely a lot more smoothly foreign. At this point, I got ready to do a semi-glueless install with this wig with the wig on my head. I went back in with my hot comb to flatten out some areas that still seemed a bit bumpy foreign spray to secure this wig, rather than actual bonding glue. Since I knew I wasn't going to be wearing this unit for more than a day in situations like this I'll, typically just add a small spray of glue to the center of the wig, as well as down near the ear tabs foreign foreign after I got my Wig glued down, I went ahead and laid the baby hairs using got to be gel. This was the point where I realized, like I mentioned earlier, that I should have just cut and laid the baby hairs with the wig already on my head, so I could have gotten them a bit more precise and custom to my own liking. You guys can also see that I had a little oopsie where my wig cap wasn't completely lined up with my hairline, but I think if this were in the correct place, this honestly would have ended up as a Flawless install foreign. After all that, I of course went back in one more time with my hot comb to make some final touches. All right, you guys well, this is how the final install turned out. I'M absolutely obsessed with everything about this wig from the highlights to the texture to the Natural density. This wig was also super affordable. I believe I got this on Black Friday for around 100 and I think you can still get 20 inches for around 160 dollars, which is an absolute steal. I would love it if you gave this video a like, and let me know in the comments how you felt about this unit. I post lifestyle content weekly, so if you're not already subscribed be sure to hit that subscribe button below I'll see you guys in my next video bye, guys

Comments
Susan Metz: You look stunning Mikayla! If I hadn’t seen this, I would have never known this was a wig. It matches your skin tone perfectly.