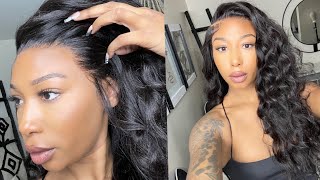
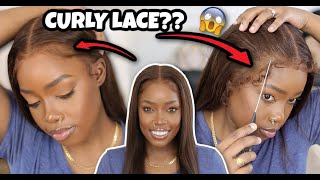
Unice Hair Unboxing And Upart Wig Tutorial Using Natural Wave Hair
- Posted on 15 April, 2019
- U Part Wig
- By Anonymous
Use code to save your money: unice201806
Same hair in the video: http://bit.ly/2Uq8ipa
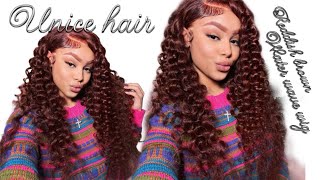
Brazilian nature wave hair,18 20 22 22
#UNice.com official website:http://bit.ly/2I5PrZR
Aliexpress UNice Hair store: http://bit.ly/2TQOnLQ
Top Selling Hair on Aliexpress: http://bit.ly/2HTBA9E
Amazon UNice Hair store: https://amzn.to/2zxP2gm
YouTube @UNice: https://www.youtube.com/c/UniceHair
Instagram @unicehair: https://www.instagram.com/unicehair/
New York Store:962 Flatbush Ave, Brooklyn, NY 11226
Email:[email protected]
Tel:347-789-8880;347-789-8881
Http://instagram.com/hairstylesbyshane...
Http://Facebook.com/shanequaoliver
For hair bookings
Www.styleseat.com/shanequa Oliver
What'S real bad coming, an ass god forbid, something happens, hey you guys and welcome back to my channel. I know I'm in a different setting today, I'm actually at home. So I my salon that I work in is under renovation, and so I said I can go ahead and record this portion of the video will the next portion, also at my house so anyway today you nice, hair, sent me. Oh, if you see me looking down this because I'm reading to make sure I get the right information, but you need the hair sent me four bundles of Brazilian nature, waves, 18, 20 and 22, and so I'm gon na do a unboxing of this hair. So in just a minute, I'm going to show you the hair and how it came packaged and also in this same video, I'm gon na do the actual making of the you part week since I only receive bundles, and I cannot do it so in on myself. I'M not gon na do anybody's hair at my house, so I decided to make a you probably and this week is going to be a wig that you can just clip in without gluing. So in anything, all you have to do is use the combs and I'm gon na show you how to do, and you just five minutes is in so anyway I'll be right back with the hair. Okay, you guys, so you need sent me this hair. They sent me four bundles of nature, wave hair and the lengths of 18 20 22 22, and they also they package the hair very nicely, and it just camera like. I guess this is like a return or packaging list that shows what you receive and from from I believe it was UPS. Yes, I received it from UPS and it came only in a few days and then they just give you this car here telling you about their different types of hair and they sent me the ice new fashion leader. So that's the brand of hair that I received from him. So yes, so it came packaged very nicely and I pulled oh they also. I did not send me these eyelashes, the eyelashes came in there. So if you need eyelashes, they sing you eyelashes inside of your package. They sent me four bundles. This is nature way. I don't know if it's gon na change once its weight, but it looks really closely related to body waves, but I will wait it once. I get it on the wig to see if there's any change in the texture I looked at. I think it was filthy, rich tresses. She had a video with the hair and it looked at like really wavy once she weighed this watch wedding, I'm sorry! So I'm thinking it's gon na wave up a little bit more, be more water, wavy. Looking so yeah the hair is full all the way down to the ends. It'S thick, the bundles, the wefts look really really good, and it's just it's a lot of hair. So I don't know if I'll be using all three bundles and my weave, because I don't wear hair that thick or a lot of hair, like that. I want mine to look more natural, like it was my own hair, even though you know I know it's not, but it just came with these tags on there on the hair, and it also tells you how to care for the hair on their hair also. So I thought that was really really good, so yeah the hair is bouncy and it has a lot of body to it. It feels good, there's, no or tangling, or anything like that smells good. It doesn't smell like anything, is wrong way to. I don't think they do hair like that anymore, but it smells pretty good. It has a nice little luster to it as you can see, and it just bounces and it looks really good get something off your hair. So anyway, the next clip I'll be getting ready to make the week. Ok guys so now you're ready to make your way so you're gon na use just a dome cap. You can use a regular dome cap or you can use this. One that I have here is by red: it's a mesh dome cap, so it's like see-through and it has the van. You know the thick band around it, but it's see-through on the cap for it and I think that helped it breeds some. This cap was very, very tight, I'm using it on a tiny two-inch mannequin head, so I had to stretch it out some and you just want to stretch it out pretty good and then pull it onto the cap and make sure that it's laying for brilliant. So once you have it laying on the head perfectly flat, you just want to take some t pins and I'm gon na pin one like direct in the middle and then I'm gon na do about two on one on each side and two in the bag. So some of my pants are gold, so they were like they're, not pointy at the tip, so it was hard to go through because that band is really really thick, so you probably have to push it hard if you use it the course mannequin heated so anyway, I just pre threaded all of my needles and then I'm taking the NYX jumbo pencil. I don't, I think, that's like a gold color, where we use white brown or whatever any kind of eyeliner, just something if you're a beginner and see. I really don't have to do that, but if you're a beginner, this is a good step. It keeps you in line and in order just make a line where you want the tracks to stop it and how long you want your part. It leave out area to be so now. The hair is I've taken a hair out of the package and I'm just threading the ends together and I'm gon na start at the nape of the hair and start sewing at the nape of the weed. I'M gon na start sewing at the nape part of the week and go back and forth if the nape, until you run out of here. So you just watch me here: I'm just gon na start sewing and I'm just going to sew back and forth around that area there and then I'll show you in the start moving to the sides. Okay, so on the ends, I always do the method. I think that's what it's called: I'm not really sure what it's called, but it's like the loop and pull and then once I do that about two to three times. I just just loop the thread around the tracks until you get to the end where you want to flip the hair over. So I don't do that loop and pull all the way, because sometimes it can cause the tracks to get loose early before you're ready to stop using the week. So for longevity I just do the loop and cool on the end and then just loop. It around the track until the other and then once you get to the end. You want to separate the two tricks and so about a half inch to inch. You just want to sew on the the last track. You want to sew it about two to three times with the Luther cool method. Then you can flip the hair over. I know that sounds confusing it. I hope y'all can follow me on that, but you can kind of see what I'm doing here. So I flipped it over and in here I'm going to just start it with the loop and pull and I'm gon na do that two to three times and then just start looping around the track again without locking this future. That may be what is called a lot spiritual, Luke and pulled I'm not really sure, but you see here, I'm just going around the track. It doesn't have to be perfect. You just don't want to sew on those scenes, just sew on the sides of the scenes and and every now and then I might go in and and be a lock stitch or move the tool stitch in the mix somewhere. Just to make sure everything is locked. But I'm just gon na do it on the ends pretty much on this video okay. So here before I start go on to the next needle I always put a double needle in and then I tied them together, and I just want to make sure that the thread will never come a loose on its own, like you would have to be cutting. So I always sew the short thread and then you cling together and then cut it off after that, and then I just continue on so in the hair. So you just want to sew in, like close together, stitches all the way down until you get to the end, and then you just gon na flip over again. Okay, so now, you've sawn the whole width on to the back of the hair. So now you're ready to go up to the side, so you're, just gon na, take your whip and sew it on to that. To that line that you you're gon na start. Your first track right, if it first liner you're just going to sew right at the edge of the band of the dome cap and it'll, be fine and you're gon na throw in your clips. So everything will stay in place and so just sew it along the line of that band and then you're, just gon na sew. All the way around to the other side, where that line that you drew is so just sew all the way around from side to side till you get to the other line and then you're gon na cut the hair at that point, because you don't want to Flip that first track, so that is gon na be full. So just watch me I'm gon na. Do it here, imma show you how to eat. Okay, so you're gon na sew up until you get to the line that you drew with it jumbo pencil and you're. Just gon na cut the whip at that point, I think you should be fine. You know you won't have too much shedding just by cutting that one spot. So I just cut it right there at the line and I just slow it down because you don't want it to be too bulky, so you just have to cut it. You have to cut it, so you can fold it over if you want to, but it's gon na be a little bit more bulky than you want. So I just went ahead on and clip mine, so yeah once you get to the ear just gon na slow. It down in the life-energy pitch or the pulls and stitch method, just sew it down like that about three times to make sure is totally stuck, and it's not gon na move, and it should look something like that. So then, once you get through sewing that part you're, just gon na add another width on and you just gon na. Do the locking stitch knit it and you just want to make sure that the hair is falling forward towards the face so that it will frame the face? It won't be falling straight down. But if you want it to just go straight down, you can you can just do it side to side totally without putting the hair toward the face, but I won't minded like shape around my face. So that's why I lay the hair forward and once I get through sewing, get is so down more I'll start to do with more side to side, but for right. Now I'm laying to her toward the face - and you just want to keep going around and around and around until you get to the other side, and then you can fold the hair over. Then you don't have to put it once you get to the next side. Okay, so you just want to continue sewing down yah. This is the worst mannequin head. I mean not mannequin head man II can't stand this sucker does not say Steel's. I have adjusted it fixed it. It keeps sliding over it's not a sturdy. I don't even remember the company that I purchase different on Amazon, I'm not even gon na bless them like that. I just need to get a new wheel. I don't know why it just is not sturdy. So anyway, I'm just continuing to sew and you can see how I'm sewing it down. I'M just now going just side to side. It doesn't help to go up to the line anymore, because you're, just gon na keep sewing side to side until you run out of space to sew. Okay, so y'all probably can see my part, my my drawing for the poor was a little bit off. So I'm having to make it up on the other side where it was just a little bit, not even so, I'm putting one extra track right there on this side and then I'm just gon na put one track. Soap, lime deadlines. Did it make sense to put around that line that I drew so I'm putting in a extra trick right here, just the feeling that spaces I had drew the line kind of nice straight, so I'm putting the track there to fill that in and then I'm just Gon na take one track that measures the length of that line that I drew and I'm just gon na sew it around the area where the leave out is gon na be okay, so I've sold the bleed completely. So here I'm just taking the extra needle in three and I'm just like a reinforcing that last track in the thread to make sure that if it happens to get cut that none of the thread will come loose just making sure that is super reinforced and sturdy. And it's not gon na come loose, so I'm just taking that extra needle and thread and I'm just sewing around the width a second time. So that's all I'm doing here, okay guys, so that was the finish result of the actual week. Making you got a please excuse my appearance on this video, I'm getting ready to shoot another video tonight for chemical peels, so I couldn't have no makeup on or anything like this so but the hair was sent to me by you nice. They send me four bundles of Brazilian natural wave in 1820 and 22 inch, and so I decided to make it for me to wear in au part week. So that's what I just did. I just did a? U part wig it's an easy week to do is easy to follow the directions of this week on the video and I'm gon na. Have the second part of the video coming up, where I show you how to add calm to your wig so that you don't have to sew or glue or anything just put that sucker on like five minutes and you're done you're out the door? And you don't have to do anything to it, because it's a natural, wavy texture. I have the link to it listed in the description box below as well as a coupon code. Don'T forget to come back to watch the second part of this video

Comments
Delannie Desire: You inspire me ALOT I love it
Lakeisha Griffin: When you like before watching cause the Queen be slaying