U-Part Wig - (Full Dvd Tutorial)
- Posted on 25 August, 2015
- U Part Wig
- By Anonymous
Hair From http://www.MrsRutters.com
Facebook http://www.facebook.com/MrsRutters
Business Email [email protected]
________________________________________
________________________________________
Check Out My Other Tutorials!
Lace Closure Sew in NO LEAVE OUT!
Invisible Sew In NO GLUE NO LEAVE OUT NO CLOSURE!
How To: Rope Cornrow Braids FOR BEGINNERS! (Step By Step)
Tree Braids Cornrows FOR BEGINNERS!!!
How To: BOX BRAIDS For Beginners!
________________________________________
The Best Wig Tutorials On YouTube!
2 Minute U-Part Wig Install (No Sewing!) https://www.youtube.com/watch?v=b_93lW...
Very detailed: How to install and style a u-part wig with luvmehair https://www.youtube.com/watch?v=LhC3dS...
Natural FLATT Start to finish | U Part Wig | Lemoda Hair https://www.youtube.com/watch?v=Mtbnud...
QUICK CURLY HALF UP HALF DOWN HAIRSTYLE W/ U-PART WIG https://www.youtube.com/watch?v=xFD65k...
How to BLEND THIN EDGES with a lace CLOSURE https://www.youtube.com/watch?v=sXyEe2...
________________________________________
Virgin Hair From: http://www.MrsRutters.com
Facebook: http://www.facebook.com/MrsRutters
In The Lace Closure Sew In DVD, you will learn;
• Hair Supplies
• Braid Pattern For Sew In
• How To Sew In Hair Extensions
• How To Sew In Lace Closure
• Beach Waves Hairstyle
• Lace Closure Sew In Hairstyle
• Removing Lace Closure
________________________________________
DISCLAIMER: All suggestions, tips, techniques and advice given are for informational purposes only and should be used at your discretion and best judgment. I highly recommend conducting strand tests when trying or using new products, hair appliances and product mixes. I am not responsible or liable for adverse or undesirable effects including hair loss, hair breakage or other hair/scalp/skin/body damage as a direct or indirect result of the suggestions, tips, techniques and/or advice given.
________________________________________
FTC: I am not representing, being paid by, or endorsing any of the product brands in this video & I purchased everything with my own money - UNLESS OTHERWISE STATED in video/blog content. There are links to products that might be helpful based on the content of this video/blog. Each of your purchases via our Amazons affiliation links supports our cause at no additional cost to you.
Music "Easy Lemon" Kevin MacLeod (incompetech.com)
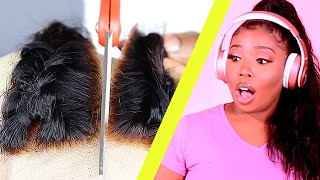
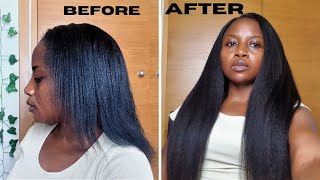
Hello, everyone. This is breanna rutter, author of over 14 haircare books and founder of howtoblackhair.com. For this tutorial i am going to be teaching you step-by-step, how to create your own u-part wig, using mrs. rutter's hair extensions from mrs. rutter's calm, the following materials. You will need to create your. U part. Wig will be three bundles of mrs. rutter's hair extensions in the lengths of 24 inches 22 inches and 20 inches. You will also need nylon sewing thread, weaving needles, a rat tail comb, a wide tooth comb, a dry towel, haircutting scissors for wig, combs, bobby pins, duckbill clips measuring tape, a flat iron, a 1 inch curling wand, a black canvas head, a dome cap, a makeup pencil Edge control holding spray and you will also need heat protectant so once you have all of your hair supplies and materials ready in the very next step, step number 2: I'm going to be teaching you how to create your braid pattern! For your? U part wig install you so here we are in step number, two of the. U part wig tutorial in this step, I'm going to be walking you through the process on how you want to achieve your braid pattern, and then I'm going to show you a 360 on how that looks so first off. If you don't know how to braid your own hair, I suggest that you visit howtoblackhair.com to purchase the cornrow braiding DVD, in that DVD you'll learn how to braid your hair with extensions and without extensions. So, as you can see, no extensions is required to braid your hair down for your. You part braid pattern base and, as you part, your hair make sure you parse them hair at the very front of your hair, which will be your edges so that when you're wearing your? U part wig it blends very seamlessly with your real hair. Also, you want to determine where you want your part to be, for your leave out. As you can see, I will be wearing a middle part and if you want to wear a side, part then choose whether you want it on the left side or the right side of your head. Now at this point, you are going to break two cornrow braids. One on both sides of where you leave out would be make sure that both of these braids are the same length as your wig clip. This is important because, after you finish, your wig you're going to clip it onto your hair in place, and you want your breaks to be the perfect length so that the wig lays as flat as possible. If the clips are too short, it may cause you issues with trying to comb your hair over your wig, and if your clips are too long, it will hang over your hairline, which is what you don't want now at this point, once you've done that you also Want to make sure that the width of your leave out is large enough for you to successfully cover your extensions now. For me, the width of mine is 3 inches. If you have very thick hair way thicker than mine, then you can leave out a smaller portion about an inch or two in width. But if you have thinner hair, you would have to leave out more hair to make it blend easier, which would be about three inches or more width after that braid all of your hair straight back into cornrow braids, and also connect each two cornrow braids into one. I have about ten Korra braids on my hair, so then at the very ends I had about five braids left at this point. You grab the tail ends of your braids and bobby pin and you just clip them down to your hair with a bobby pin and that's it for your braid pattern, and now I'm going to show you how that looks. So, as you can see, the pattern is very simple and easy. So now that your braid pattern is finished in the very next step step number three, I will be teaching you how to sew your hair extensions onto your dome cap to create your? U part wig here we are in step number three of the. You part wait tutorial using mrs. rutter's hair extensions from mrs. rutter's calm in this step. I'M going to be teaching you how you need to sell your hair extensions onto your dome cap to create your? U part wig, so here we are in our! U part wig tutorial where I'm going to be teaching you how to sell your extensions. But first I want to show you how you want to create your markers on your wig caps, so that you know exactly where you want to stop so. There'S three red marks on the cap: there's two on both sides and there's also one at the top. Now, when you're measuring the width of where you want your markets to be, it has to be the width of your leave out. So, in a previous step, I've stated the width. You want your hair to be as well as how far back you want your braids to be so. The width of my leave out is three inches and that's how far I have my measured now the length back. Will consist of how long your actual braid is that's next year leave out the length of my braid is four inches to match my weight clip. So I measured back four inches with the measuring tape and I made a marker there to show where you want to stop now we're at the point where I'm going to be also teaching you how to sew your extensions, but right before I do that, I'm going To show you really quick how you want to thread a needle threading, a needle, is simply connecting thread onto your needle, so that you can sew your extensions onto your dome cap now, if you have multiple needles, this will help the process continue to go on. Instead of always read threading one needle at a time as you're sewing your extensions. So, for example, I'm going to show you how you want to thread your needle. So I have my needle here, and this is AC needle we're also called a curb needle because of the shape. So what you want to do is grab one end of your thread and you want to put it through the eye of the needle. When you do this, you gather the two ends together and you create a knot. Now after you create your knot, you're then going to grab your scissors and you're going to snip off the thread right above the 9. The reason why is because, when you create your first knot, you don't want a lot of thread hanging through because it will show through your extensions. So, that's simply how you thread a needle so now that you understand that I'm going to go ahead and teach you how you want to sell your extensions now when you're sewing your extensions, you got to do so in a u-shaped fashion, meaning that the direction of Your extensions as it's being sold on your wig cap is going in a u-shape when you're sewing make sure that every time you reach the edges of your actual wig cap that you go through the edge here, so that, if you ever do the side to where You part into a point or anything like that there is no cap showing or any web showing whatsoever. So now, at this point, I've left for my needle and thread intact and I'm going to teach you how to sew your extensions through this point here and we're going to go through the cap and I'm also going to teach you the fold-over method. With the end of the extensions here so to create your knot, you're going to go through your cap, you're, going to go under your weft, come back out from under your weft and you're, going to create a knot in this area. So through the cap under the weft and when you pull through you're going to do a knot, technique that I like to teach now, this knot technique consists of you wrapping the needle around the string twice and pulling through to create a knot. This is the same process you're going to do throughout all of your extensions. So now you go over just a little bit of space and you repeat the process through your spandex cap right, underneath the weft of your extension wrap the string around the needle twice and pull through to create your knot. So you're going to continue this on until you reach the edge and you're also going to do that on the edge as well. When you reach the edge, you make sure to put your needle directly through the edge of the cap. So that way, it's very flat right against the perimeter of it. So we go right through the edge of the cap you're going to go underneath your web and do the same thing. Do that once again, going over just a little bit of space through the edge of the cap and create another knot, and when you run out of strength, you simply can just cut off the thread and then continue with the rest of your threaded deals. So just open up your thread to tighten the knot, cut the string off and then continue sewing and then do your flip over, which is what I'm going to teach you so now we're at the tail end of our bundle of hair of the 24 inches when You'Re sewing your extensions, make sure you start with elongate extensions in the back and then work your way up to the shortest link. So the back will be 24 and then, as you go up, will be 22 and then 20. So now we're at the point where I'm going to teach you that infamous fold-over method and what the fold-over method simply means. Is you fold your weft back over so that you can begin sewing in the other direction so that you can keep following your u-shaped fashion? The reason why the fold-over method is so important when sewing your extensions is because it prevents you from actually needing to cut your extensions, so the entire time. You will continue to do fold-over methods to sew in all of your extensions without cutting through the weft. Every time you cut through the weft of your extensions, you increase the risk of shedding in that cut areas. So that's why the fold-over method is preventing that so you fold over and then what you're going to do is you're going to go through the cap and then, when you go under the weft you're going to go under both of these webs to create that knot. Once you do that, you're going to wrap the string around twice around a needle then pull through to create your knot. Now at every fold. I suggest that you secure your fold with two knots before you move on by stitching, so now that your fold is secured. You'Re going to be getting stitching up to finish off your 24 inches and then you're just going to continue with your next length of hair. So, as you can see, this is a finished result of the. U part wig with all the bundles sewn in all three bundles are included of 24 inches 22 inches and 20 inches of mrs. rutter's hair extensions from mrs. rutter's calm, as you can see, with the very last track that sewn on you want to make sure that Each knot is as close as possible to one another because, as you're wearing your wig, this is the area that has the most friction from your comb and styling, and things like that so to prevent the threads from wearing and tearing and beginning to unravel. It'S very helpful to make sure that the knots are extremely close to one another. Now that you have finished creating and sewing all of your extensions onto your dome cap in the very next step step number four, I'm going to be teaching you how to sew on your wig clips. Welcome to step number four of the! U part wig tutorial using mrs. rutter's hair extensions from mrs. rutter's calm in this step. I'M going to be teaching you step-by-step, how to sell your wig clips onto your wig, as well as how to safely remove the excess cap that was left over so before you begin actually sewing your weight clips onto your wig. You first want to remove this excess cap that you see here now. Remember you need to make sure that you leave a u-shape fashion. That'S actually going to be able to cover around your leave out. So you've already done those measurements created your wig and come up to this point. So now at this point, you want to use your scissors and you want to carefully remove the cap. Now, when you remove the cap, make sure that your about a couple centimeters away from the actual knot itself, because if you cut too close to your nuts, it will cause your? U part to unravel around where your leave out will be so in order to safely. Do this, what you want to do is just get kind of close, but not too close to the knots with your scissors and began cutting once you finish, cutting all your caviar, then going to begin sewing all your wig clips. The goal is not to get as close as possible is to be a good distance away from the thread. So you don't accidentally cut your string so once you remove the bulk of your excess, we cap going further and clean up any extra cap. That'S left over. Remember the goal is to get as close to your knots, but not to actually cut your nuts so that your, u part, doesn't unravel so once you finish, cleaning up the rest of the cap around your? U shape. This is how your? U part should look at this point so now. The next thing that you need to do is sew on your wig clips. So after we finished trimming off the excess cap that was on the? U part wig you're then going to go ahead and begin sewing on your wig clips. So, as you can see, I have two weight clips at the top of the wig and one in the back. You want to at the top, because that braid, that you braided on both sides of your leave out will be where you sit your clips onto, and then you want one position in the back on the left right side, as well as on the other side as Well, so, to make sure that they're pretty much evenly spaced in the back, you can use the design of the cap to guide you where you want to place your clip. So, as you can see, there's some stitching inside the cap here and to make sure that they're lined exactly perfectly in the back at a good distance from one another. I made sure to align one clip with the netting that you see here in the week and then you're going to do the same thing on the other side. So you're going to sit the clip here where it lines up with this netting in the wig. To begin stitching, so here's the last week clip and also you want to make sure that you prepare some weaving needles and threads so that you can continue to work without having to constantly stop just to rethread anneal, so prepare about four to five needles. Just so, you can keep working so at this point, you're going to lay it down to where these circles are positioned on the edge. The reason why is because this is what will actually go into your braids, so this is where it will be positioned, but to begin, what you want to do is to connect your needle and thread on the edge. So you want to go ahead and put your needle through the edge ring here, because remember these will actually go into your braids. This is what needs to be sewn down. So you go through that and you do your same knot technique that I've been teaching you you're going to wrap your string around twice and pull through to create a knot. So once you connect your needle and thread to your weight, clip you're going to begin stitching it down to the edge of your wig cap. So what you want to do is to make sure where you place it is aligned right across from the threading. That'S the side of this, because you have threading that goes inside this way and then also in the opposite way. So, in order for the two clips in the bag to be evenly spaced apart from one another, you want to go ahead and line it up with the threading that's already in the cap. So it's going to be positioned here and what you want to do is hold it securely with your hand and you're going to stitch by going through the edge of your wig cap here. So once you go through the edge you're going to go through the opening of your weight clip and then you go to your same knot, technique, which involves you wrapping your string around the needle twice and then pulling through to create a knot. Now, with every point that you stitch through, you want to make sure that you're doing it twice so two knots are going to be here. Two knots are going to go again through each hole so that way, it's very secure and the weight clip won't unravel from your wig, so go through the edge of your wig cap once again and through the opening of that hole on your Wii clip, then once You do that you're going to wrap the string around your needle twice and pull through to create your knot. Now, if you happen to get a little bit of string tangle, you can cut it off and then just continue working. So now we're going to move on to the next one you're going to go through the edge through the opening there wrap it around the needle twice and then pull through well once more and then move on to your next opening. Now, once you finish stitching two knots per hole at the edge of your weight clip on your cap, you're then going to be able to wear your wig. So this wraps up step number four of sewing, your clips onto your. U part wig and then the next step step number five, I'm going to be teaching you how to style. Your hair extensions welcome to step number five of the. U part: wig tutorial using mrs. rutter's hair extensions from mrs. rutter's calm in this step. I'M going to be teaching you how to achieve beautiful curls on your? U part, wig and style in this step, i'm going to be teaching you how to add curls to your? U part, wig! My! U part! Wig was made with mrs. rutter's hair extensions from mrs. rutter's calm and i'm wearing 3 bundles of hair and the length of 24 inches 22 inches and 20 inches. So once you've constructed your, u part wig! You want to go ahead and place it on your hair and then you're going to straighten out the extensions and your real hair with a flat iron. Now, personally, for my hair, I can get my straightest result on three hundred degrees, so I straightened my leave out on three hundred degrees with my sweaters hair. I don't suggest that you go over three hundred and fifty degrees so that you don't encourage any heat damage. So set your Flatiron then to 350 and then straighten out your extensions. So at this point I'm going to be teaching you how to add curls now in order to add curls in a very tidy way. I suggest that you bite your hair into three sections, so you're going to have a section here on the left on the right and in the back, keep all three sections separated with a clip and work on one section at a time. So I started on my right side. Add a curl did the back section added curls, and I did this section and I left one small portion to teach you how to do it. It'S extremely simple and extremely extremely easy. So now I'm just going to grab a section of hair here, and what I'm going to do is divide it into two, because the curl that you want to add you want to do so very small amounts, meaning that you want to have a thin amount of Hair that you're going to add your curl with, so I'm going to do it with two sections here, so we're going to do this section. What you want to do is make sure it's smooth out and it's bent comb through and detangle, which has already been done. You also want to make sure that you've already prepped your hair with heat protectant. So now at this point, you want to make sure that you have your curling iron, pointing downward and you're going to wrap your hair going over. So that way, the direction of your hair is actually going towards your face like that. So as soon as you wrap it around, you want to have it going toward the face, and then you want to continue to wrap the hair going in a circular motion. All the way down your curling rod so hold the end just a little bit away from the curling rod, so that your hand doesn't get hot from the Flatiron and you're going to hold this for about 15 seconds. If you hold it for about like five to ten seconds, it's going to be more of a looser wave, but if you hold it for about fifteen, it's going to be a little bit tighter, as you can see so now. What you want to do is let it release into your hand, so it's going to drop like that and just hold it for a few seconds. The reason why I suggest this is so that the curl can cool and retain more of its shape. So it's a little tighter! So now I'm going to do my last section just once you've gathered your hair, hold your curling rod, pointing downward to the side, wrap your hair over top of it and then bring it around and then just wind. Your way to the end hold for 15 seconds and then release into your hands after you finish, curling your very last section you're going to spray all of your curls with hairspray and then you're going to slowly right through to add more thickness and volume. If you like your curls to look more tidy and perfect the neat, how they look now, you don't have to rake through, but if you want to, you can go ahead, hairspray, first, a lot of hairspray to dry and then you're going to rake through your curls With your fingers to make your look bigger so as you can see, adding curls to your? U part: wig is a piece of cake when you're doing this process, make sure that you already have prepared your hair with heat protectant, as well as straighten your extensions and your real hair with your flat iron and then you're, going to jump right into curling. Small sections of hair with your wand, curl so after your curls have been finished and if desired, fluffed out with your fingers and the very next step step number six, I'm going to be showing you the finished result to the. U part wig install here, we are in step number six. The finish results to the: u part: wig tutorial using mrs. rutter's hair extensions from mrs. rutter's calm and there you have the finished results to the. U part wig tutorial, thank you so much for watching and if you want to see other styling dvds be sure to visit howtoblackhair.com for more also for your hair extension needs purchase. Mrs. rutter's hair extensions from mrs. rutter's calm, i'm breanna rutter from howtoblackhair.com, and i want to thank you for watching.

Comments
Dawn Nicole: I like watching your videos because your so professional, neat, and calming. Plus I like the fact that children and or people isn't in the background making loud noises...lol Keep up the excellent/ professional work......
4Mrs. Lynn: This is my first time watching any of your videos. This is a great and very informative video. You explained clearly, and walked the viewers through step by step, however I really would have liked to have seen you put the wig on and blend the leave out to see how it should be done properly. Either way, you shave a new subscriber. Keep up the good work!
Deborah Afolabi: I have been using your channel to help with my hair for years and you don't get nearly as much credit as you deserve!
Ronsay: Love it <3
Sonnie's Styles: Nice tutorial!
Glow Tiffany: Love this!!!
Tammy Lee: This was the best tutorial! Why do some ppl cut the elastic band and some do not!?!! I am so confused about that part only. What is the reason? Please someone explain! Thanks
Sundeep Ocean: im still waiting on a descriptive video on how to make a wig from start to finish with extensions of hair
S. H.: Whew! Felt like I was in classVery informative. But u missed a major step....putting the wig on
Tiff 0817: Will you be doing a tutorial video on the Vixen Sew In?
Sundeep Ocean: full wig with closure please
chinewmarie: Love your videos hun. Your hair is gorgeous :)
Sugar Manhattan: did you sew a black elastic band on the dome cap where you are sewing on the wig clips
Jay Bee: thanks for sharing
HowToBlackHair: Video To Long? If So Watch The Shorter Condensed Version of This Whole Look By Clicking Here https://www.youtube.com/watch?v=jbze0Xv_z8Y
R0yALtyS: YES!
Kingzdiamond: lol how are you goin to try to show someone else how to make a u part wig and you can barely make one
Shazaya's Channel: were is you other channel shquina and Edward