How To Create A U-Part Wig Tutorial - (Part 1 Of 6)
- Posted on 08 June, 2015
- U Part Wig
- By Anonymous
Virgin Hair From: http://www.MrsRutters.com
Instagram: http://www.Instagram.com/MrsRutters
Facebook: http://www.facebook.com/MrsRutters
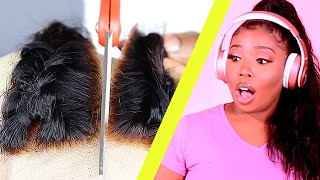
In this step of the U Part Wig Tutorial, Breanna Rutter will teach you step by step how to create your customized wig with virgin extensions!
PRODUCTS FOR THE U PART WIG;
3 Mrs. Rutter’s Bundles Lengths: 24 in, 22 in and 20 in http://www.MrsRutters.com
Black Nylon Sewing Thread http://goo.gl/rr36p4
Weaving Needles (Curved C-Needle) http://goo.gl/cugnQi
Rat Tail Comb http://goo.gl/NTJJnC
Wide Tooth Comb http://goo.gl/mkXsZC
Dry Towel http://goo.gl/JN0XQP
Hair Cutting Scissors http://goo.gl/rYH7BX
(4) Wig Combs http://goo.gl/ZvDKzx
Bobby Pins http://goo.gl/M6997x
Edge Control (Design Essentials) http://goo.gl/2ibYgw
Hair Holding Spray (Garnier Fructis Style Flexible Control) http://goo.gl/dKC7ni
Duck Bill Clips http://goo.gl/SQ5SNn
Measuring Tape http://goo.gl/MmeI9V
Flat Iron (Nano Titanium Babybliss PRO) http://goo.gl/TbgJFv
1 inch Curling Wand (HSI Curling Tool) http://goo.gl/maV8uy
Block Canvas Head http://goo.gl/UPqHWx
Spandex Dome Wig Cap http://goo.gl/MCa4Rw
Makeup Pencil (Maybeline Wear ‘n Go) http://goo.gl/3DuwlL
Heat Protectant (Garnier Fructis Marvelous Oil Frizz Defy) http://goo.gl/NaspXv
How To Dye Hair Extensions Black HERE https://youtu.be/y93K9gZiBww
How To Dye A Lace Closure Black HERE https://youtu.be/f0F7FWrgnPY
U PART WIG TUTORIAL STEPS
Step 1 http://goo.gl/gGvdVI
Step 2 http://goo.gl/4jbK6N
Step 3 http://goo.gl/cHTJSD
Step 4 http://goo.gl/6S5diw
Step 5 http://goo.gl/6le0ZR
Step 6 http://goo.gl/gzMryd
Thanks For Watching!
----------------------------------------------------------------------------------------------------------------------------------------------------------------------------------------------------
Free Giveaways & Weekly Updates By Email! http://eepurl.com/bN6ddr
Buy My Books, DVDs, and T-Shirts at http://www.howtoblackhairstore.com
My Website: http://www.howtoblackhair.com
Twitter: http://www.twitter.com/BreannaRutter
Facebook: https://www.facebook.com/OfficialBrean...
Instagram: http://www.instagram.com/breannarutter...
Google +: bit.ly/15gNK3M
Got Hair Questions? Email Me!
Email for Business Inquiries
----------------------------------------------------------------------------------------------------------------------------------------------------------------------------------------------------
DISCLAIMER: All suggestions, tips, prizes, techniques and advice given are for informational purposes only and should be used at your discretion and best judgment. I highly recommend conducting strand tests when trying or using new products, hair appliances and product mixes. I am not responsible or liable for adverse or undesirable effects including hair loss, hair breakage or other hair/scalp/skin/body damage as a direct or indirect result of the suggestions, tips, prizes, techniques and/or advice given.
FTC: I am not representing, being paid by, or endorsing any of the product brands in this video & I purchased everything with my own money - UNLESS OTHERWISE STATED in video/blog content. There are links to products that might be helpful based on the content of this video/blog. Each of your purchases via our Amazon affiliate links supports our cause at no additional cost to you.
Music Used
“Easy Lemon”
Kevin MacLeod
Incompetech.com
Hello, everyone: this is Breanna Rutter, author of over 14 haircare books and founder of howtoblackhair.com. For this tutorial, I am going to be teaching you step-by-step, how to create your own. Your own! U part wig using Mrs. Rutter's hair extensions from MrsRutters.com the following materials. You will need to create your. U part way will be three bundles of Mrs. Rutter's hair extensions in the lengths of 24 inches 22 inches and 20 inches. You will also need nylon sewing thread, weaving needles, a rat tail comb, a wide tooth comb, a dry towel, hair cutting scissors 4 wig combs bobby pins, duckbill clips measuring tape, a flat iron, a 1 inch curling wand, a block canvas head, a dome cap, a makeup Pencil edge control holding spray and you also need heat protectant. So once you have all of your hair supplies and materials ready in the very next step, number two: I'm going to be teaching you how to create your braid pattern. For your? U part: wig install


Comments
Breanna Rutter: YOUTUBE HASN'T Been Showing You All My New Videos?? CLICK THE BELL ICON Next To The Subscribe Button to Turn on Channel Notifications To Never Miss A New Video Again!
Everjoyce Manzie: Hey Mrs Rutter, I love ur channel and I have learnt soooo much from watching ur videos. I recently decided to go natural, how do u suggest I go about this? My hair is kinda thin and I was wondering how I could increase its volume while maintaining hair growth. Thank You
Faith Johnson: I tried clicking on Part 2, but it says that it's private. How can I get to part 2?
Breanna Rutter: Watch The Shorter Condensed Version of This Whole Look By Clicking Here https://www.youtube.com/watch?v=jbze0Xv_z8Y
kymmy Got Sisterlocks: I wish you was in Chicago :-(