How I Made My U Part Wig With Closure (Detailed)
- Posted on 05 August, 2013
- U Part Wig
- By Anonymous
flyfiercefab.blogspot.com
I purchased all the hair and the supplies needed to make my wig with my own money. I used:
1 Bundle of 22" and 1 Bundle of 24" of Brazilian Natural Curly Hair from Sassy Mitchell
A 14" Lace Base Natural Curl Free Part Closure (Eurasian Hair) from Closure Addictz
Fray Check
TRESemme Flawless Curls Curl Hydration Shampoo and Conditioner
ORS Creamy Aloe Shampoo
A Highlighting Cap Kit from Sally's
A Dome Cap
A Styrofoam Wig Head
2 Packages of the blue Kaleidocolors tonal powder lightener
A small bottle of 10 vol creme developer (by Salon Care)
The videos that taught me a lot of the techniques that I used to make my wigs were:
How I learned to sew the wig:
http://www.youtube.com/watch?v=en0W-IV...
and
Where I got the pantyhose tip:
http://www.youtube.com/watch?v=XrUt4bM...
Questions or Video Ideas? Leave a comment! Don't forget to subscribe!
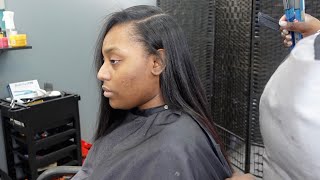
Hi guys it's shayi from fly fiercefab.blogspot.com and today, i'm here to talk to you about how i made my u-part wig with closure that i'll be getting sewn in very soon i'd say it took me about a week from start to finish to make this wig with The closure and start to finish that would be getting my hair getting the closure washing the hair, stealing the wefts of the hair bleaching, the knots on the closure and then the process of like putting it on the cap and sewing that down and highlighting the hair And the closure as well after so that took me a week, probably also it took me three days to sew it simply because i've never done a sew-in before or anything like that. So i had to get used to like you know how to hold the hair and the needle and holding the wig head still and stuff. It was a struggle, but i got it done it's the first time i ever made any sort of wig or anything like that. So i'm excited and i'm proud of myself. I think i did a good job so um. First, let me show you guys what the wig looks like. I still have to cut the dome cap off and then underneath where the closure is. I saw in a video that i'm going to link in the description box that you should put a little pair like a little swatch of pantyhose that are in the call of your skin tone, underneath the lace, the closure just to make it look all that more Realistic, but this is the wig on my wig head. I highlighted it as you can see, this is um one bundle of 24 inches of brazilian natural curly hair and one bundle of 22 inches brazilian natural curly hair from sassy mitchell and the closure up top. Here. That'S um pretty much. All in this section is from closure addicts, dot com, that's uh, closure, a d d, i c t z, dot, com, um and i'm pretty sure this is eurasian hair. I ordered a lace. As you can see, this is a lace right here. A lace, natural curl, uh, free part, closure and um. According to what i had seen like on instagram from sassy mitchell like um, this closure would match and work with the hair that i ordered pretty well. So i'm excited about that. So let me tell you guys, um how i made the wig and then i think i'll try it on for you guys. So you can see. I mean you have to imagine a little bit because i haven't cut the cap off yet and i do plan on leaving a little bit of hair out around the perimeter of my head. This way, i can, like you know, pull my hair up on a ponytail. Still and whatnot and still be functional. So after i got my um sassy mitchell hair, which, like i said, came really really quick, i washed the hair and online. I had been looking for recommendations, you know how to care for the hair and how to wash it and a lot of people said to get tresemme the curl, hydration flawless, curls, shampoo and conditioner. I got this from walmart for about, i think, like maybe three dollars, and i got this big bottle of the conditioner for about five dollars at target and it works really really well like. As you can see, that's what i used to wash the hair and my sister, who has like a wave nouveau in her hair, tried this stuff and it worked really well in our hair, like it looks, really really good and it stays moisturized. So this stuff right here get you some tresemme, like i said: curl hydration, shampoo and the conditioner from the flawless curls line after i washed the hair uh, the hair and the closure. I washed, both with the trust of my shampoo and conditioner. I, on the wefts of the hair: this is my little leftover piece from a 22 inch bundle. Everything else i did use on the wig, except for this little piece of the 22 inch bundle. So i got some fray check from walmart. I think it was like 297 and i sealed the lefts on all my hair on both sides, and i think i let it dry for about 10 minutes in between on each side. So i did one side: let that sit for 10 minutes flipped it over. Did the other side and let it dry, and i could feel that the lusts are definitely stronger, so um ceiling lust is definitely important and i believe it was suggested on the um instructions on how to care for the hair from sassy mitchell. So i steal them. This way, i wouldn't have any problems with like shedding or anything with the hair and then um. I got a dome cap from sally's which came in this package. Damn cat right there there it is, i put it on my head. I took like a silver eyeliner because it was the only thing i could find and i put it on my head. I put the closure on top and i traced where the closure would go. I did a line around like how much hair i wanted to leave out so, like i drew a line around for where i wanted to put the hair in like where i wanted to sew it in um, then i took the cap off. I put it on the wig head, pinned it down with some sewing pins, and then i started to sew the hair onto the dome cap and i didn't sew through the left. I kind of sewed around it like around this piece. This way it would hold in um, and then i sewed the closure on last and when i attached the closure, i don't know if you'll be able to see it nope, it did such a good job. You won't see it but um. I kind of like attached. The closure to um the part of the cap where the wefts were sewn in, if that makes sense so like right here, you can kind of see right. There kind of kind of this is where the closure is, and this is where the west ended and it's kind of sewn together, but you won't see any of that with my leave out like i said, because i'm going to leave out enough hair in the front And on the sides, where you won't see any of this business right here - okay, that's the just between us! So after i did that sewed the whole all the hair down and sold the closure and cut the lace off the closure. And yes, i did bleach the knots. I'Ve never done that before, because i've never worked with a closure before either. But i do have some pictures that i will insert in at the end and what i used to bleach. The closure was the same stuff i used for my highlights. I have a little bit left over then i used um a package of kaleido colors. It did not take the whole thing to bleach the closure. Just a tiny bit of this, and i believe i used cream a volume developer from sally's. I think it was the salon - caroline, the 10 volume developer and some of the colada colors in the blue package. It smells like blueberries actually but um. It says that it lightens up the five levels and then coolstones or black, to medium and blonde hair. So i just used a tiny bit to bleach the knots on my closure. I think i left it on for seven minutes and then i washed it out with this, which is ors um organic root, stimulator creamy, aloe, shampoo, um, it's a neutralizing and a regular shampoo, and i heard somewhere before that you should use some sort of like neutralizing Shampoo or something like that to wash out stuff after you like work with color like to lighten hair or bleach hair or whatever. So that was why i used that and then i washed again with the tresemme, the shampoo and the conditioner. So after i bleached the knot to the closure, like i said, let that dry did all the stuff with the hair sewed it onto the cap. I straightened the hair and then i pulled the hair through um, a highlighting cap that i got from sally's, which was this it's kind of in rough shape. Now, but this i pulled the hair through the holes while it was on the wig head this way. I could highlight it um after i did that it came with a kit like it had like the brush for the hair, color um, the little thing for you to pull the hair through and obviously the cap with the holes. I use um an entire package of this um and a little bit of this too. So if you're going to highlight your hair, i suggest you probably get two packages or you can just get the um the jar of this, but i didn't know how much i needed. So i just bought a couple packages so to highlight the hair. I used this an entire package of this and a little bit more from this package like a package and a half of the kaleida colors um tonal powder lightener, and then i used um 10 volume developer from sally's the cream. One, like i said, and i mix it together and i put it on the hair for 10 minutes like the package is set like the package um, the clyde colors package says with heat for 10 minutes, and that was how i got these lovely highlights like you. Can see - and this is so when i applied the um, the kaleida colors and the developer mixed together. I started in the front because i had read online that when you do highlights, you always want to start in the front and then work your way through, because naturally, the front of the hair, i guess, is what would get lighter um the lightest normally and it's A good thing that i did that, because by the time i was done applying it to all of the hair, this part was already getting pretty light. So after i put that on and like i said, i put a plastic cap over it and i applied heat for 10 minutes. I then washed the um, the developer and the collider color stuff out with this, the neutralizing shampoo, and then i washed it again with the tresemme shampoo and the conditioner, and i also leave a little bit of this in every time after i wash the hair. So i'll wash the conditioner out pump a little on my hands and just kind of run it through the hair just to have some conditioner left in there now i have never highlighted hair before, like i said, i've never even made a wig before anything like that. So before i highlighted and did all of that on the wig on this tester piece well, i call this my tester piece, but it's that little bit i said i have left over from my 22 inch bundle. I tested um the color out the kaleido color stuff that i talked about and if you can see, i don't know if you can that's the color that i got so. I decided to just kind of go with it and um highlight the rest of the hair and it came out pretty nice, so um. Today'S monday, on wednesday, i'm going to have my friends sew this on for me, um by then i'll have taken the pineals, and let me just show you what i'm talking about here. This is the color i usually wear. Um, like sheer energy suntan, got it from walmart just gon na take like a little piece of this and sew it underneath where the closure is just to get like a more natural like scalp. Like effect, i'm going to cut the dome cap off, like the rest part that you see here like this under here. I'M going to cut that off. Have my friend sew it on for me and then to blend my hair with um the way because my hair is relaxed. I recently purchased a curling wand from nume and i got their 13 millimeter curling wand. I haven't used it yet um. I will be using it wednesday after i get my wig what's going on and i will try and do a video on how i'm blending that okay, so, like i said i was gon na put the wig on for you guys. So this is it as you can see, this is the um where the cap is that'll, be coming off. That'S where my leave out will be okay, so i can still pull my hair up in a ponytail and whatnot, but this is what the wig looks like on and just to um, be totally clear. Like i said, i have two bundles of hair in my head. One bundle is 24 inches of brazilian natural curl from sassy mitchell and the other is 22 inches of brazilian natural curl from sassy mitchell. The closure, i believe, is eurasian hair and it is 14 inches from closure addicts.com and it is a lace, um, natural free part, closure and yeah. So, oh totally important when i mixed the um, the lightener and the developer. I mixed it like, as far as like what ratio whatever to use, i mix them together until i got the consistency of whipped cream, because that is what i learned and saw in other videos and that's what worked for me. I'M not a stylist, i'm not a hair care professional. So definitely you know look that up on how to do that. If that's what you plan on doing like lightening your hair, but that is what i did. I mixed the developer and the lightener together until i got the consistency of whipped cream, so it was like kind of it on the thick side and then i worked with it. Um i'm going to stand up, so you guys can see or squat down to see what the wig looks like and yeah it's nice and curly. It'S really full some people did have questions for me on like whether or not two bundles was enough. I feel like it is because, after like looks, can be deceiving when you first take it out the package you're like oh, maybe not, but once you wash it that hair does fluff up and do this thing. So, for me this is more than enough hair like this and a closure. More than enough and like i said, i still have like this little bit. Left of the 22 inch bundle um, if i wanted to add it in somewhere, but i don't feel that that's necessary for me, two bundles and a closure is more than enough hair, and just so you can see the highlights there. Yes, i like it. I, like it so yeah i'll, be back with another video after get this sewn in and hopefully in that, i will be able to conclude include how i'm blending my hair with the hair on this wig bye guys. So this is a picture of the closure when i first received it from closure. This is a picture of the knots before i bleached them. This is a picture of the knots after i bleached them with the kaleida colors. This just shows how i marked where i wanted my closure to go on my u-part wig, and this is just showing that i did not cut the wefts, but i folded them over as i was sewing and kept going hope that helps you

Comments
Aisha C: Loved your Video . Definitely going to Order this Hair ! Very Helpful