U-Part Wig For 4C Hair
- Posted on 10 August, 2020
- U Part Wig
- By Anonymous
Here's a very detailed Tutorial on how to make a U-Part Wig. My customer is an artist and used this wig in a video to emphasize that Black Lives Matter, watch until the end.
Wig "Zoey"
https://polishedappearance.com/collect...
Want me to make you a Wig
https://polishedappearance.com/
Keep in Touch
https://www.instagram.com/polishedappe...
https://www.instagram.com/jasminebetse...
https://www.facebook.com/PolishedAppea...
Send me something nice
Jasmine Betsey
PO Box 300063
Houston, TC 77230
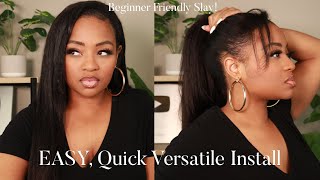
Hey family today, i'm going to show you how i make this natural textured u-part wig, that you see my customer over here rocking so flawlessly. It'S very simple! If you'd like to see how i do it make sure you stay tuned subscribe to my channel. If you haven't already and give this video a thumbs up, what you will be needing is a cap. I am going to be using my traditional mesh, dome cap. You could use a ventilated cap or whatever wig cap, that you'd like to use. That'S perfectly fine, um you'll need the hair, obviously um. This is a natural textured hairstyle that mimics 4c hair. So i'm going to be using two bundles of this to make a wig. It seems like not a lot, but because this hair swells and it gets so big - two bundles - is more than enough and you'll be needing some clips so i'll be using these clips to hold the wig in place when she puts them on and secures it clip. Combs all right and of course you need your uh sewing machine or your thread. If you hand stitch, you could do this through a hand, stitch very easy um. So let's get started so i have resized this cap. Normally, we would take that excess lac from my cat. We would take this excess and we would resize it in the front, but because this is a u-part wig and it doesn't have a lace, closure or frontal for me to remove the excess from underneath. I resize it in the back right here: okay, i pulled the excess back around the perimeter of the back of the wig and i stitched it here. Okay, so now my customer wants a right-sided part. Now i make my parts six inches deep and one inch wide. So six by one is the measurements i'm going to use, i'm going to go right to the side of the seam to make uh to the side of this seam to make um my part, this is a nice deep five by one part. This is where i will cut out um when i'm finished. I won't add any tracks right here. I'Ll add clips around this opening. Okay. So now i'm just going to draw my guidelines like i traditionally do i'm going to make my i'm going to make my part 1 inches apart, not my parts, my tracks, i'm going to drop, draw my guidelines, one inch apart from one another, do yeah. This will be the opening, and then these will be um the tracks that will fall over into her face. Okay, yes, so, let's get ready to sew, do okay! We have constructed our u-part wig. Everything is sewn together, except for this part like i said, this will be where we cut out and i will add the clips underneath it um, so i sewed it all together on my machine. Let me turn it inside out. I haven't cut the excess threads, so you guys could see stitching my line. I follow my guidelines even - and this was the this - is the curved part over here at the top that i was drawing. This is how it turned out to look okay, so i'm just going to cut away these extras thread, cut it open and add, combs do so boom. I opened it up now it's open, and now it was just remember how small that part was you see how big it opens up to be um? That'S why i only do one inch. Some people do two inches i've seen people do as much as four and five. I'M like. That'S a that's a whole. That'S a whole uh, half a wig, so yeah you could. When you put it on right, you could open up up as much as you want, but you only need it to be just right here. That way, you don't feel like you need to have a lot of your hair out that could get damaged or whatever just minimal, leave out. Okay, unless you like a lot out now, we're going to add the combs, we're done with my sewing machine. Add the combs! I'M using my hooked needle nylon thread, i am going to add five seven and add seven comb. Okay, so i put four of the combs right here along the end, and i have one more to put right here. So hopefully you guys can see me. I make sure this rubber band part is facing the back of the wig. I sew it on. While the clip is closed. Okay and i start um left - i go left down back up right down back up all right, i'm having a hard time get this in focus, so you guys can see how i sew on the comb. Okay. So, let's try again they're from behind here and two at the nape to hold it in place. Our right sided part and voila. That is it all she has to do. Is comb this hair out with the right product and style it and she'll have a nice big, vibrant, throw? I can't wait to see. I it wan na live right. Now there is a portion of our community that is frustrated and they are suffering and they are hurting. So, as an empathetic christian, i'm gon na go and say i agree black lives matter. That'S what i said.

Comments
Kevnesha Boyd: I love the Upart wig you made me, it’s my favorite one thus far. The hair blends with my natural hair so well!
Kai Watson: BRAVO!!!! Detailed explanation and I absolutely love the ending. YOU ROCK DIVA!!! #BLM
Olevia Henderson: Love it I need my hair to grow out more I’d love that
Destinee Griffin: Nice work!!! Where's the hair from?