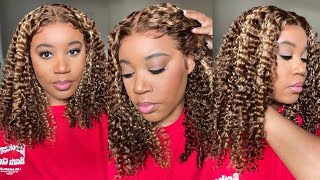
Comeclowe: Sugar Ditch Girls| Sweet Curly Wave 3-Section Upart Wig
- Posted on 08 June, 2016
- U Part Wig
- By Anonymous
Hair: http://sugarditchgirls.com
Hair specs: 18/22/24 Sweet Curly Wave
Connect with me! ↓
INSTAGRAM | BLOG | TWITTER
http://instagram.com/carolynclowe
http://instagram.com/sugarditchgirls
http://www.sugarditchgirls.com
https://twitter.com/carolynclowe_
Business inquires: [email protected]/[email protected]
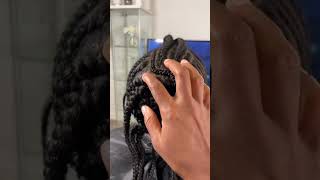
Hi beauties welcome back to my channel, it's your girl low. Thank you so much guys for tuning in to my channel and watching my videos. I appreciate all of the love and the comments you guys have been leaving me. I definitely appreciate it. I know it's been like a month since i've posted a video and it's only been because I haven't had my equipment together and up to par. I'Ve been having problems with my macbook, but luckily i'll have another one here in like two days. So, thank God. Yeah me right blessings, so I'm super excited about that. I'M super excited about more videos that will be coming to you, guys um, but yeah. So, let's get to the good part. Install is actually a three section. U part wig! Yes, ladies three sections, not one you but three so yeah, it's pretty much built or look built. Did you build a house? No girl, it's pretty much constructed where you can style it somewhere either a middle part, a side part or a right, a right side, part or left side part, but anyway um. I typically never really wears middle parts. With my curly hair, i only love the whole flip over type met the thing um, so that's pretty much. What this install is i'll, give you guys a view from the bag view like joint front of it. A look Bicket like shrink. No, I'm sorry! Otto ratcheted, you got ta, come out at some times some point, but anyway um. Let me know what y'all think about these, but I just love here. Oh my god, i love my bundles. I love okay, i'm done basically, but yes, they told if i wan na see with these beautiful bundles are like before i installed them and live as fabulous as i'm looking right now so to get started your materials that you're going to need a pretty much needle Thread a cap maybe clips, depending on your personal preference, for how you want to make your wig and then I'm mannequin head now. All of these materials can be bought at any local beauty, supply store, so they're really accessible. You can find them pretty much anywhere, but yeah so right here it's pretty much giving you a view of how I'm going to anchor my first track as I layer it. If you notice, i do have the cap on the mannequin head inside out, so that if ever i decide to apply my wig and i want to leave a. I want to say, like a pretty good amount of leave out around the perimeter of the install it'll. Always look natural because that first track is laid on the inside of the cap. If you get what i'm saying so, you'll you'll soon see how i'll flip it around on once. That first track has been laid out, but it typically gives you a more natural look and it will blend better within your natural hair. If you decide to pull it up in a ponytail or you know, whatever the case may be, when you do pull that hair up, it'll always give it a more natural and realistic appeal so on to furthering these steps once that first track has been laid out. You want to remove your cat and then flip it on the other side, which would be right sides out, and then you know the inseam of the cap would now be touching the head of the mannequin. So once you apply that and you get it situated, you pretty much want to continue to lay your tracks back and forth as if you were continuing to do an original. So in so the trick in the key key key key to success with making these wigs is. When you get to these corner edge pieces, you want to make sure you are taking your needle directly through the weft of your track, exactly in the space where your track is going to fold and you're going to do that. Just because you want to make sure that that's going to be as flat as possible. So when you penetrate your weft, make sure you do it right on the edge of the fold and a lot of the times. Normally, when I, when I am sewing the intention, extensions, I'm sorry, I'm always looping it. So that's what you kind of see me doing, i'm taking the thread and taking it over the needle as I you know, loop it through or as I so it through. Each time that I attach it to the actual spend X cap, you so um right here again, this clip is actually going to be able to show you a little bit better and up close exactly what I meant about that fold and Stitch to make sure that You have a really clean and flat base to your folds on each. You know each line or each row of your tracks that you're laying there on your wig and also just in case you guys, are wondering like what does that Miss on the cap? What I did with my cap first just for a better fitting. I applied it to my head and I took like a white liner and pretty much just outlined my hairline, and so what you see there is just a line over the ear area point so that I'll know you know, hey make sure you don't so over this Right here, because your ear space needs to go there, so yeah, that's pretty much what you see there and, as you can see here, i am not penetrating my wife's as I so through. I'M only penetrating the web's when i get to the corners of where i'm trying to anchor it down and make sure it's really really flat. Otherwise, I'm just looping around my track, looping around my track, looping around my track as I go through you. So this is what your wig cap should look like once you've applied majority of your hair arm. I believe i only have like maybe one bundle left and that's pretty much going to cover the area of where my three sections are going to be placed throughout the wig. So once i get miss lady situated i'll pick back up with adding those strikes and where they belong for those three sections, you so just an FYI in case you're wondering how to make an original. U part wig without these three separate sections within your wig, you want to continue to apply your tracks. Just as you see me laying them here, except you won't leave that space. That'S there. You won't leave that gap. That'S there. You'Ll just continue to take your tracks back and forth in a u-shaped motion and that's pretty much how you will create your u-shaped. Are you part we you so we're almost done making this 3 section? U part wig, so I just wanted to put the tip or throw it in there with you guys when you do get to the top area of your wig, where you're normally going to have your leave out, you do want to lay your tracks as close as Possible, you don't want to make it too bulky or two things so that it won't. You know so that it will look lumpy or anything like that, but you definitely want to lay your tracks close together, so that you can make your install look as full and as neat as possible. You you so I do want you, ladies or guys, to take note of the idea that, when you do get to the spaces, where you're actually laying your tracks around the area where you will have leave out, please do feel free to penetrate through your whips. When attaching it to your dome cap - and it only leaves just for better anchor ship, I would want to say if that's even a word just to make sure that you don't have tracks that are loose. Looking and flopping - and you know things of that nature or whatnot, because honestly you don't have anything, but your natural leave out to conceal whatever is sewn down at that point. But after this track is laid, we will be absolutely done constructing our three ships section. U part wig you you finally done with that! Three section: u part wig, oh my goodness! Oh so if that was pretty easy guys, I'm pretty sure that was easy to catch on. I'M sure you guys can easily make that at home yourselves, but yeah. So here I'm just giving you a slight demo of how it'll look with that flip over method with that side, part with the middle part and then as well. You have a left side, part also, which makes it a very on versatile way to have, because you can wear it in so many different styles. You know you have the option to wear it in at least you know for definite three different styles left right or middle you. So once you cut the excess perimeter part of that cap off, you do have this left as a base for what you will actually stitch down to whatever foundation or braids that you decide to lay on your head or maybe a client's head. However, you choose, but this is how it should look once you've cut out those excess spaces again. Thank you guys for watching thanks for tuning in so much leave me any comments, any questions you have below and I will see you guys soon. I love you. Your girl, lo


Comments
Dalen Thomas: Wow you actually made me NOT scared to try this. I love me some hair and I’m always wanting a sew in but not about to pay an arm and a leg to get it done. You definitely just inspired me!!! Also I’m not a fan of the lace frontals or closures because my hair usually will blend good with the weave and I think it looks better so this was so helpful I’m a go head and subscribe now lol thanks beautiful !!!
Chastity Hillman: You are so welcome! I also follow you on snap!! Love them!!
Chastity Hillman: