How To Make A Wig With A 2*6 Closure || Enlbeauty Hair
- Posted on 23 August, 2021
- U Part Wig
- By Anonymous
HOW TO MAKE A WIG WITH A 2*6 CLOSURE
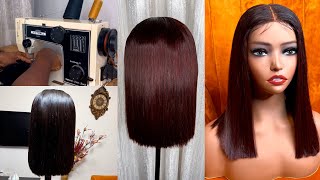
Hair used 3 Bundles if 24" Double Drawn Bone Straight hair and a 24" 2*6 closure both are from ENL BEAUTY on Instagram
SOCIAL NETWORKS
Email: [email protected]
Subscribe: https://www.youtube.com/c/LindaEzemedo...
Instagram: https://bit.ly/3KDexgN
Tiktok: lindaezemedolu, enlbeautyhair
Thanks for showing love sis
I am an Amazon Influencer, support and shop your essentials :)
Amazon US: https://www.amazon.com/shop/lindaezeme...
I film my videos with my this:
Camera and audio- NOKIA 8.3 5G no microphone used: https://bit.ly/32rEkXO
My ringlight: https://bit.ly/3tRtGVH
Soft box Lights: https://bit.ly/3FYoUbp
Tripod Stand: https://bit.ly/3rODUDs
SHOP BELOW
MY BOOKS: E-BOOKS – https://enlbeautyng.com/books
ON AMAZON (PAPERBACK): HOW TO START YOUR HAIR BUSINESS: https://www.amazon.com/HOW-START-YOUR-...
HOW TO START YOUR HAIR BUSINESS (EBOOK)- https://enlbeautyng.com/product/how-to...
Hair Extensions And How To Test Its Quality (EBOOK): https://enlbeautyng.com/product/hair-e...
ENLBEAUTY HAIR (WIGS): HAIR – https://enlbeautyng.com/hair/
WIG MAINTENANCE SERVICE IN LAGOS NIGERIA: https://enlbeautyng.com/wig-maintenanc...- services/
MAKEUP: ENLBEAUTY https://enlbeautyng.com/makeup)
MY HAIR VENDORS:
Vendor Plug – ENL BEAUTY https://enlbeautyng.com/vendor-plug/
1.Raw/ Donor Vietnamese Hair Vendor – https://enlbeautyng.com/vendor-plug/ra...
2.Virgin Vietnamese Hair Vendor – ENL BEAUTY - https://enlbeautyng.com/product/virgin...
3.Virgin Chinese Hair Vendor – ENL BEAUTY
https://enlbeautyng.com/product/virgin...
4.Raw Chinese Hair Vendor – ENL BEAUTY
https://enlbeautyng.com/product/raw-ch...
COURSES: Hair Colouring Course – ENL BEAUTY (enlbeautyng.com)
https://enlbeautyng.com/hair-colouring...
Wig Making Course –
https://enlbeautyng.com/wig-making-cou...
HOW TO ADD HIGHLIGHTS TO YOUR WIG COURSE: https://enlbeautyng.com/product/how-to...
HONEY BROWN HAIR COLOURING & STYLING COURSE: https://enlbeautyng.com/product/ honey-brown-hair-colouring-styling-course/ HONEY BROWN HAIR COLOURING & STYLING COURSE
SPEAK TO ME: https://enlbeautyng.com/one-on-one-bus...
SPEAK TO ME:
IN PERSON TRAINING: EMAIL ME [email protected]
Music is from Youtube Audio Library
videos are filmed and edited by me on my phone..................................................................................................................................................................................................................................................................................................................
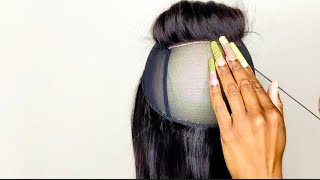
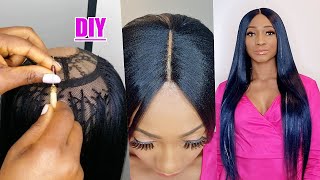
Hey guys lina here welcome back to my channel if you're new here. Thank you. My name is linda and i'm going to be showing you how you can make a wig. So i'm starting now using this wig cap here and i just turned it around to put the rough part of the wig pack wig cap on top. While this smooth part is on the inside, so i just placed it on a mannequin head and strapped it on. Then next i'm going to reach out for my t-pins and just use it to secure the wig ups really flat on the mannequin head. Then next i'm placing my closure and for this week to draw i'm using a by six closure, which is what like popularly known as a clean glue closure. I'M also using my t-pins to secure the closure on the center part of the recap, because i'm actually trying to achieve a center part wig. Yes, so i'm just trying to secure the closure down on all the sides from the front down to the back side. I'M trying to also check to make sure that it's really flat on the head, even on the sides too, but you see the front part - is tilting backwards. I'M just going to lift the pin and just try to place it better so that it's not sliding to the back too much, and i also paint it to the front just to make sure it's really well placed. So i just painted the hair away now, then, i'm going to proceed now to start pinning the these the parts in between the closure area. So next i'm just going to quickly sew around the closure. Making a wig is very easy guys. The most important thing is just knowing the basics of how to place your closure and then sewing it securely right now you can see how i'm going um going through with the needle and looping my needle through the thread just to tie it, while i'm also sewing It and i'm going to do the same thing all over the area of the closure, i'm just storing it from this side down to the other end of the closure. Now guys these are the bundles i'm using take note these hairs, which i'm using for this week tutorial is from my hair brand named enl beauty hairs. So this is a double drawn: um bone straight hair, it's 50 density, so it's not the fullest. It still has some short hairs in this, but the quality of this hair is so amazing guys and it's not so expensive, it's more like on the affordable range and it's 24 inch. So if you want to purchase this hair extension, you can reach out to me on instagram at enl beauty and we'll hook you up with it. So i'm just saying i'm just starting now to secure the tracks on the recap, from the ends of from the back of the recap and what i'm doing now, i'm doing a double tracking. I doubled the tracks, but i've gotten to this part of the recap. Now i want to start doing like a single track so that it's not so bulky at all parts. So i'm just sewing down the wefts. You can see how i'm sewing it. I loop the middle in and i pass them into the trade, and i keep on sewing it. Making a wig is really easy. All it just requires is patience, and you need to sew your trades closely like leave at least half an inch distance between each part. You sew just so that this, so these sewing can be very secure and you don't have your tracks losing out, and the thing is for you to get better as a big maker. It'S practice that makes you get better. Some people are able to use a sewing machine to make the objects, but unfortunately, i've not been able to learn how to do that, and i just feel like even when i, when i did it, i felt like um the ones i had so i i hand-sewed Came out better than the ones that were mashing, so so i just teach using like my handmade wigs because it just comes out better. It'S just better looking and it feels better when you touch where you run your hands from the back. So just keep sewing until you get towards like the end of the recap, but then now that we're approaching, like all part of the week, i'm going to start showing you how i tend to flip the hair around and how i join new tracks together and how. I introduce a new trade so now i just joined added a new track, i'm just trying to sew it in, and some sort of join the two tracks together, while i'm sewing it on the wi-cup. So after i've tried it together, i'm just gon na proceed to just doing the same to the other end. So now i'm at the end of this recap now you can see how i'm going to flip it over and while i flip it over, there's like a almost like, almost an inch distance between the one that was previously sewn and this one i'm seeing on top Right now, so the essence of flipping the um, the weft over, is just to ensure that when you flip it over it's flat, it's not bulky! You need to give that this, that bit of a distance, that it's not too bulky and it just lifts flat. So you're able to sew it and when your client touches the b cap on our head, if you flat underneath so now, i'm just proceeding to sewing sewing sewing down to the other side of the wig cap and the same way i flipped it over. On the other side, i'm also going to flip it over on this side. You can watch how i do it just take off that t-pin and i've got into that and flip it over and sew it. Yes, so i'm going to just show you security there and keep on going yeah making. Maybe he's really easy guys? Oh, you just need these parties package practice practice practice practice. Practice practice makes perfect yeah. You can see it's really easy, just making sure you so from one end to another end and when you start getting towards the parts of the recap that is close to the closure area, you can choose to start cutting your wefts just to ensure that that flipping Thing doesn't cause like a bulky effect on the all parts, but on this side here i'm still flipping the wig over i'm simply flipping the left over, but on the next part, i'm going to start coating the wefts, oh, i didn't even cut it here. I still flipped it over, but then you can start cutting the wefts from this part here, just to ensure that that all part is really really flat, but keep on sewing, keep on sewing, keep on sewing and so tightly, and you can see that i'm almost i've. I'M almost covered on the area that is in between the closure, so big is almost ready. Yeah you're almost done it's really easy, very easy process, and if you need videos on all the necessities or what you need in making a week, i think that early families there are on all the things that you need. When you're making a week, i'm gon na link it up in this video, so you can go check out all the things that are required in making a wig, yes guys, so we are almost done they're almost there. I just securing the last wefts on that. We cap trying to soak closely neatly you can see now we've closed out the entire space now so there's no space between the closure area and the recap area too so babe, please be sure to subscribe to my channel if you are not yet subscribed. Please, like this video share with your friends, are also interested in learning how to make a who or would you struggle with the process of making a week? Please support me: let's just grow this channel together. I would really really appreciate that, and also thank you. So much to all those i haven't subscribed to my channel all this work. I really appreciate you guys yeah. So, let's just continue making this week, you can see now i'm just trying to secure this other end of the week. Yes yeah almost. I can't see how i sued the the sewing on the up. Recap is very close to each other. I didn't give species because i don't like a situation whereby i give so much space and you can literally see bumps in between your weak and that tends to happen who looks when you're managing your tracks yeah. So now we are done, i'm just i'm. Thinking of the clip i used on the closure area and i'm just called mini closure down, so i'm using again, oh now, i just want to apply it only on the hair of the closure and that's because i had to wash the hair on the occlusion. It doesn't have that um, it's some sort of isn't as slick straight as the way it was when before i washed it. That'S why i'm just applying very little of that argan oil on the closure, the hair and the closure before i start to straighten it. So it's still straight, but i wanted to have that very slick straight. You know that blue straight look again yeah, so i'm just treating it now with the streets hair straightener. Next. After doing that, i'm going to start proceeding now to opening the parts on the closure area. Yes, i'm just using that comb now to open the parts yeah and then i'm going to use the hair wax to lay any flour away. Here'S the short hairs on the closure just to lay down then i'll proceed to using my hot iron, because i'm lazy yeah, i'm lazy. I like using hot iron just to lay down the closure like the hairs on the closure area. Well because it's just easier to work with, but then, if you have like a coiling wand or a hot comb, you could use that. But me i like to use my iron, but i'm very careful, so i don't place it on the neck of the closure, because once you place it on the interior closure, it's going to burn it so be careful if you're going to have to use the iron To flatten the short hairs on your closure, yes voila, we are almost done. I'M going to now cut off that list that we capitalize, that is on the inside area, of where the closure is after i'm done, cutting it off. I'M going to proceed now to applying a foundation to the inside part of the wig cap, but then, before i do that i'm going to put like um, oh let's just let's just apply the foundation. I think i did that step first before applying the straps there's. This elastic band, i tend to sew on the sides of the recap just to ensure that when the client wasted on our head is secure - and he just holds - has like a comfortable hold on her head, so i'm just using the elastic bar now just to sew On the b cap area, you can use about nine to ten inch of length for the elastic band, and i saw it on one side on like the area that is in behind our ears. On the recap: that's where i'm sewing one side of the strap and after i've soldered, he said i'm taking it to the left side down to secure it on the other side. So you can see he went from one side of the recap down to the other side of the recap and he's just going to be placed behind the ears when the recap is on the on the head. So it just holds the recap securely. But then it's not going to be uncomfortably tight, so guys now i'm trying to take off the ends. I want to make sure that the wig is on the same level like it's. You see. Has that um um blondes look he had as he was in a bundle, so i'm just taking over the ends of the recap of the bondage. Right now, i said: wake up sorry, guys picking it up just so it has that leveled look and it just looks sleek so by just doing that. Just maybe we have that it just has a rich look to it. It'S full from the upper down to the ends. It looks amazing. Yes, i hope my client loves how we cause many. We look so so adorable, and this is a 24 inch week. It'S 24 inch double drawn bold street hair. You can see how it looks. It'S really long she's, so beautiful yay. I love it. Tell me what you think about this wig share, though, to me in the comment section yay, it absolutely looks: amazing. The hair is luxurious yeah. I absolutely love this. Tell me what you think about it. I like the way it came out if you don't have a 24 inch bone street hair holla at iana, beauty will hook you up with the best quality hair extension it's affordable, also to get something like this from us. It'S um cost some around 200 000. As long as the laboratory means the same, i'm gon na put the equivalent in dollars in the description box, but i think that should be somewhere around um 200 to 220 dollars. Yes, so you can reach out to us and we the hookup so guys. Thank you. So much for watching this video, if you got value after this video, please make sure you subscribe to this channel share with your friends, are also going to learn athena too from watching this video and um. Thank you so much for supporting us over the years. We really appreciate your support. We do not take your support for granted yeah, let's just admire that closure area. Let'S see how natural it looks. Literally, look skin like thanks for watching you
Comments
Linda Ezemedolu: To order hair or Purchase my hair vendor information Message ENL BEAUTY on WhatsApp. https://wa.me/message/VJ44HSQOKIHWO1
Ify Ezeogwum: Lovely
Ify Ezeogwum: I love it oooo
it's clarice: Wow queen you fud that your good so beautiful