How To : Sew An Elastic Band On Lace Front Wig| According To Alecia
- Posted on 10 November, 2020
- Lace Frontal
- By Anonymous
#Accordingtoalecia#howtosewelasticbandonwig#elasticband
In this video I show the detailed step by step method that I use to sew elastic band unto my lace front wig. Sewing an elastic band unto your lace wig is a easy way to achieve a glueless application. Let me know if you guys like this kind of content and also feel free to suggest any video ideas.
Here is the link to the items used in video:
Tpins and Needles- https://www.amazon.com/gp/product/B07C...
Elastic Band- https://www.amazon.com/gp/product/B06Z...
Other Videos to watch:
https://youtu.be/w3uRLiDIqdU - how to bleach your lace
Wavy Bob Wig- https://youtu.be/LomWWMuB8HM
Connect with me:
https://www.facebook.com/fretonzia.bro...
https://www.instagram.com/aleciasky/
For Business Enquiries:
The links provided are affiliate links. At no additional cost to you, I will earn a small commission if you click the link and make a purchase
Welcome to ACCORDING TO ALECIA official YouTube channel.
Just a simple island girl, born in Jamaica and living in New York City.
On this channel you will have a glimpse into my everyday life.
I love shopping on a budget , so expect to see lots of hauls (jewelry, home decor, fashion) and products reviews. Self Taught Nail tech, expect nail tutorials. I also do lets chat videos where I give my opinion on real life issues. On my channel we stay slayed, entertained and enriched. You don't want to miss out
Be sure to subscribe, like, share and leave a comment !!!!!!!
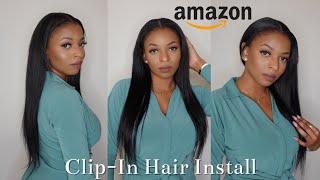
Hi guys welcome back to my channel, it's your girl, alicia and i'm back with another video now for today's video i'll, be showing you guys how i attach the elastic band to my wigs - and this is the brand that i normally use. Um lusata and i get it from amazon i'll, be sure to link it in the description below and, as you can see, you get a good amount of elastic band that can serve you for quite some time all right. So what i'm gon na do now is. I'M gon na measure from ear to ear um. What i do is i use the combs as a marker. They normally fall on the wigs. They normally fall right at the top of your ear, so i'm just placing the elastic band at the top of one ear and then stretching it to the other side. You want to make sure that you stretch it. So you get a true fit because remember when you put on the elastic band it's supposed to stretch um in order to keep the wig flat and um, where you can wear it glue less, so i'm stretching it from ear to ear. However, i will go ahead and double check the measurements with my own head to make sure that it's correct and just to let you guys know that the wig cap that the mannequin head i'm using is 22.5 inches, which is the size of my wig cap. So i know it should fit correctly. However, i sometimes add a quarter inches just to make sure it is not too tight, and then i will cut the elastic band all right. So in this clip now guys you can see. I already started sewing on the elastic band. I thought it was recording, but it wasn't so what i did was. I just used my t-pins to pin my wig cap down on my mannequin head, so it wouldn't move once i begin sewing on the elastic band. All right, so what i did was i placed the elastic band a little bit down from the comb, and then i used my t-pins to fasten the elastic band to my wig all right, and you want to make sure that you leave enough space between the end Of the elastic band and the t pins, so you will actually have space to sew on the elastic band all right. So that's basically what i did and then i sewed it on. As i said, it wasn't recording, but i'm gon na show you guys, on the other side, exactly what i did all right so right now, i'm just stretching the elastic band to the other side, i'm gon na be repeating the process, so you guys can see it In real time all right, so i stretched it and i placed it a little bit down um a little bit below the comb and i'm going to be using the t pins now to fasten the elastic band to the wig. All right and, as i said, you want to make sure that you leave space between the end of the elastic band and where you place the t pins, because you will need space to actually sew alright. So that's what i'm doing here and then we're gon na begin sewing all right. So now we're going to begin sewing on the elastic band you're, going to put the needle through the lace as close to the elastic band as possible and then you're going to pull it through the elastic band right and then, of course, you knotted one end of The thread then you're gon na go through and almost in the same spot, not the same spot but very close you're gon na go through and you're gon na do the same thing through the lace and then up through the elastic band right and right here now. You'Re going to um loop, the knee loop, the needle through the thread, i have a list guys so yeah and then pull it through right. So you just continue the same process, making sure that when you pull the needle through, like you're, actually looping the needle through the thread, so the elastic band will stay flat, all right so through the lace as close to the elastic band as possible. Because you know it's gon na stretch and you do not want to put too much pressure where you'll get holes in your lace right so through the through the elastic band, then you loop it and pull it through all right. So one more time guys, you are gon na go into the lace as close to the elastic band as possible up and through the elastic band through the lace up until the elastic band and right there. You see where i made the loop to make sure that it is gon na lay flat all right. So hopefully you guys can understand it by watching it better than i have explained it. So i'm going to let you guys watch all right, so i wanted to show you guys what i do at the end, all right so right here, i'm gon na make i'm gon na loop, the needle through the thread twice, and this is just to make sure That it is secure, so that's the second time and then i'm gon na push it straight down and make sure that it is tight and secure. That'S not going anywhere all right. So now i'm gon na cut off the thread, but i'm going to leave like two and a half inches enough, so i will be able to hold this hold the third and actually tight um here, you're gon na see, i divide the thread into two: the two Pieces i'm going to go through and make is this what they call slip knots, i'm not sure, but i'm just gon na tie it twice to make sure that it is double secure. After that we are done, we will just be cutting the thread and removing the t pins all right, all right guys. So there you have it. You have your elastic band sewn into your wig and it looks very professional. It'S very neat and your wig will fit um more secure and it could be worn glueless all right. So i just want to let you guys know i will be leaving the link to the t-pins and the curved needles. I got them from amazon. I will leave them in my description box all right, and this is how your wig will look on your head. Um, it's going to look very professional and it's going to be very secure, as i said before, all right, so that's it guys. I want to thank you guys for watching, and just in case you didn't know, i did a video before this, where i showed you guys how i bleach the knots on my wig. Yes, so you guys can go ahead and check that out coming up i'll, be showing you guys. Oh, i cut the lace from my lace front, wigs all right if you haven't yet subscribe to the channel, go ahead and subscribe and turn on your post notifications leave a like leave a comment all right. Thank you guys for watching and until next time bye, you


Comments
Alaina Richard: Thank you! This was a huge help ❤️
LaLa Jas: Thank you, this helped a lot
Eleanor Charles: you make this look so easy and I still don't know how!
Caleidoscopio 360: Can apply that method for man wig?
Prisy E.: was here