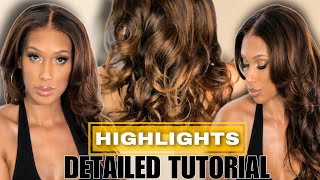
Updated Knot Bleaching Techniques Bleach Knots Lace Frontal Wig Mspreciousmarie
- Posted on 22 January, 2023
- Lace Frontal
- By Anonymous
Step by Step Bleaching Knots on lace frontal wig. These updated knot bleaching techniques and products will create a fake scalp look on lace frontal wigs that match skin tones.
WIG LINK: https://ronniehair.com/collections/new...
DISCOUNT: Marie
LENGTH:16
DENSITY: 150
SHOP EVERY TOOL AND PRODUCT I USE: https://www.amazon.com/shop/msprecious...
Every product and tool I use will be in this link.
✦ ✦✦✦✦✦✦✦✦ HELPFUL INSTALL VIDEOS ✦✦✦✦✦✦✦✦✦✦✦
HOW TO CUT EAR TAB ON WIGS https://bit.ly/3AkkyL1
HOW TO CUSTOMIZE A LACE WIG https://bit.ly/3QrGuKM
CUTTING EAR TAB AREA 360 LACE WIG https://bit.ly/3w8zYAp
HOW TO MEASURE WIG TO FIT HEAD https://bit.ly/3A41UXg
NO BABY HAIR BEGINNER WIG INSTALL https://bit.ly/3CdZLuX
TIPS FOR APPLYING WIG ON NATURAL HAIRLINE https://bit.ly/3CcyCZy
SECURE NO GLUE WIG INSTALL https://bit.ly/3c00y8e
8 TIPS TO MAKE YOUR WIG LOOK BETTER https://bit.ly/3w94quf
HOW TO BLEACH KNOTS ON A WIG https://bit.ly/3w7zASY
HOW TO REMOVE WIG & WASH PROPERLY https://bit.ly/3SWCLq8
HOW TO SEW FAKE SCALP MATERIAL https://bit.ly/3PP5MBH
✦✦✦✦✦✦✦✦✦✦✦✦✦✦✦✦✦✦✦✦✦✦✦✦✦✦✦✦✦✦✦✦✦✦✦✦✦✦✦✦✦✦
Get the SCALP Material:
Fake Scalp Material https://bit.ly/3mp7qwU
___________________
FOLLOW ME HERE:
♡ Tik Tok https://vm.tiktok.com/ZMRwbmjdu/
♡Instagram: https://www.instagram.com/mspreciousma...
♡My Website: https://mspreciousmarie.com/
SPONSORSHIP INQUIRES EMAIL: [email protected]
If you would like your product shared in my videos, email me for details.
TIMESTAMPS:
00:00 Intro
00:22 Q&A Of The Day (How to store wigs)
1:34 Wig Details
2:08 Why You Should Bleach Knots On Wig
2:45 Remove Band
3:07 My Favorite Hair Bleach
3:37 Hair Bleach Measurements
4:19 Bleach Times & Which Developer
4:57 How To Bleach Knots
7:24 Get Rid Of Brassy Knots
8:03 Results & Additional Tips
*Hair or products shared are my OWN personal and honest experience. This video may contain sponsored content and affiliate links which I get a small percentage that helps invest back in my channel to continue to bring great content! Thank you for being so supportive!* #fakescalp #bleachknots #naturalwig
Foreign welcome back y'all. Let'S start out with the question of the day. This question says: what is the best way to store your wigs now this question: I actually get a lot and I have so many different ways that I store my wigs. I'Ve tried, you know: dresser drawers, I'll, try, mannequin heads and I've also just tried just leaving them in their original packaging or like little um dust baggies. But the one thing that I really found that is very convenient is actually using these right here, which are wig storage bags with hangers, and I find these very convenient, because not only if I wanted to store them like hang them up in my closet or on. Like a rack, it's convenient for that, but if I'm traveling I can have an easy way to travel with wigs that I want to take on vacation now. I will have this link down in my Amazon storefront. So if you would like to purchase it um, it will be in my Amazon storefront link below very convenient for you guys to find um. But if you have any more questions be sure to leave a comment below in the comment section and I will either answer it in the video or I answer it directly. Let'S Jump Right In all right, let's get into the bleaching tutorial, but first, let's take a look at what this wig looked like straight out the box before I did anything to it. This is a body wave texture. This is a 16 inch. This is what the quality of the hair look like. I am going to lighten this hair with my developer method, shared that in a previous video, so go check out that video. If you would like to see that method, but the hairline on this wig, of course, is a delicate hairline Swiss lace, as you can see, the hairline looks really good. The knots are not bleached, so this is what your knots will look like if they were not bleached. Now the key to bleaching knots is to make the scalp area look like scalp. You don't want to see all these little dots that you see and even though the knots are very small, very good on this wig, you still want to make them invisible. So my method today is going to show you exactly how to do that and how to achieve a scalp appearance without using a wig cap, and I'm going to drop some secrets on how I use the developer to determine what color my knot should be for complexions. So make sure you keep on watching, let's jump right into this all right so before I start with bleaching the knots I'm going to remove this elastic band, that's in the inside, because I don't want anything hindering how I bleach the knot. So I just kind of take it out, so it won't be in the way I put it back in normally after I finish styling and everything with the wig. So as you can see, this is a 13 by 6 cap. So my plan today is to show you the techniques that I use to get the perfect scalp look with bleach, but if you want the exact bleach that I'm using in today's tutorial, which is really good by the way, I will put it in my Amazon storefront. However, there are cheaper alternatives to hair bleach, so if you guys have your favors, you can use those, but if you want quality check my Amazon storefront Link in the description box, I will link the developer and the bleach for the measurements. I use one scoop of the bleach and I use one scoop of developer in the scoop. As you can see, that's why I'm saying scoop, but I just put it in there and then I pour it into the bleach. This is how much I use and, as you can see, the bleach that I use is very creamy. It'S not watery. It'S got a thick consistency um, so I just dumped that in there and mix it up now. This right here is enough to do two. Wigs and I always find myself trying not to throw away extra bleach when using this particular bleach, because one scoop will do two wigs when it comes to bleaching and Knots. So I'm just telling you all that if you can save your money and definitely bleach more than one wig. If you have leftover bleach now for the knots I like to use 30 developer because it takes the knots to my complexion - and I usually leave it on for 15 to 20 minutes, if you are darker than me, you only need 20 developer. You only need your knots to go Brown so take only 15 minutes with 20 developer. Now, if you are fair, skinned, definitely go with the 40 developer for 15 minutes. Nobody ever talks about that, but I wanted to tell you all that, because it's very important to understand what developer you need to achieve, what color knots that fits your scalp color and for me, it's 30 developer, and I figured this out a while ago. I had to switch, I don't know if you guys saw the drop or the increase in quality. I used my cell phone. For this part. I have an iPhone by the way, if you're wondering what the quality is for this part, but I wanted to make sure that you all was able to see exactly what I'm doing and I'm very impressed with my camera. So I had to tell you guys that yes, but anyways I'm taking the applicator brush and painting the bleach down the inside of the cap um. Let'S talk about this part because I've heard so many people say all the time you don't want the bleach to spill onto the root of the hair, which is true, you don't want us to go an inch or even two inches onto the roots of the hair. However, I would say: push that bleach into that lace, so that you're making sure it's getting over the knots on the other side of the lace a lot of times, if you're, just placing that bleach on that lace and then you rinse it off. And then you be like, oh my God, the knots did not bleach it's because it only bleached the underside of the knots. It didn't go through the lace, so you want to press and push that bleach so that it's on the other side and I'm gon na show you all what I mean in a second. But that's what I like to do. Another thing people will say is make sure the bleach consistency is very thick if the consistency is thick, like, I said, make sure you're pressing it through the lace, so it's actually getting over the knots. That'S on the other side, if you think you're brave enough. I'Ve done this before make your consistency a little watery, not too watery, where it's running down the hair, but watery enough where it can seep through. So as you can see, the knots are covered. This is what you want it to look like on the edge all the way into the hair. Now remember at the hairline: the knots are thinner, so you want to make sure that behind the hairline, where the knots tend to be bigger, you are pressing that into the lace. So it's going through the lace. If you don't, you will not cover knots and you will still see them. The point of this is to create a scalp like look, and even if you make a mistake and get some into the hair, it's okay go back and use a coloring, a kit and fix it. But this is what it looked like when I part the hair. As you can see, the bleach is actually covering the knots on the other side, and this is key now, when you are done and it's time to rinse, I will recommend using a purple shampoo, my favorite one. I have Linked In My Amazon storefront link. You can check that one out it's a little pricey, but it's very good and if you use that one particularly let it only sit for one minute, if you are my complexion or lighter because you don't want it to completely turn the knots back Brown so um. If you are my complexion, it'll definitely take that brassy yellowishness out of the knots and make it look more like scalp um, so definitely check it out. The link will be in the description box foreign. Now, once you are done, it should look like this and, as you can see, it looks exactly like scalp. You can part this particular wig anywhere on the lace. Now, if you wanted to have a more intense effect, you can go back and bleach again for an additional 10 minutes. But if you were like me and you used a 30 or the 40 developer during the first round, don't use that again you can use the 20 developer or the 10 developer just to take it just a shade or two lighter. You don't want to go in again with that, but if you only use the 20 developer during the first round, then you can go in maybe with a 30 developer and see where it gets. You just in case you're wondering yes, you will go in again with that purple shampoo to knock out any breasts or yellow tones so that the knots can look more like scalp each time you bleach your hair. You definitely want to use any type of shampoo. That is going to get rid of that. Another thing I like about using my method is that, as you can see, I have not glued this wig down and from the forehead all the way into that parting. It looks like scalp, so if you wanted to wear this with glueless, of course, you can definitely do that. Now, this texture is body wave. I use my blow dryer to straighten it out and I'm not going to install it with glue until my next video. So if you guys want to see what the install will look like, I'm going to show you that in my next video, but right now, I just wanted to focus on showing you all what The Parting look like. What the knots look like and also how to bleach them now, here's a better close-up of everything and again I don't get any shedding with the method that I use you do not want to over bleach, so make sure that if you're bleaching, your knots, you are Paying attention to that time, you don't have to be scared to do it either. If you feel like you, may over bleach, go in increments, maybe 10 minutes the first round, rinse it and then do it again and I'm just throw it all out there, because you all seen that I use that bw2 bleach in my previous video. I don't like that bleach. It is so dusty, like the particles get up your nose so using a quality. Hair bleach is key to bleaching your knots and also just overall your health, okay um. So the one that I like to use will be linked in my Amazon storefront Link in the description box. I will also put the um purple shampoo in that link. The wig storage bags will also be in that link and also this wig will be linked in the description box with a discount code and don't forget to subscribe turn on those notifications, because I'm going to be installing this wig in my next video. But as you can see, you can wear glueless if you would like. So thank you guys so much for watching, and I will see you back in my next video


Comments
MsPreciousMarie: Happy Sunday!! This is a VERY DETAILED video full of tips! Thank you for watching ❤
Reign Rey: When I tell you every detail was on point! You gave us everything. Step by step. I really feel like I can do this!
CaSaundra Jolliff TV: Hello, Precious Marie! Thank you a million sharing your expertise. You are the BEST on YouTube. You’re personal and professional. Your knowledgeable and high quality in your delivery and your work ethic is ABSOLUTELY OUTSTANDING!!! You’re inspiring me. Grace and peace.
Airee P: Thanks for dropping the jewels about what level of developer to use per skin tone. Another super helpful video!
Ms Gorgeous: Thank you Ms Marie! This bleaching technique is very helpful. You always give the best tips in your videos.
Beauty by Jay Morris: Love this video Marie, thanks for all the tips
Graciously Blessed: Good Evening Ms. Precious Marie. I pray that all is well. I appreciate you sharing your expertise. Your detailed instructions were perfectly expressed with clarity. The closeup view of 'the bleaching the knots' process was truly helpful. Thank you very much. GOD BLESS you and your family in JESUS' Name. Amen.
Ms Barbell Barbie: Right on time! I'm planning to bleach knots on a new wig today. I have been so scared to do this, but it's a must for more realistic wigs!! Thank you
Mammie Summers: Thanks for the update Marie, I shared the video with my granddaughter. She’s experimenting with bleaching her wings.
MsCynsational: Thank you, Marie, for this very detailed video. You are the best!!
Alebra Smith-Cooper: Thank you Marie❤Flawless as always
Loni Hale: Very nice - looks great!
Donna Wallace: Very helpful! Thank you. I recently purchased those bags and put all my unit in them and hung in the closet. I can vouch that they work.
Andy Edwards: Thank you for the tips. Especially the tip on how to prevent spill out. That is my biggest problem. Have a great Sunday
kelly mcleod: Thank you for this! I just had knots that didn’t bleach, I will use this method next time! I have the Blonde bleach & developer too!
Gail Hopkins: Perfect! Once again i was glue watching u do your thing with the bleaching! Because as i previously state i have bought several units & want to do the bleach , etc ! So i am very interested in watching, learning from one who knows, u understand what she is about! Will rewatch & checking out the Amazon store for items u use , as i bought the bw bleach & now i am afraid to used after hearing of your reasons for not USING.! I have had these 2 new units for 4 to 5 months now & 2 others for about a year or so & not doing a thing with! I desire to make some changes for myself in this new year on several issues & 1 of them is to learn, all i can to be able to do my own wigs! Why i am saying thank u for all the very excellent contents u give to us. I am truly learning! & want to let u know your labor & pearls of knoweldege is not unnoticed by me & other's ! Again thank u! I will be watching, taking notices on this video. ! Lots if GOOD STUFF! ( ) ( MPM)grace to u & ALL.gh
BrzyLife: Dang…this video was a day late for me lmao I over bleached my wig because it was my first time but it’s all good! Glad I came across this video so I know better for next time
Kea Daniels: 10×10 so soft and pretty banging natural
Cynthia Patton: Thank you! I used the bleach and dev, but the knots didn’t bleach completely. I’m a dark complexion and this is always a challenge along with toning the lace☹️
Crystal Amos: THANKS MARIE FOR THIS UPDATED BLEACHING METHOD I HAVE THE SAME SKIN TONE AS YOU AND ALWAYS CAN'T SEEM TO GET THE LACE COLOR RIGHT
Sherry Zetar: Thank you, I learned ALOT!!
Halimat Idris: Hello, please I would love if you would teach us how to color hairs, I would love it and looking forward to it , thanks for the good job
bettina kaiser: Great tutorial
LQ M: Hello, Thank you very much for answering my question. I will get the wig storage bags.
Zariyah Nicole: That hairline is everything!
Rancelis Valdez: Gracias marie dese República Dominicana
Gail Hopkins: THUMBS ☝ up! Excellent information, with on sight photo's to back it up! U are gem! ( MPM) ALL THE WAY around! All the time! grace to u & all.gh
Bobbie S: Can I do anything else to hide knots other than bleach? I don’t feel comfortable bleaching. I tried concealer but they are still showing.
Latresa C: Thanks for these kinda videos.
Airee P: I love how fast I got the notification! Video was Uploaded 12 minutes ago!
TamaraLicious: Hello Ms.Marie how are you doing! could you tell me what bleach you used precisely used... So that I could find it elsewhere,besides amazon...please and thank have a Blessed day
melissa douglas: I just figured something out hello Miss Precious Marie are you just wanting to he kept to you and let you know how much I've completely enjoy it for real and I try to follow you as often as I can you're very knowledgeable
Redz: I love your videos. I'm light skin as well & the developer in your Amazon is a 40 Developer. Should I still use it?
amababy902: Pls can you share a link to your video that shows how you lightened the wig itself with your developer? The links in this video don't show that process. Thanks so much
Jasmyne Moore: I went to your Amazon store, I didn't see the bleach and developer in the wig essentials.
Esther Sowell:
HonorableSienna: The best bleach
Halimat Idris: What is the color of the bleach you used
GLAM by KimmyFab: Don't be telling these girls to use my favorite bleach on these wigs so it can be bought all up, The cheap bleach and purple shampoo is just fine for these at home stylists & cheap wigs they have. This is to preserve the health of your natural hair, waste of money using it in a wig, which means dead hair with no life already. So no need to preserve it,
ladyj40: Just my luck this crap went all through my lace