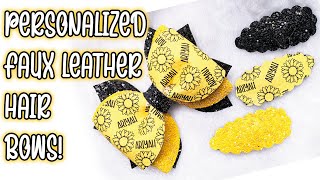
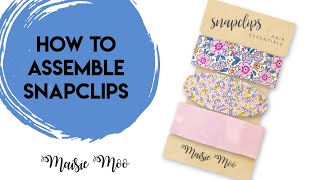
How To Make Faux Leather Snap Clips With A Cricut : Diy Cricut Faux Leather Hair Clips
- Posted on 24 January, 2021
- Clip-in Hair Extensions
- By Anonymous
HOW TO MAKE FAUX LEATHER SNAP CLIPS WITH A CRICUT : DIY CRICUT FAUX LEATHER HAIR CLIPS
Learn how easy it is to make faux leather snap clips with a Cricut in this very easy and beginner friendly tutorial!
Affiliate links are available below, allowing you to easily shop the craft supplies used within this tutorial. Thank you in advance if you choose to support my channel by shopping my links so I can continue to create new content to inspire you.
Machines In My Craft Room
✏️ Spellbinders Platinum 6 - https://amzn.to/37EwMn6
✏️ Cricut Maker - https://amzn.to/3p7mX6v
✏️ Explore Air 3 - https://amzn.to/3P8WS1m
✏️ Cricut Joy - https://amzn.to/3QyeO6O
✏️ Pink Heat Press - https://shrsl.com/3m79p
✏️ Cricut Mug Press - https://amzn.to/3dllWVQ
✏️ Sawgrass SG500 Printer - https://shrsl.com/3m79q
✏️ My Embroidery Machine - https://shrsl.com/3m79r
✏️ Craft Supplies Used ✏️
Explore Air 3 (newer model) - https://amzn.to/3P8WS1m
Measuring Tape - https://amzn.to/36brnOt
Deep Point Blade - https://shrsl.com/2eoq4
Cricut Tool Organizer - https://shrsl.com/2g6ck
Purple Cricut Mat - https://shrsl.com/2qvr4
Snap Clips - https://rstyle.me/+uQOj2Q6OTLrb484S7hx...
True Control Knife - https://shrsl.com/2jjx3
Glue Gun - https://surebonder.com/collections/lyn...
Holographic Faux Leather - https://rstyle.me/+qcONMQxK8qdXTgJOLrE...
Blue Floral Faux Leather - https://rstyle.me/+yy2En7xLyw-tkj5n8Mx...
Pink Cross Faux Leather - https://rstyle.me/+HtFJxMhBjCEqy3h4xMH...
Light Pink Solid Faux Leather - https://rstyle.me/+VwZnWPWryoOlNmJT7rq...
Pink Santa Faux Leather - https://rstyle.me/+-ly-pmUQP6MgoJLq7QD...
Mustard Gingham Faux Leather - https://rstyle.me/+9xFqTr93sLC-LxWSkve...
Halloween Print Faux Leather - https://rstyle.me/+ZpguyjgpU_zv_YtReAp...
Pink Floral Faux Leather - https://rstyle.me/+hWtVwdBtLnOwoDi3YPr...
Pink Gingham Faux Leather - https://rstyle.me/+ERluXfq5YCAlZpILdw5...
#Cricut #CricutMade #cricuttutorial
Cricut, Cricut Explore Air 2, Cricut DIY, Craft Tutorial, Custom Hair Clips, Faux Leather Snap Clips, Faux Leather Hair Clips, Cricut Faux Leather, Leather Crafts, Cricut Explore Air 2 Craft, Cricut Explore Air 2 Tutorial, Cricut Explore Air 2 First Project, Cricut Explore Air 2 Leather, Cricut Explore Air 2 Hair Clips, Cricut Explore Air 2 Beginner, Cricut Design Space, Cricut Design Space Tutorial, Cut Faux Leather Cricut, Cricut Deep Point Blade Tutorial
Hey everyone: it's bethany in this video i'm going to be creating some little faux leather snap clips. These are so fun so easy to create my girls actually wear these day in and day out, which is what prompted me to finally figure out how to make these myself. That way, i could get a little bit more creative with some patterns and get them personalized for what we want to have them look like. So what i'm going to do is show you how to create these on the cricut explore air 2.. It'S so easy! I made all eight of these very very quickly when i was practicing, and so i'm excited to show you how easy it is so for this um tutorial. All you're going to need is some faux leather. I purchased my faux leather from etsy, but you can purchase it many different places and i got a variety. I will go ahead and show you a little closer look at them later in the video, and i'm also going to tell you a little bit of pros and cons about working with each one of them. So this little holographic one is the thinnest that i actually worked with and i'm going to tell you a little bit more later about why that is necessarily a good or a bad thing. So it's really really fun and it turns out beautifully. But i'm gon na give you a little bit more of my insight on the thickness of the faux leather okay. So what you're going to need are some little snap clips i purchased mine from target. I did that because i really like this gold color and that's where i found this nice gold or bronze color. Now the point of the snap clip with the faux leather is that you completely cover it. So, of course, that really doesn't matter what color it is, but i just like that final detail of being gold on the back. You can also purchase them at amazon or other places for really really cheap if you want to get them in bulk, you're also going to need a true control knife for some kind of exacto knife. Potentially, if you just need help cleaning up the edges and then i light really liked using this um glue gun because of the precision tip and it was, i found it really really helpful for doing a smaller craft like this. So i'm going to be using that and then the only other thing is we're going to be using the deep point blade for the cricut explore air too. So i have that all ready to go and we'll load that into the machine and i'll show you how to change that out. Once we get to that point, all right, let's go ahead and go into qriket design space. I'M going to show you how to make a template for these, and then i'm going to show you how easy it is to get them all cut out and then wrapped around the little clips. Okay, so creating the template is so easy. This is going to be really quick, so what i'm going to do is come over to the shapes on the left hand, side i'm going to select that and i'm going to grab a square, then i'm going to bring the shape into the center of my screen And unlock it, and then i am going to make the width 4 inches and the height 1 inch now you're going to want to make sure that you create a template. That is long enough for the actual clip that you have, because these clips actually come in many different sizes. Actually so what i did was i just measured my particular clip to see how much i would need to wrap around the entire thing and it turned out being four inches by one inch. Okay, so that's what i'm going to use for that i'll go ahead and just make this a fun pink color and then what we're going to do is we are going to make sure our cricut explorer is selected. Now, let's talk for a minute about the cricut joy, because i know i'm going to get a lot of questions, so i'm going to pop on over to cricut joy's little cheat sheet. This is something that i keep in my bookmark, and it is just all about what the materials are that are um able to be cut with the cricut joy. So if you scroll down, it does have a leather option and it does have a faux leather option for the cricut joy. So the thing that i am most concerned about is that the option says paper thin and out of all of the faux leather that i purchased. I don't really see anything that is paper thin. So that's what kind of detoured me from actually giving this a go with the cricut joyce. So is it possible with the cricut joy? It says it is, but it would be have to be a paper thin, faux leather, which i don't really think anything that i purchased necessarily fits that category okay. So back in qriket design space that answers the question about what machine you can use. So definitely the explore air 2 and the maker and then, depending on the thinness of your faux leather, you potentially could do it with the joy. Now i'm going to be completely honest, you could cut this little template out with scissors. It'S two very easy straight lines. So if you get in love with this idea - and you only have a cricut joy and you just aren't sure um, then honestly, you could really just cut this out with scissors, and you will see once it the machine gets cutting. How easy this is. Okay. So i'm going to go ahead and say, make it and then it's going to put my little template right onto my little mat here, i'm going to go ahead and say continue now i am going to be cutting my leather upside down, so i'm going to be Using the pretty side face down so because my little template is a rectangle, no matter which way you cut it, i don't need to do any mirroring, but if you are cutting out, let's say words or letters or anything that was directional. Of course, you would want to mirror your image, but for this it is not necessary. I'M going to go ahead and browse all my materials, i'm going to come all the way down to leather, and i, even though i'm working with faux leather, i don't think that mine is classified as paper thin. It just doesn't seem that thin. So i found that working with the genuine leather setting was much better, so i'm going to go ahead and say done once i do that setting it tells me to move the star wheels all the way to the right, and that's so that the star wheels don't Make any indentations into your leather and then it's also going to prompt me to load the d point blade in clamp b. So let's go ahead and get started okay, so i am going to be cutting out three different types of faux leather. Again, i will link all of my materials and these particular designs in the description box below, but i'm going to do this pretty floral, i'm going to do this really fun patterned solid. It has little crosses on it and then again, this holographic heart, one. So of all of them, this holographic is the thinnest, but i went ahead and used the same setting for all three pieces. So what i'm going to do is i'm going to use my purple strong grip mat. I found that this works best because it really has a sticky, sticky grip to it, which really helps keep the material, nice and firm and in place on the mat. So i personally found it better. I tried both ways, but i found that i got a cleaner cut and that the material stayed put better if i placed it side down so the shiny side down or the print side down on to the mat. So i'm going to go ahead and because my hearts are directional, i want to make sure that i have them the right direction. I'M going to go ahead and turn that over and i'm going to cut it upside down and then i'm just going to flatten this out. Now i have a brand new mat, so it's really really sticky. It'S i've used it for a couple projects, but it's fairly fairly new and it still has some good stick with it. So i don't need any additional tape or anything like that. Okay, so again, putting it upside down gave a cleaner cut. It gripped onto the mat a lot easier, because the back side of this is more like a felt or a fabric, and i just felt like it didn't, have a nice grip and also this felt or fabric kind of made a mess on my mat. It would kind of leave some residue so by doing it the pattern side down, which is just that nice faux leather, it didn't leave a residue and it had a really firm stick. So i hope that makes sense, but just know that that is why i chose to do it that way. Okay, i'm going to open up my machine. Now i'm going to go ahead and grab my deep point blade. So i'm going to go ahead and open up clamp b, i'm going to go ahead and remove my fine point blade, that's always in there and then i'm going to simply set my deep point: blade right into the machine and close clamp b. Now i can simply load my mat and then get it cutting now this setting, it does do three passes, so it will cut the rectangle out once and then it will go and cut it out two additional times. Okay, i'm gon na go ahead and unload. My mat and then i'll go ahead and just remove my extra and then bend my mat a little bit to peel off my little strip of faux leather. So it looks really really good. It did a nice clean cut and now i'm ready to do the next one. So i'm going to go ahead and just again flip it upside down, so that pattern, side or faux leather side is face down. I'M gon na go ahead and make sure it's laid really really flat. Okay load it into my machine and cut now. One thing i'd recommend is that you always do a test cut with your material. If you need a tutorial on how to do that, i'll place, one in the upper right hand corner and another thing is before you hit the unload. If this is your first time doing it, what you want to do is you want to just go ahead and try to peel up your material to make sure that it cut all the way through, because if it didn't, then what you could do is you could Just press go again, but if you unload your mat, then what will happen is when you go to try to reload your mat into the machine, it could load it just a fraction of a hair differently and then it won't do the exact same cut. So you want to make sure you check your material and do a test cut before unloading, your mat, okay, so that one again is good. Just like the last one again, i've done this quite a few times, so i know my setting works, but i think that all machines are created differently or can act differently. So that's why i recommend that you do a test cut on yours, so you don't waste any material so again putting this pattern side down and if you have a pattern that is like this, where it is different all over see how that's different all over and If you have, you know a certain section, you want to focus on be sure that you go into your map preview section and just move around your actual cut so that it cuts in the area where you want, so i'm fine with it cutting anywhere. I think all this is beautiful, so i'm going to go ahead and just place it. How i had it right on my mac here and then i'll cut this final piece and we'll get them assembled. Okay. So now i have my little clips and then i have my little pieces of faux leather. So, as you can see, it might be a little hard to see on camera. This is my thinnest and then the other pieces that i purchased ended up being a little bit thicker. So again, i used that genuine leather setting with the deep point blade and it did a perfect cut. So i really liked it that's how i prefer to do it. There are probably a million different ways that you can do this, but this is just the way that i found worked best for me. Okay, so now what i'm going to do is i'm going to take my clip and i'm going to grab one of my pieces of leather here and then i'm going to keep the pattern side face up, but the clip i'm going to turn over and i'm going To make sure that it is opened up so with it turned over, i'm going to bring it so that it is almost to the end, but not quite so. I want to leave about a half an inch. Do you see how i'm leaving a half an inch? I'M not going all the way to the end here, because what i'm going to do is i'm going to wrap this all the way around and if you go all the way to the end, there you're not leaving much room for that. Little tiny piece to wrap into the back, and it can probably not last as long if it doesn't have a substantial amount of surface area to grip onto so. I found that it was better to bring that little piece down about a half an inch and then from there. What you're going to do is you're going to snap it closed so snap it so that it is closed and firm on your piece of faux leather. Okay, so now i have it turned over and on the inside, i'm going to take my hot glue and i am just going to place a generous amount. You really can't do too much on this part and i'll. Tell you why in a second, so i'm going to place a generous amount right from the top of where the faux leather starts to the bottom of this clip? Okay, so i have that all there working quickly because it is hot glue and then i'm going to start folding that piece over and then i'm going to start pressing, so the glue presses and comes out of the little fold on the side. Now, when you have a lot of glue, that's a good thing, because then it seals, those edges and those sides closed because then it will make a really really nice clean edge and it'll make sure those are nice and sealed and pressed together. So really the more glue the better and then you can just wipe off the glue grab it with your fingernail or you can clean it up with either some scissors or x-acto knife, but honestly just kind of washing it off with your fingertip. Once it has cooled. A little bit, of course, has proven to be very easy for me. Okay, so now what i'm gon na do is. I have this little piece now that needs to be attached, so i'm going to go ahead, grab my glue and i'm just going to place it all over both the clip and that piece of faux leather. Then i'm going to take that piece and fold. It making sure everything lines up and press press press so that glue really really meets and presses those sides together and then, if it comes out the side, almost even better, in my opinion, so then i just wipe it off seals. Those edges really nice wipe it off seal the edge, and it is all done. How easy is that so cute so easy and then make sure if you need to you can always take your little exacto knife. If you have little tiny pieces of just hot glue, you can just get those right off. They come right off so easy to work with and i'm sure there's other adhesive methods that you could use. So if you find that something works better for you then go for it. I always just share what works best for me and what i prefer. Okay. So now, i'm all set so now the clip, if you turn it over. It opens just like that very cute, and then it shuts and what i like about this, is because it's a nice, thick leather when it opens it does it has a really nice clean indentation when it opens there. So i really liked how that looked now. If you find that you need more glue around the sides, that's why i really liked this precision tip on this glue gun. So you can just stick that little tip in there add a little bit more glue press really get it pressed in there, wipe it off and you're all set very, very easy. Okay, let's go ahead and do a couple more just so you can kind of get the idea for the routine practice really makes perfect on something like this. So again you have your clip open it up, flip it over. Then you have this little piece that you're going to do pretty side up and then i leave about a half an inch there. We go and close the clip. Okay, then turn over and apply glue from the top of that faux leather to the bottom of the clip and generous is perfect. Okay, then, i'm just going to flip over the faux leather, letting the sides meet press press press. It gets rather warm when that glue comes into contact with that little metal clip so just be careful and mine, be mindful of that. Okay wipe off any residue that comes out from that glue. Super easy. Okay, then turn over and add more glue here. Just like that, okay, and now that is all set now. What i wanted to point out about this particular clip here is that this is the thinnest of the leather that i found. So i did not really enjoy working with a thinner, faux leather, because when you open it, i felt like it made a really kind of unflattering crease on the outside. Just because it's so thick and you can almost see the barrette through it or the indentations of the barrette, so it doesn't have that much of a clean opening. However, does that really matter? It really doesn't because every time you see this product you're actually going to be seeing it seeing it close and actually on someone's hair, so that really isn't a game, changer and honestly they're so cute, especially with this little holographic that i went ahead and still made Them, but i wanted to point that out that i actually preferred working with the thicker of the faux leathers just because i found that when opening them, they still had a really really nice and clean crease on the top. That thickness really worked in my favor okay. So now i'm going to go ahead and close that and get this all put together, so i've had so many requests to make leather bows and while we are really big bow fans at our house, i'm not really a fan of leather bows um. I just don't really like the look of them, i'm much more of a fabric, bow person. So that's why um when leather snap clips or faux leather snap clips um became popular, i really like that. Look as well just because they look so clean um. So i know a lot of you really wanted some faux leather um bow tutorials, but i decided that this is definitely more my style. Okay, so again, just finishing off this clip. Okay, just finishing off those edges super easy just like that, and then we have our nice little clip now you want to just let it cool for just a second, because it is rather warm before you start opening and shutting it and just to make sure it Really sets in there i just kind of like to smooth it out and make sure all that glue is evenly distributed in there and then once it's cooled, open and shut so cute. I love these. They work so good, especially um. If you have a little one with thin hair, they work really good with thin hair. My other um daughter also has really thick hair, which works just as well, but they look so cute and plus you can personalize them for about anything. Okay. So, as promised, i'm just going to show you real, quick what i splurged on for my first time: shopping for faux leather. These were really really fun to shop, for the prints are endless and i'll share links in the description box below so that you can easily find these as well. So, of course, we have the holographic hearts very, very cute again. This was the thinner. So i didn't love working with thin, faux leather, but this was worth it just because it was really really fun. I definitely preferred the thicker um faux leather, and then we have this little indented little plus signs in there, and it's just really really pretty. It has a really nice little texture to it, and then we have again the little floral ones that were really pretty. I just bought a really nice plain pink, so i thought that would be really nice we're always wearing pink. So it's always a good idea to have that on hand. Even though christmas is far off, i did practice with this print. It'S so cute with little santas on it and then for fall. I did not cut into these yet so i haven't practiced on these yet, but i got a little mustard gingham and then look at this. This is so cute. This has little jack-o'-lanterns and witches hats and candy it's gon na be so cute for the halloween season. So i had to grab that while i was shopping and then, of course, another floral, because i just love the florals and that's how this one turned out. I thought that turned out really really pretty and then finally, a pink gingham, which is just gorgeous, which i have over here as well, so i thought that was really really sweet as well all right everyone, i hope you enjoyed this. These are really really fun. Really easy to make and honestly, i feel like i have gone down a rabbit hole of making faux leather clips, because they're very, very quick, um they're simple and they turn out really polished and pretty so good thing. We really enjoy these because i think we're gon na be wearing them for every occasion all right everyone. I hope you give me a thumbs up for this video leave me a comment and let me know which was your favorite and i will see you all in the next video
Comments
Michelle Drab: OMG!! Great idea and cute! I can make these for my grand-daughters!!! Thanks!
CARIXIA { Lunna Creativa }: love it, so easy to make, the leathers you choose are so pretty, key fobs for keychains will look great also, thanks for sharing! huga
Backwoods Designs: I have the cricut joy and have made some faux leather earrings with it. It's got more power than I thought! It does better with the stiffer materials. Some faux leather is kinda stretchy, and that is a struggle! But, with the right materials (and a lot of patience), it can be done! :)
Darlene Lorimer: These are great, and so simple! I have sons, so dress up my Yorkies instead, lol. And it has been a struggle to find clips that will stay on their thin hair without elastics. So, I am excited to try these!
Laura Woodmansee: These are so cute! Thank you you for showing us how to make these. The faux leather is all so adorable, especially that pink holo with hearts
Sarah Seid: Love the video. Great idea for Valentine’s Day. Thank you so much
Cathy Riccetti: So cute! I wish I had someone to make these for! Just love them!
Star Brown: What a clever idea. Would make great party favors for girls.
Posh, Glam, & Pristine: This is so fun I wear those clips all the time and my hair gets stuck in the metal circle-I think this will solve that issue and I’ve been scared to use leather
Tew Much: So so precious - will add this to my project last as well.
Joanne Panagopoulos: What a lovely idea. My Granddaughters will love this project
Cindy Luoma: I have some faux leather so I need to give this a try. Thanks so much for sharing with us!
Lucille Helmer: thank you so much for an easy tutorial!
Deborah Dececca: Thank you these are so cute. Makes a nice gift to match a outfit.
susan johns: My granddaughter will love these!!
Sarah Tapia: You can get a huge pack of snap clips at hobby lobby in the sewology section I believe for like $3.
Jacqui Drinkwater: Sooo cute I wish my girls would wear these, well my eldest is 16 but my youngest who is 10 but she won’t x
Kensley Foster: You are so good with your Cricut I’m still learning how to use mine
Kathy Lewis: I have cut thicker faux leather with my Joy. No problem. Made a ton of earrings. It does wear the blade though. I love these little clips!
Darlene Krisak: Super cute idea.
Brenda Lawrence: Cute little clips for your girls Bethany. Hugs, Brenda
Arletta Shaw: Could you take those faux leather strips and put small magnets on each end, bend leather in center, and use as a bookmark
Denise Wright: So cute. Wish our Grandaughter liked clips.
yolanda woods: thank u i love it this so cute i will give my daughter will love it ,,,
Lori-Jo Carroll: Very Cute❣️
Angel Morrissette: do you know how to remove the stickiness on faux leather? I used my strong grip mat and put the pattern side face down and now the rest of the sheet is sticky
• Brøwnie Øtter •: It does work best. Paper trimmer not so much.
esswest: How were you able to use that genuine leather setting mine keeps telling me I can’t ?
Dominique Maysie Bennett - Tripp: I assume I can do this on my maker I don't have a deep cut blade though I have cut leather with my maker though
Ashley S: So is the 4 inches the length of the clip or twice the length of the clip?