Diy Tape In Extensions Tutorial On Natural Hair - Amazing Beauty Hair | Simply Subrena
- Posted on 25 April, 2022
- Tape-In Hair Extensions
- By Anonymous
☆☆☆SUBSCRIBE☆☆☆NEW VIDEOS EVERY WEEK!
#HairExtensions #AmazingBeautyHair #TapeinExtension
Products Mentioned:
Tape in hair extensions: https://bit.ly/36ReLkO and https://bit.ly/3JGYflY
Home page: https://bit.ly/3IINU7F
Coupon Code: "ABHST" 20% off for Hair Extensions
-------------------------------------------------------------
Contact with us:
Instagram: https://www.instagram.com/amazingbeaut...
Facebook: https://www.facebook.com/amazingbeauty...
Email: [email protected]
Grow Longer, Healthier Hair
Use Code: YOUTUBE for 15% OFF!
Liquid Gold Growth Serum
Ayurvedic Mega Growth Serum
CATCH ME HERE!
Instagram : http://instagram.com/SimplySubrena
Business contact: [email protected]
Music: Soundcloud and/or youtube library
I do not own the rights to any music featured in video.
FTC: This video is sponsored. All opinions are honest and based on personal experience. Some links may be affiliates.
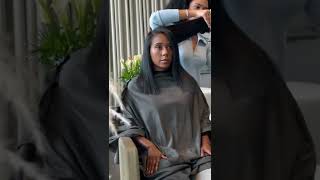
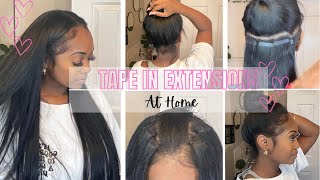
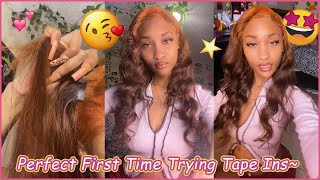
Hey guys welcome back to my channel if you are new here, hello, i'm sabrina, if you are not new to this, but you are true to this - welcome back pretties for another video. So today, i'm here with a clip in not clipping. Why do i keep saying clip it today? I'M here with a tapen extension install slash review now, if y'all know y'all know, tapens has been like the move lately and i get it. I see why the girlies are going crazy over it. So in this tutorial, i'm going to show you guys how to install these tapings and sections how to install tape and extensions yourself and with the install that i did you're able to do it in like a half up, half down style, a high ponytail style and Of course it's so versatile you can honestly do anything with it. Now i've been wanting to try color for a very long time, and i feel like tape and extensions, are the perfect way to test out hair colors before you actually really commit to it. I did a little bit a little highlight in here next time. I definitely want to put more color than i did this time around yeah. It'S like such a natural look. I love it um. So, if you're interested in learning how to possibly do tape and section yourself, because the cost of the hair plus the insole process at a salon can be quite pricey. So, first and foremost, i want to shout out amazing beauty, hair for sponsoring today's video. So i did get four different sets of clip-ins. I got three of their jet black clip-ins in 20 inches and then i got one of their r4 427 and 20 inches as well. I'Ll have all of the information all the links to the hair down below, as well as any coupon codes that i have for you guys. So, if you're thinking about doing tape and extensions yourself, then i hope this tutorial helps. You definitely give it a thumbs up. If it did and let's go ahead and get into it, okay, you guys, so i am starting out with freshly washed hair. You want to have a super clean hair. They tell you not to put any conditioner near your roots, so i rinse my hair super clean and when i was blow drying and flat iron, i didn't put anything on my hair throughout the blow dry process and i only put heat protectant towards the end of My hair not gon na lie. I was not a big fan of how my hair felt throughout this process and that the fact that it had to just be so clean and so dry, but whatever so. As you can see here, i am parting out the perimeter of my hair, and this is what is going to hide all of your tape ins. To make sure you can have a versatile style, have a ponytail half up half down whatever you decide to do, and the goal is to part out enough section that when you pull everything up, it is going to hide the tape and extensions. So now i'm just going to make sure that i get all of that hair out of the way, i'm just doing a twist around the total of my hair and i'm gon na get that about the way. So in each box of clippings that you get one order does come with 20 tape. Ins total. I keep saying clip ins, you also get a hair clip and some tapes and a comb. So you can use your tape ins over and over. You just have to get tape replacements to put over there, so this is the color that i got and i'm very happy with the color choice. It had some blondes some auburns in it. So it's a very good tone for my skin tone and here i'm just showing you guys the length, so i did get 20 inches. They do have a longer length, 22 inches and i low-key wish i would have gotten the longer length. But this is where it comes to me still a very natural good, looking length so with these tape in extensions honestly practice practice makes perfect and you're going to test out different methods of installing these and you're just going to have to find basically what works for You what's easier for you, so i did have so many mirrors set up. I had one in front of me one behind me. I had my camera viewfinder to look into. I had a handheld mirror, so i just had mirrors everywhere. You want to just be able to be be able to see all sections of your hair from every angle so to apply the tape ends. What i have found that was easy starting out was, i would place my fingers on my actual scalp, where the parting is, where i would be placing the tape ins, and that made it very easy to apply it because you don't want to put the tape, ends Right on the very scalp of your hair, you do want to give it some space, so it's not super tight on your first day, and so they are movable. After that i just used my fingers um, because i tried the comb. It was not the easiest, so i just used my fingers to then get out all the excess hair that did not tape on the first tape after i did that, as you can see, i'm touching the tapes so much don't do that, because the grease from your Hand all of that gets on the tape so for the longevity of your style, try your best not to touch all over the tape like i was doing, but for the back of the hair you got to do what you got to do. Okay, so i was touching it to basically feel to make sure that i was placing the tape directly on top of it, so it wasn't slanted it wasn't. Half and half you know, that's the only way like you can see visually, but then everything is kind of flipped, because it's behind you, so your hands are just going to be the best guide for you. Then i tried this method here and i was like, oh if i pre-section the hair first and it should be very easy to install and in theory it would have been, but in the back as you can see, i think i clearly missed. Like half of the section of hair that i took out and then it actually got stuck to like hair that wasn't even part of that section again. This is going to be a trial and error situation, especially in the back of your head and then you're going to find out what works for you. That did not work for me, but after that i just kept doing the first method that i did and basically just putting it on top using my fingers to take out any excess hair on the sides of each tape in um and throughout the middle. Before i really close it and seal it in so reading is very fundamental. I did not read the instructions before i started installing these, because i figured i've watched a thousand youtube videos. I know how to do it. These specific tape ins does tell you to hit your tape ins once it's sealed, so basically the sandwich with a hot tool to like seal it in more. I didn't do it this time around, but i will say next taping extension. I definitely will do that to seal it in so one of my best tips that i can give you for a tape and extension is that you definitely want to make sure you take out the excess hair in between your tape ends. If there's too much hair in your tapens, then the sandwich won't be able to seal properly and you will have loose tape ins going on in your hair, so right here, i'm showing you the very first row. I did all black tape ins because i wanted to make sure when i put my hair up in a ponytail, everything was very seamless and then all of the rows after that is when i started incorporating my color. Obviously, if you're using the same color throughout you, don't have to really pay attention to this, but for the girls that are going to be trying color what i did just because it's my very first time and i was unsure about the color - i didn't want it To be too overwhelming, so i did half and half. I did the top tape ins as the color and then i would do the bottom tape ends with the jet black color. So this way it just really dissolved and diffused the color, so it wasn't too much and in the end i kind of wish i did more color to be honest, but if you are going for a very more highlighted look, then this method definitely works for you And if you want more color to show through then highlights, then i would say just go for the full blown color for the full sandwich instead of half and half so with this method, as you can see, i just keep going straight up and right here. I am sectioning my hair, so for the back part, i'm just going to keep going straight up and then in the front, i'm going to come back and show you guys how i do that. So this is that my hair - i'm almost done with the back part, and i just wanted to show you guys again for the girls that are going to be using color. What i did to make sure that my hair would be very seamless. If i wanted to do a half up half down, i did finish the very last row with a full black tape. In extension, so i didn't use the color on the very top row because i just didn't want to run the risk of the color of the tape in showing through my hair or anything like that. So when you come to the front of your hair, that section is very important, especially if you want to do ponytails, because you want to make sure that it's going to lay super flat in the front and it's not going to be bulky or anything like that. So for the front of the hair, i am going to take out my leave out because it was getting in the way and after i take that out um. I am going to do my part slanted. So when you do your parts slanted that makes sure that it can go up in like a high ponytail towards the back. If you do it going straight across like a regular part, you will literally have to put your hair in a super high ponytail. If you're going for that, look go ahead. If you just want a normal ponytail make sure that your parts are slanted, because you want to think of the way that the tape ends are going to lift up so right here. I'M just making sure that, with my very first part, you you're not going to be able to see the tape end once you lift it up, but i miscalculated that i was going to use some of that hair in that section to go in between the tape Ends so you still kind of come see it a little bit um. Maybe i guess like once my roots started sweating and it gets more volume. You don't really see it, but initially you'll see towards the end. You can kind of see the tape ends. So when it comes to the front pay attention to that make sure you definitely have enough hair left out or in the front before your tape ends, especially towards the very front of your hair, to make sure that it's covered and yeah it's the same process. I just wanted to make sure that you guys saw how i was parting, my hair, and that it's slanted, and not just a straight back part, because that is going to determine how your ponytail, you know how your ponytail looks. So i'm just going to keep installing this all around and then after i finished the install, i did curl the hair now again, the flat iron that i was using was not the best my hair had so much texture in this video, because my flat iron broke The day off i ran out and just got a flat iron for the moment. I thought it was going to be good, but it was not. My hair still had so much texture and i was a little bit worried that it wasn't going to blend, because my hair wasn't silked out to the max that i know that it could be soaked out. But in the end it all came together, especially after i curled it, and you guys will be able to see in the curling process this flat iron gave nothing. It gave no effort, it did not want to be here, it did not want to participate and it was on 450 degrees. I took it back, i i definitely took it back and i went and read up on my good old, faithful flat iron that i always use. So i'm really excited to do this install again with like truly fresh silked out hair and then doing the install, because i know it's going to look amazing, but even so the end result beautiful. I loved it. Uh, okay, uh! So, okay, you guys. So this is the next day as you can see what i did to preserve my hair. I just did two um flat twists and i just twisted the ends and then just secure it with a ponytail, because you know this is not a protective style. It'S not a protective style um, so all of your hair is out, so i still want to make sure that you know my hair is protected throughout this style and i don't have to put heat on it every day. There are a few few roller options that i actually want to try. While i have this hair um yeah, but this is the final product. I absolutely love it. It looks so natural. I was a little bit concerned with the texture matching because this is remy hair. So it is um on the silkier side but yeah. I i'm loving the blend of it. I'M loving the extra length that i get and i just love that it looks so natural yeah, i'm loving the peekaboo colors. So on a scale of one to ten. I would say installing these were actually not that hard. They really weren't um. It didn't take me too long to actually do the install process. I didn't time it, but honestly, i would say probably an hour, maybe even two hours, i'm not really sure, but i thought it would have to take me a lot longer to install it. So install process is not super complicated at all. You just have to definitely have mirrors had a mirror behind. I had a mirror over here i had a mirror behind me and then i had my viewfinder on my camera that i was looking at through this mirror. That was behind me, so that made it easier. So yeah, if you're interested yourself you're going to need multiple mirrors, that's going to make it a lot easier for you, but other than that um. The install process is not that difficult, so you can do it yourself. If you want to try um, you know you might take a few mix match tape. Ins like i did to get it, but eventually you will get it down pack, as you can see, the front of your hair is a lot easier um than the back but yeah. So i love these um. I low-key wish i would have gotten their 22 inches. Um this is the 20 inches um still gave me. You know some length, okay guys. So let me know if you guys enjoy this tutorial. Let me know if you are liking, this new look. Let me know if you try taping extensions. What are your experiences with it again? All of the links to this hair will be in the description box, so check that out again. Thank you to amazing beauty here for sponsoring today's video and until next time, bye, guys

Comments
Allen Stokes: Beautiful skin oh and your hair looks great also
Kalisha J: It's super cute, I love it!!