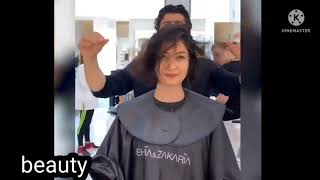
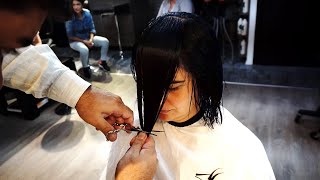
One Length Bob Haircut Tutorial, Bob Hair Cutting Techniques
- Posted on 10 April, 2020
- Bob Hairstyles
- By Anonymous
One Length Bob Haircut Tutorial
Bob hair cutting techniques
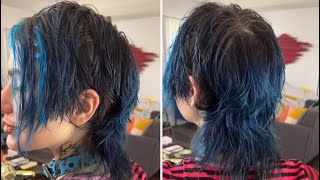
How to cut a Layered Bob Haircut Tutorial
Bob Hairstyles
*Giving is hold forever*
*********************************
Thanks for Watching!!
Please like, comment and share!
#OneLengthBob #LayeredBob #BobHaircut
Yeah good all right! Well, I'm Ronnie Appel! I'M going to show you a textured Bob today, so I'm excited to show you this technique. It'S a little bit unique for a textured bob, we're gon na focus on some disconnection. We'Re gon na use diagonal graduation and we're gon na start in the nape area yeah, so I'm gon na get started. I want to show you real, quick, the head sheet and we'll come back to this. So here's our first sectioning that we're going to do is we're going to do diagonal parties through one side of the head, creating a diagonal graduation and then we're going to come back across and meet that on the other side and create a nice graduated layer. So you want to start this, so we're gon na start down in this right-hand corner and a little trick I like to think about is what I'm starting down here start with real small sections. Is I'm going to make sure that my knuckle is touching the skin and my nails are pointing off of the skin? That helps me kind of guide my mind to creating the correct, graduation and you're gon na want to change this up to how we're steep or out or soft you want to create the graduation. So at any point feel free to stop me and ask questions. I kind of jumped right into it, so if you're just getting here, we're starting in the nape area of the textured Bob and we're creating a disconnected nape area and we're going to use diagonal graduation to create that we're just going to take diagonal subsections across using Your guide underneath keeping the knuckles against the neck and my nails, pointing away from the neck to degree the degree of or the angle that you create, is going to decide how soft or how hard that transition is or how. You know how aggressive your your your graduation is versus how soft your graduation is. So if you want soft you're going to elevate it out about a forty-five, if you want a little bit more aggressive, you can hold it at ninety from the head and just follow that head shape. You can talk if there's any questions or anybody that chimes in Indian Tracey's in hi. Hey Lindsay, hey Tracey, thanks for coming in we're just going to work. This diagonal parting all the way across the head: we're not going to worry about our perimeter until after we'll go back through and detail that so we're just going to keep working nice diagonal subsections, I'm using my thumb to hold that hair on the side so that I can get my comb in there and keep the subsections nice and clean if you're, just tuning in we're streaming on. Neal Facebook live and elevate, hair Instagram live, so thank you for joining from both those platforms. Thank you for taking for the invite to present on here Sergio wants to know if the head is tilted forward Sergio. Yes, the head is tilted slightly forward and I've also, I failed to mention it's just a center part. You could also work off a side part to the occipital bone and then the angle goes down to either the the center of the ears or the lower the lower lobe and that's decided based on the density of the hair. So if you have some thicker hair, you can go up a little bit higher and bring it to you know to the mid section of the Year. If the hair is a little bit less dense, you're going to go down to the lower lobe. This type of graduation really creates a nice soft soft looking graduation in this cut. In particular, it's just any disconnected underneath, but I like this technique instead of using a clipper to come and shave this area, because it creates this natural bevel when you're cutting the hair over top of it, that forces the hair to stick to the net. So that's what I love about that technique and you've got so much bulk back there, that this helps to remove that and create the same movement that you get on the sides. So this is going to be my last diagonal subsection on this side. Keeping a consistent angle, my trick is still keep the knuckles up against the neck. Keep the fingers pointed away. Okay, you don't jump to the other side, you're just tuning in we're creating a textured Bob. This is a disconnected panel. I'Ve created diagonal graduation and now I'm going to start working back the other way and meet up with my god. So I can see my guide here. I don't have you can see that my guide here and my trick on this side is now I'm going to keep my nails up against the neck, and my knuckles are going to raise off of the off of it. Maybe Connect gets in the way a little bit, but okay, I'm not in the camera view Dave liaison, hey Dave, thanks for coming in. I am so with you're just checking in we're doing a textured Bob. This is a disconnected panel underneath we use diagonal to create the disconnection. It creates a really soft base for your your disconnected hair to fall over. So this is my last section there I'm just going to go ahead and connect the two. You can see how nice that graduation ends up. Looking I'm going to detail my perimeter afterwards, but you can see it's a really nice subtle, graduation period or late. So then you come in you're going to detail your perimeter. This is you know. You'Re gon na have a disconnected layer that drops over top of it, so really just place this, where you want and create some texture with point cutting or just blend cut the line. So this creates a really nice movement. You know a movement section for the disconnected layers over top check. Your balance got a little more length over here, so I'm just going to go back to that section, correct that real, quick all right, so we created the nape area. This is a nice again soft. Graduation, it's going to set set a baseline for the layers to fall over top and create a softness through there after you've set your baseline or your your nape area, you're just going to drop down the remaining of the hair and really just cut a rough one. Life like it doesn't you know, you're not going to have to take a bunch of subsections, really cutting this about an inch inch and a half longer than you're going to finish is the next step, so I'm going to actually jump over to a different mannequin that I'Ve already dried already flat iron, because the rest of the haircut has done dry. So essentially what you would do after this, you would cut that cut that one length. Then you would blow it dry, I'm just going to grab another blow dry flat iron in it, and then you would look like this and again you don't have to go crazy with flattery, because we want to still be able to get some curl or texture through It with the curling iron Sergio wants to know if you'd consider this an undercut yeah. This has an interior graduation. So again, if you come over just point over the head sheet, so we've just created this section here, which is the base and now we're going to come through and create a top, a top layer which has an in what I call an interior, graduation or you Can call it an undercut, this area is undercut and this is going to fall over it, but we're going to create it into your graduation in that hair so that it collapses over that shape. So what I mean by interior graduation is I'll show you I'm just going to start with the vertical panel here vertical section it. What you're going to want to do is just pull that section straight out, so you can see I've already created my you know graduation here, that's dining the graduation, I'm going to start from the top of my diamond graduation to get my guide and with like a Backslash technique - or I call it pinch and push I'm going to start at that same length and pinch and push away so that I can gain length as I move up the hair. So I'm just kind of creating a really soft graduation in there or out of that. Let'S pinch push pitch push teenage crush. You can see that collapsing into this shape will still go through and detail that perimeter afterwards, but you can see it's it's really nice. The layers don't sit on the exterior, it all sits on that interior. I watch that technique. I mean in variation from takashi kimura from paul mitchell, and i mean the guys, like the texture, the texture King, but you know modifying that technique and creating it to something that works. For my guests, it's been something that they like a lot this. This haircut will grow out really nicely. It doesn't get old P. You can also use this technique without the disconnected section underneath it. So if you just came in and you had a guest that had like you know just below the shoulder hair and they didn't want it to flip as much this technique can be used to create devil and suck the you know suck the the perimeter in so That it doesn't flare out or flip out, so if you're just shining in I'm kind of moving quickly here, we've done a diagram eat, that's going to be a disconnected and now we're going in and doing like the backslash technique to create a soft soft layer. Over top of the graduation there's a question on how you gauge your elevation as you work diagonally on the bottom. So when you're working through the bottom section, you can gauge your your elevation is always going to be at 90 from the head. So so, if you've got somebody with like a prominent occipital bone, you're going to be angled a little bit more. If you have somebody with a little bit flatter, then you're still going to be coming out at 90, but you can change you the degree of angle with your fingers, not changing the degree of elevation with the hair, but changing the angle with your fingers. Whether you want it to be a little bit softer you're going to angle it a little bit more at a 45, and if you want it to be a little bit more aggressive, you can keep it closer to a 90. What is your finger angle? Creating for graduation what is my finger finger angle, creating the graduation my finger, a girl is deciding the the severity of the graduation. Yes, let's talk again real nice. You know we can set the perimeter somewhere right in here, but it's already, you know sucking into the head really nice. This will move really well, once I get the finished look together and then we'll be styling it with like a little bit of a beach wave or a texture. Wave type. Look. Should I go to that tight, oh yeah, so I'm pinching it with the fulcrum of this year and pushing away kind of opening and closing this isn't super aggressive. So I'm not! You can't really hear this on the hair. It'S not like a shred technique where you're hearing I teach classes and you'll see them kind of like really aggressively stroking the hair. It'S really more like a painting or a you know. If this finesse, a finesse, will move for lack of better word, how do you feel about doing that step with a razor? Instead, I don't know that I would get the same effect with a razor. I would be a little bit weary to trust it to push the hair back, see when I'm when I'm in here and I'm clamping the hair and I'm pushing away. That'S saving a little bit of length in between and I'm not sure. I could get that same motion with a razor Hayden says that looks great. Thank You. Tatum appreciate it. Billy has lots of great questions. Sure we can't read half a baby questions, but thank you for tuning in Billy, so I'm just watching my tension coming in Rico. Ming to keep that tension consistent throughout just using that to create a soft layer of top. What shears are you using? I use different types of shears, but for today I am using my Cacho shears. I enjoy the use of had them for 12 years. They'Ve served me well. Does this write down curly here this would work on curly hair. I, like the shape on curly or textured hair. I find that because it's an interior, graduation, it just expands the shape out a little bit, but there's not a lot of layering on top, so it's not going to get you know it's not going to get too curly or too crazy on the top. So we're still going to go back through we're going to detail this perimeter line, but you can see where it's wanting to suck in and where it's really wanting to to detail. So I'll just go through detail that a little bit for you there's a lot of comments, saying great technique: perfect technique, good good good! So if you're just tuning in recently, we've created a underneath section I'll go back through that with diagonal graduation and now we're disconnecting it over top with some backslash technique, interior graduation to create softness. And now I'm just going through and kind of point cutting detailing the line, not being too specific about it. I know how long are your shares? Five and a half? I always use a five and a half see that tucks right in it's got a really nice. Look to it not a lot of layers on top, but a really soft. You know soft movement throughout and here's that disconnected section that I did earlier just for those kind of tuning in a little bit later. This was done with a dying of graduation. It'S an underneath to kind of manipulate this hair to shape it under I didn't use, you know clipper. I used a nice diagonal graduation so that would create softness over there. My wonderful elevate, hair clips - these things are amazing. Generosity says: hey Jen, so again we're taking a vertical subsection here going in and doing a pinch push pinch brush pinch pinch push and softening that hair out it's one of those tech with it's one of those techniques. You want to practice a few times on the mannequin before going on to your client and starting, and thankfully, we've got a few days to continue practicing and using our hands on these lovely doll heads you can use this technique again on longer hair people, you know, Complain about it flipping out or complain about it getting too bulky as as they're growing out the hair. So you can do this technique without doing the dyeing of graduation, underneath it just to create a bevel at the end, it kind of forces the hair to bevel under. So it's one of my favorite techniques for that. If you have any questions, please feel free to put them in the comments. I'M happy to answer them for you. How do you cross-check for younger hairdressers, so in the horse or in the dyeing of graduation you'll, you'll cross-check horizontally with this technique, because it's a textured, textured motion, you're, really starting in the same area and then you're gaining a little bit more length towards the ends? It'S not going to be something that you need to. I don't want to say you need to cross-check, but you can go in and finger check to see if you've got balance, but it's going to be because it's a technique like this. It'S gon na have some variations and movement as long as it's not too extreme or you're like three inches longer on the right side to the left side. But the interior sections you know, are really going to vary in length because you're creating that texture and movement throughout besides spinning a removing bolt from the bottom of the head and back cutting to remove more about. Do you find that this makes the hair fine or lifeless lifeless? I find that this encourages movement, because the interior graduation pushes the hair to you know on the inside to give you movement and bounce so as the the client or guest walks. It really moves nice and because it has weight over top, because I'm really not cutting into that top layer. It still moves and flows like a like a graduated Bob wood, but it has just less density and bulk to it. It was a long way of saying. No. If you were going to do this from a side part, you can just work it from your side. Part you're not going to start. You know you're gon na, do it afterwards. It'S just something. You'Ll start from the side. Part and work that into the car are you pivoting as you're cutting? I am NOT I'm just doing straight vertical sections: subsections down along the head. What about the light sides over the ears making sure that you're that you're not cutting too much out? So when I'm doing this, I'm pushing more, you know more towards the head, as I'm cutting I'm pushing more towards the head. So that's saving a lot of hair in between and really I'm just cutting that in between layers so that I can keep a nice. You know nice shape around the ears and still have a strong perimeter by removing that weight through the nape area and the back. It gives you a consistent, a consistent look throughout the perimeter line, so you don't get a gap in there or see any sort of like you know, missing, link there. I do a lot of my texturising or this type of movement by seeing light through the hair. So what I mean by that - and I don't know if I'll be able to show it on camera as well, but if you can look here so as I look at this hair, it's you know, it's completely solid as I go through and I create you know, My backslash or you know pitch and push technique, I'm creating movement or I'm creating gaps in that you know in that bulk line. So as I bring it back up, I can see where I'm starting to see light throughout the the shape. So you can see that here you can see light throughout it, so I really don't want to cut much into those. I can take a little bit out of this piece here to create some more light through it, but I really want to get rid of that and go to this bulb line up top, where I can't see any light through it and want to create some gaps In map so that I can see the light, I also use a mirror quite a bit when I'm doing this technique to make sure that I'm you know working in the same areas. That'S something I'm a little limited to today, but trust you'll. Tell me if it's all right now, I'm gon na go through in detail the perimeter here on this side again just point cutting, probably can't see that quick, see it's really still solid. I could still go through and do that technique a little bit more and create some more movement around the ear there. The bulk out of there he's going through detailing the perimeter. I feel, like this side, still has some weight through it. So I'm gon na go back through right here and just create a little bit more layer underneath interior, graduation, Barbara said beautiful shape and thank you for sharing your knowledge. Yeah, thanks for coming and tuning in appreciate you guys coming and letting me show you one of my favorite techniques go ahead and rotate her, so we can see this little concave layer, puncay Brad. Are you over directing onto your previous section with your vertical airs or no guide? No, the guy comes from underneath so where I, where I began in the back so again, I'll show you the back here so underneath here we have our disconnected layer that are our disconnected section, so this was done with the dyeing of graduation keeping it real soft. We worked from one side to the next. On this side. We kept her knuckles against the neck. I used my fingers to decide the level of graduation that I wanted, so I kept it nice and soft. I work to about the the occipital bone and reach the left side corner and then from there I worked my way back with diagonal subsections and me meet in the middle. Then I take a vertical subsection there using my guide underneath I started in there with my pitch push technique and pinch push pinch brush pinch push from there. I just worked my way vertically around using that same guide underneath for my starting point and then just work to a to a similar length. All the way around did that answer the question. You can't answer me, but it answered me a comment cool. So I like this shape, I think it's you know this is really the textured look, I'm going for. She said yes, thank you, so you can go back through and detail this a little bit more. I feel, like I'm a little heavy on this side, so I want to kind of go through. What'S up so I'm just going to go through look for little sections that need a little bit more and go ahead and detail those soften them up a little bit. Thank You Bailey. He said it's a he they're, just softening up being an Institute. New York is watching the clowns for tuning in alright. So now I'm going to show you my favorite part of this is the style portion, so I'm just kind of quickly, as I got to turn on the curlers I'll. Do that and I'll keep working a little bit. Please ask any questions you have. I want to show the head sheet one more time. So again we started in the nape area. We started with the diagnosed up section and we worked our way across the head: stopping somewhere along the middle as as long as we met or reach that corner from there. We'Re gon na work across that the opposite side, so from left to right, keeping our nails against the neck and walking this way and we meet in the middle. We can cross check horizontally and you should have a straight line there from there. We took vertical subsections and walked around the head, doing a back, slash technique or an interior graduation, creating a softness. You know within this shape, so so what it really creates on the interior. I can do this is little gap, so this is the the shape that you're creating on that inside. So then, all of the longer hair falls over those gaps and it's going to create the graduation from the inside and keeping the length on top so that you don't have any layers really on the top side of the hair. So for styling, I'm just gon na. Do kind of my favorite way of doing this, so you can see, is I'm always going to create a nice panel sub section? I'Ve already sprayed air control on this hair or you know a light hairspray product I'll use air control. To kind of give me some texture and grit to the hair and then, if I need to add shine on top of that, I would use light on limit smoothing fluid fluid to give me a little bit of slip through it. But right now I like the texture that it feels so I'm gon na start with it there and we're just going to go from horizontal. Like a horizontal panel section there, I'm always going to start my bottom section towards the face and end up away from the face and that helps to swing down. You know create a slim section. This will kind of tuck into the face. The last section will come out of the face, so it highlights your cheekbone eye area and really covers up any sort of like you know, excess you might have Billy's loving your long hair thanks Billy. It needs to be needs to be cut here soon, so we're gon na come in with the the one-inch iron. I would like a little bit smaller than higher. I'M gon na get those remix irons here soon, but and I'm just going to go towards the face. I'M just gon na pull this down as I'm kind of working and really sharpen the ends with a little bit of you know, with some heat down there. That angle is going to kick towards the face really nice. My second section is going to come and go horizontally here and then we're going to work away from the work away from the face. Okay, I'm just sliding down pulling that out as I get down. So I'm going to alternate towards the face away from the face towards the face away from the face. As long as I start towards the face and end away from the face, then I've accomplished what I would have come to do so after this. If you want to see this cut and style done on a human, you can check out my Instagram. It'S just at Ronnie Appel, a panelist spelled like Apple, but with the e and the L swapped and I've got it on one of my clients, they're little short videos snippet. It'S actually photos but turned into a little video snip of this exact cut done. Maybe a little bit longer but okay, so I've got enough. I'M going to do away from the face here. I'M going to go one more, that's going to come towards the face and then I'll finish away. It'S super easy technique, you're using big panels section. So there's not a lot to do and it's easy for your client. I won't make you watch me curl the whole head, so let me just get the 1/2 done and I'll shake it out for you. So you can see the look. You can also flatiron. This look, and it looks really nice and soft and creates that in a really cool texture throughout. Can you repeat your? I G handle yeah it's Rani ro and in IE appel ap PE L. Thank you to kneel organisation and elevate hair for having having me on. It'S been a pleasure to to be able to share with this audience. So again, I'm just taking this section, that's going to go towards the face next sections away from the face. Until I need a little bit more ear control there, thanks JC, don't you put your tag up? Oh, Thank You Tracy. They towards the face away from the face towards the face away from the face, always in that sequence, with small horizontal panels just pulling out towards the end really giving that, like a flat iron level towards the end yeah all right. It'S all! I'M going to force you to watch of that, I'm going to shake that out for you, so you can see what that ends up. Looking like see that movement it creates over top, it doesn't expand too large. You still have a really strong perimeter line throughout and the rest is going to collapse over the back over that shape and create really nice movement for you for lack of better things to do, I'm going to decapitate her real quick and you can see that movement Will create in there it'll fall back into place really nice. The layers over top keep enough weight. So it's not expanding too much, but you can get volume in this and height because of the interior graduation that you created in there. So nice movement, nice look! You can detail this, you can go through it a little bit more make it shorter longer. So hope you, like those tips and tricks. I really appreciate you guys tuning in any further questions. I'Ll give you like yeah, there is: do you have a preference between flat iron or curling iron for waves? Yes, I do love the curling iron. It gives me the look that I, like I haven't like. I haven't successfully got the the best curl with a flat iron. I'Ve seen it done, and I've seen people be able to do it. I can curl hair with a flat iron, but I just really love the look that I created with my one inch curling iron. I do kind of flat iron it at the ends, but it's a quicker motion for me and something easier to use. Thank you. Thank you guys. Thank you for tuning in yeah. Further questions hit me up on Instagram. Thank you.
Comments
Hamog Sa Umaga: Thank you for sharing, very informative ✨
Hair Trendy: This video so great