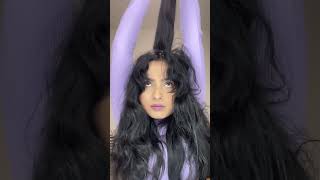
Perfect Long Layered Haircut For Women | Round & Triangular Layered Cut
- Posted on 01 June, 2021
- Long Hair
- By Anonymous
Long Layered Cutting Techniques. Triangular layers are constructed starting from a little below the shoulders and lower as far as there is enough density.
"I Love Haircut - I Love Hairstylist"
Uh but today we're gon na work on layering um. I have a brand new mannequin, so there's no point in doing a pixie on her straight away. Uh we'll work down to that, but it's got a fresh mannequin from pivot point and uh we're gon na work. Two variations: i'm going to work triangular, long, concave layers and i'm going to work round, concave layers on the other side. So we can see a little difference between the two um section, wise um, what i've done on the left side here, i've sectioned from the apex which is the top of the head and i've followed that ridge. So when you put your comb against the head, you'll see that it will actually touch the head shape all the way down until this spot. So that's an actual round of the head. This way, it's a ridge to it. So i've followed that. So that's the left side and then on the right side. I'Ve sectioned a little bit further back into the crown, so there's the apex, the other side and then on this side, we're a little bit further back into the round of the crown um. This side is going to be triangular. The other side is going to be round. So obviously i can't film and cut at the same time, hi hello, everyone kelly's joining us uh, so yeah welcome. Let'S get started. Let'S do some stuff get some haircuts yeah. So if you guys have any questions at any time, just like normal, please ask uh: kelly, will only get the good ones and answer them for me. Okay, so make sure they're awesome um, but yeah. If you want to learn anything, you want to know anything. Please feel free to ask again: uh kdf live is a weekly series of free haircutting tutorials. So this is for you guys from us, and we do it every week and it goes on to my ig tv. So you can watch all of these tutorials. They don't get taken down or anything like that and yeah. So, let's get on with this week's uh so, like i said, i've sectioned, the mannequin and obviously i'm going to do something different on this side. To this side, we're going to be in the same family. We'Re going to work with concave layer all right, so we're going to be using an elevation above 90 degrees, whereas this is 90. That would be a convex layer that follows the head shape vertically. In this instance, we're going to be working in more of an elevation up towards the ceiling, instead of maybe down through the sides and elevating a little bit to keep this length. We'Re going to be using a lot more elevation, so proper full-on concave layering. But there are two distributions of weight that move from back to front front to back um and they oppose each other. So one shape is round, and that means is it. It gets dark. It gets darker, it's lighter up front, it's heavier in the back okay, so it creates a more rounded shape through there. It descends from front to back and then triangular is the opposite. It'S lighter in the back heavier in the front and so the distribution of weight pushes forward. So these different balances. So one side we're going to go back off the face and one side we're going to go forward onto the face, pretty simple as to why you would do one or the other one's gon na open up the face one's gon na close the face one's gon Na have more of a face frame through the front one's, not all right. So that's another factor in the two different variations. So let's get started. I want to keep the length, so i want to protect the length that's on this mannequin, so i'm not going to come through and cut an outline length to begin with um. I want the outline to be softer. I don't want it to be a very solid, strong outline, i'm not looking for that. Bob kind of a feeling think about this lines: swing back and forth right, so layers they're removal of weight. So they have that tendency to bounce right. Graduation doesn't balance! It'S earthquake! Proof right, it swings back and forth right, just like the line would do so. If i put a harsh line in there, i will limit what kind of movement i have on the inside right. So what i'm going to do is i'm actually going to cut the layer first and i'm going to work to the outline all right, so something a little different. A lot of us are conditioned to pull the length in, but then we establish this really strong line. You look at people's long hair. Now there isn't really a solid line. It'S all soft and broken up we're using wands and curling irons to break up solid outlines. So there's no point in me putting that in there. So, just thinking of how we wear hair, if we were wearing solid, outlines like it was 1999 and 2000 and that's what i would do. First, all right, where's, my water yeah, oh yeah, oh, i was hiding. I was hiding it. No. I knew it was there. I'D just forgotten so we'll start in the back. This is a triangular balance. So what that means it's going to be lighter in the back. It'S going to get heavier towards the front, all right. What that does is it closes in the face right, but also what it does. Is it lifts this back area so that you get body and volume you can blow dry and get the the movement that you need in there and this side does the opposite. It leaves it heavier in the back, so it's harder to get volume in the back area, but you get a lot of action in the front so to do this, we're going to start on the interior, so the first place that i'm going to start is this Crown area i'm going to remove the weight first, so i'm going to establish the layer first and then i'm going to work to the outline from that. If i work from my outline, it limits what i do on the inside. If i work with the layer, i take care of that straight away, so i'm going to work from the occipital and i'm going to follow that natural ridge. Excuse me all the way down and section away the underneath from the crown area so around about there and that follows that natural round of the head shape that round of your head shape. Guys is what becomes your jawline, so working with head shape? All the time very important, don't put generic things on top of this head shape and expect it to work. You'Ve got to work with it so that sections away the ground area and what i'm going to do and flip it around too. Yes, better light yeah anyway. Okay and what i'm now going to do, is i'm not going to do anything with this? To begin with, this is will be the second area that i work, so i'm going to clip that out of the way, so it's not in the way. So now i'm going to go into the interior, so if you see the sectioning, it naturally is working with that triangular balance of the bone structure and the head shape, see what you have to realize. If you analyze the bone structure, you'll notice that the jawline is actually angled with that triangular balance, and so is the cheekbone. So is the nose the lip, the chin, even that neckline into the collarbone area through here. It'S all very complementary, even like from the eye socket here as well, and we're all like that. We'Ve all got that complement that shape to work with triangular. So that's why training, the shapes look, really really good round is abstract. So it's going to open up the face. It works against your face shape. So if the face shape, isn't that great don't be doing round? Do you know what i mean and one of the biggest one of the first rules i learned and was told, was don't put round on round and it makes perfect sense because you know how i look at this opening and closing it's almost like picture yourself at Your house right and you live street level, and you live just like our salon. There'S people that walk by all day, long right and they can see through our window right when those blinds are open. Everyone can see how clean or how messy this place is. So if i work around shape, everyone can see how big my cheeks are. My cheekbones are, they can see all my chins and all that kind of stuff, so you got ta start thinking about what's gon na counteract that's what triangular shape is going to do. For me, so that's why i'm going to show you this, so the first place to start is to start in the crown area working with vertical sections, which makes perfect sense. Vertical sections always have a tendency to remove weight and make whatever you see vertical flatter, because you're physically cutting through that dimension, all right. So body position i'm going to work on the outside of my fingers outside of my hands and that would enable me to use a higher elevation as i move through. Whereas if i work on the inside of my hands, the swing is to pull down. It'S not to pull up it's to naturally pull down, so i'm working on the outside of my fingers, fingertips pointed down, so i can work from the bottom up. Then i've got way more control over the line that i cut. If i work from the top down i'll, probably cut concave, that means shorter here longer down here, right, completely different layer than what i want to achieve right now. I actually want to follow the head shape through here. So there's an element of convex right now because of that so working on the outside of the fingertip fingertips pointed down. My feet are parallel to what i'm doing right. So if i move this foot this right foot, then it will change everything i do because now i will pull the hair over here, so i'm going to pull it straight out from the head shape, so it must be parallel to it. So there's there's a you know: a regular cone length there i'm going to go a bit longer than that take away quite a bit of weight on the inside, but not too much, and i cut a line. That'S going to follow the curvature of the head shape. So i'm going to pull everything 90 degrees straight out from the head and make sure that i don't leave any excess weight. So if i was to pull this hair down and just pull it straight to this wall, i'm going to leave that weight there. That way, it's then going to fall down and make this flick quite a lot. You can have a weight line all right, so i don't want that. I want it to be nice and fluid, so i'm making sure that it's actually all the same throughout and now what i'm seeing is these layers fall, i'm going to see much more dimension and shape in the back than what i'm going to see. On the other side, because i've actually taken that weight away now, so when i hit this with a round brush or whatever brush, i will get volume and i will get lift if i want it, whereas if on the round shape, it's going to be heavier in The back it's going to be a lot more work to try and get anything going on in there. How are we doing we're good yeah lots of hearts so moving on to my next section so guys now, what we have to think about is what's going to happen, this way horizontally within the haircut. So what happens to this dimension of the haircut? So i have options here. I can pull everything into number one that will make it its heaviest drop-off towards the front right. That'S too heavy, that's too aggressive, so i won't be pulling everything into the middle. The least amount of over direction is to move into the previous, so two rows into one. Then three will go into two four into three, so you're just pulling back into the previous. It'S definitely going to get heavier towards the front. But what's going to happen, is it's going to take me past this? If i go past that in danger losing a lot of this in here, because the hairline jumps up and comes around the ear, so there's less hair, obviously because there's no hair here, whereas in the back we have that so my over direction is going to be Within that window, so the round of the head's there, so basically, what i'm going to do is i'm actually going to pull everything straight back, not into the middle, just straight back off the head, so everything is going that way towards that wall behind the mannequin head. So i'm not going to pull it in i'm going to send everything straight back. It'S just like pulling everything straight up to the ceiling, not pulling everything into the middle. I'M going to do that, so i'm going to do the same thing back there. This question: are these vertical sections going to create visible texture um any time that you layer, you're, going to see visible texture because you're removing weight yeah so whether you cut it with horizontal section, remove the weight or vertical it's still going to create a texture. The difference between working, horizontal sections and vertical sections is the vertical will always have a tendency to remove weight, whereas horizontal sectioning will always have the tendency to build away and having that weight pulls down. Any natural texture right like when the hair is heavier just exactly you're, avoiding texture, you're suppressing it, because you're you're leaving length and weight gravity will pull that down and make it straighter right yeah. So this immediately just frees up texture wave. Let'S call it that yeah yeah, i think people get really like with the texture word yeah, everybody is textured. Aren'T they like. I have texture right. Even if my hair is straight. It'S a straight texture. It'S like conan today, right and even straight is a texture. Exactly straight hair is the texture of hair yeah. So anytime you remove weight, it will loosen, it will lighten and if there's any you know, amount of wave or curl in that hair it will be encouraged to do that right, um, okay! So a recap: what is the goal of doing layers this way? Okay, so i'm working a triangular layered shape, so the goal is that it's lighter in the back and it's heavier in the front uh. What i'm doing is i'm working smarter, not harder, i'm actually taking care of the weight first and then working to my outline. If i work my outline, i'm limited as to what i do on the inside, because i've just created a strong outline. I don't want a strong outline. This is not a bob. Long hair should be softer so that it moves more. The more you put a line in it, the more you restrict it and you make it swing back and forth. That'S what lines do that's? What graduation does is supposed to do this? What'S the move with you, it's like an octopus, so um i'm leaving the outline until last, i'm working from the inside out again, all this is possible when you can understand the what the, why the, how and the when behind hair cutting you're able to do things In a different manner than maybe what you've been taught, are you starting to learn more about the craft of hair cutting? You know more about the more that you understand that hair cutting is literally to pull away from what you want to keep. Then it starts to make things so much easier to do, because you know where you need to start, and you know where you need to end it's very simple, i'm pulling away from what i want to keep. So i start in the back. I'M pulling everything straight back to that wall behind the mannequin's head, keeping my feet parallel, so that it actually goes straight back. So if i move this foot, i'm not in a position to send it straight back. I have to then overthink things and go make sure. That'S going straight back and now i might be going over towards you guys. I don't know because i'm stood over here, but if i'm stood here i know that it's going to do this. It'S going to do that. It'S going to do that, but if i switch the foot now it's doing this now it's common sense right, yeah! You can't you can't see what you're doing yeah these things control everything the whole thing yeah. So i pulled everything straight back and now i can see if i let that fall, how that weight goes from lighter in the back to heavier in the front, and it's opened up this wavy texture that this mannequin has so now that that's done. I can now connect to my existing length that i want to protect right, but the thing is, i can't work from here, the reason being, if i stand here still i'm now working from my outline to that layer. So whatever i cut here when i stop there, i'm going to create a corner, there's no fluidity to this position that i'm studying. So i will not stand here. It will not give me a really nice fluid layer. It'S practically impossible to do that by working. This way - and i might cut that shorter yeah right, so what i really need to do again is work a bit smarter with this turn her around stand on the opposite side. Now, and now i can let the elbow control where that length is so. I can pull the hair straight off the head again, you see now my elbow will determine what that length is. So if she was like kardashian length right down here, then i would have to use my elbow to protect that. It'S that simple, it's just like when you work like this short, too long right, i'm gon na do that here now this is the top of the head. Think of it like that, so i'll now lift this straight up and i will connect obviously we're not gon na lay down first first, so you have to stand in the position to do that. We could try it on a model and get a lot of likes on the on instagram. Did they someone put someone in a uh, massage bed? Oh my gosh, and did um a technique that i told them to told them about, like the one where i did. A graduated mob from here, oh right, so they had the person lay down and they just did the graduated bob like it was. They were in the back right and they got their round concave up there, yeah yeah pull away from what you want to keep. That'S it so i've connected into my outline length, let's get some water, so what the the objective is is to protect the length as much as possible. What'S up haircut plus massage sounds dodgy thoughts, yeah also, let that happen in the shampoo hello from liverpool, nebraska, liverpool, argentina and greece. What'S up argentina yeah, that's really cool! Thank you for joining us yeah. What'S really amazing about us doing! This is the fact that we are able to connect with everybody all around the world. I want to say congratulations to our friends in the uk who are back to doing hair in san juan's. Today scotland was last week and that's awesome. Obviously, i'm english i've got a lot of family that are actually in this industry over there. So it's really nice that they're able to get back to work so everything's going straight back, just like it was before, and all i've done is connected whatever reaches in and i'm able to keep the length all the length yeah. What'S nice about this technique too, like when you're doing it with the client who doesn't want to lose any length, but they want all that volume right exactly all that space, you show them like how you're putting that all away. You don't even touch it until the very end. They can see how how mindful that, you're being with their length that they're wanting to preserve, especially in california, for sure everybody with their lives, two witnesses yeah. So what's happened now guys with that convex that i've created see what i didn't do is i didn't create a convex that went below the round of the head? If i'd had done that, then we'd have this situation going on and that's a divot, an internal corner, not that kind of corner a crater right so by sectioning at the top part of the round of the head. When i joined the underneath - and it's enabled me to turn a convex into a concave without me - cutting through this too much, i'm able to do that and take that all the way through. So i've not skinnied that through like a traditional concave layer. So, as you see now hold alternator this way, you'll see much better. Now we've got shape and dimension in there. So you see where those layers fall see. All of that would have been full, dense right phone book of density in this area. So getting anything in here with layer or movement would be hard yeah. So now, let's talk about connecting to the top the front. This will work from here. Two options: um any visits to london. I wouldn't imagine yes that will be on the horizons for sure and there's a request for us to go to new york as well. Yeah, that's probably going to happen as well, i'm starting to travel in the next few weeks. I will be in minneapolis at the beginning of may, i'm starting to book up classes now. So if you're interested in having me out to your salon or any of us to come, teach uh, you want to come here, we're doing classes here now, our first one's july 11th uh coming up tickets go on sale this week, so save that date only seven Spaces available in that and that's here in san diego and yes, like i said i'm out there on the road again soon so yeah. If you want to book us, contact us and uh we'd love to come and teach for you guys. Yes, we would so um options as to joining this into this two options. I can work with vertical sections moving through to the front and i could pull them back so that we can maintain this triangular shape getting longer and heavier towards the front. The the setback from that or the negative to doing it that way is there's only so much space from your guide, which is here to there, and actually we want to say it's there, isn't it because this area is a rescission area. So it's really from the apex. You know area into that, so one of the worst situations - and i'm sure lots of you - may have been in this situation - you're pulling the hair back and you get to that round of the head and all of a sudden. It'S like, oh, we say over it yeah, and that means oops. It'S too short, so because of that, the reason for that is, there's only so much real estate for you to pull this back. It will only get so long. What, if you wanted it longer so then you have to switch it. You work this way so kind of like what i did in the back. I'M now going to do through here i'm going to work from this point and i'm going to work from fingertips to knuckles and i'm going to get longer just like i did through here. So it's the same situation in the front than it is in the back, whereas i was pulling back to that wall, i'm now going to be pulling back to that wall up to the ceiling all the way, the ceiling wall, the ceiling wall, yeah, that's a wall As well, it is so we'll work this way, so i can actually work to a longer length. If i want, i have way more control with the elbow than i would if i over directed. So that's the reason why i choose this way. So there's two questions here: um, do you use this layering technique on tighter curl patterns, yeah, yeah yep? You just have to know that when you cut tighter curl patterns, whatever you cut, you see it three dimensionally. So if you cut a box, you see a box. If you cut a triangle, you see a triangle because circle, you see a circle, so you got to be aware of that. The looser the curl is, the less that happens the less out here it is, but this whatever i would cut on curly hair, i'm going to see this fall, so you can see it lighter, and you know maybe, on curly hair i'll, probably take this in a Bit more not so concave i don't find concave looks fantastic on tight curly, hair agreed, convex layers or graduation. I think you're amazing on super tight, like you're here mm-hmm, clearly kelly um and then, if we use this approach with very long hair, we will get a disconnect. There'S a question: no yeah, it's not disconnected everything's connected. If you do this on longer, hey you just go longer, you know what i mean. You'Ve got to be in control. Where do you want that layer to fall? Where do you want it to be? You know and that's why i choose to go this way, because guess what a client does when they sit in your chair, they tell you how long they want that layer and how many they want we're. Instead of doing it here and then trying to figure out, where is that going to be and you're limited because you're trying to protect that right start the inside work out yeah, then if you want to protect outline and keep the strength and stability of an outline Like a bob, you start with that first and then you work on the inside, so you work outside it, keeping going straight up to the ceiling, so you can see how that's being elevated up from the scalp and i'm going from short to long. I'M keeping that balance of triangular, so i'm keeping it nice and fluid all the way through now. Key thing here is what, if you can't reach it, i'm six foot tall. This is my limit. If i do that, i'm all about the elbow which a lot of us are because that's how we're conditioned, but i can only get my elbow so far up in the air, can't i so if you're on this shorter side than i am, then this is going To be difficult and you're going to be doing this all day long, oh yeah, let's cut them down here over here instead right, so you see people do that. So you do it right, we're copycats! That'S all we do, but the thing is is i do not lock the hair. When i put my fingers around it, i'm gently holding the hair in place because i don't want to use too much tension. I don't want to pull it from out from the scalp. I don't want to shift the scalp. Do you know what i mean? Some people have some gear like an older clientele. When you pull on it too tight you give her a little facelift, so you got ta, be careful, so you keep it nice and steady. Now here's the thing drop, the elbow see. If i keep the elbow there, i'm stuck. I have no other option. I can't go any higher, but if i drop the elbow, i can now go even higher up but see that's such a great trick there. So we're all about, i can't reach it, so let me drop it, lose the tension, no keep your tension and use elevation for what it's for right to pull away from. What you want to keep all you have to do is drop the elbow, and i can now go up way higher all the way up to there, because they can both reach yeah. Well, it's so much better for your body too right yeah for sure got it. You got ta, keep that in mind is protect the body, so everything's coming up to the ceiling just got to get some moisture in there mist mist it's a light mist, so we're moving down into the lower round of the head. All i'm doing just lifting strikes up guys straight up to the ceiling to the round of the head and up to the ceiling and there's my guide constantly using the mirror to see what's happening. You have to use the mirror to see everything if you don't use the mirror, you're actually cutting two-dimensional. You can expect things to be off and uneven by doing that. If you use your mirror you're, then seeing every aspect of it. Lots of love great tips, great teacher, thank you very much, so we let that fall. Now. Nothing has been done with the outline. So whatever i cut, the natural outline or the natural hairline will show in my outline in this perimeter length through here and if you think about what naturally happens guys with your hairline, is it comes up from down, stops there and goes across right. So when we look at this, as it falls now, nothing's been done with that in the outline. It'S all internal, so in actuality, i've just done the most like. What'S the word complementary or working with the natural structure of the body because what's happening, is it's actually coming up through here and then coming down again? So there's almost this like gap right here? Can we turn it with the white background? You might get a better view. Yeah there we go yeah there, that's better, so what's happening, is it's actually a little bit weaker in here? That'S this hairline! That does that, and you know why, because there's a shoulder that goes right there to me. That'S all about suitability and understanding suitability. So if i come in now - and i put a harsh outline on this - we're not allowing for shoulder whatsoever right, whereas with this i'm allowing for shoulder so whatever sits in front, sits in front when it sits over. It sits over it once it's behind. It sits behind it that to me, that's it's there for a reason, obviously, and that's what it's there for, because there's something there generally. So i'm going to work with them to keep that if this was a bob, it would be above the shoulder, so we won't be leaving any hole in there. Wouldn'T we we don't need it. So i'd come through it and i'd pop my outline in first. If i was doing the bob with layers, this is not a bob with liz, it's not a layered bob. It'S just layers and my outline is the heaviest part, because it's concave, so i've kept the length of the mannequin in the right spots. It'S interesting. How much focus goes on filling that hole yeah in a bob in a barb? It lives above it right once you go. Oh you've got to allow for this people always ask me: what do you do about the shoulder? Nothing, it's going to be there. You can't do something special for it all the time you're gon na move around it's gon na move around this. It'S never just gon na stop in one place. So, yes, it's going to be balanced in this stuck position. If you're gon na be like that and you're gon na be like that all day, it's definitely not gon na be balanced, but chances are you're. Gon na be like this right right, so don't be searching for balance for this over here and this one over here, because nobody walks around like that so yeah, so that's triangular, so a little cross-check just to make sure. So if i check the layers through the front, i'm going to elevate them up to the ceiling, i'm going to cut check the opposite dimension, so i cut it this way, which is horizontally. I now check vertically and i bring it up to the ceiling, because it's exactly what i did and i can see my layer so now, let's do this side, let's do the opposite, so this pushes forward. It actually covers the face, so it makes the face on the narrower side, because it's put the weight in there round's gon na. Do this it's gon na open it up. So we'll do this side now. Okay, i love teaching this. This is how i start my knowledge destroys fair, hands-on classes. Obviously you have to start on longer and you go to shorter and we get quite a lot of haircuts during the day in those classes, but this is how we start. We start with these two particular haircuts and then we move into obviously different areas and zones, but the aim of a knowledge destroys sphere class is to actually teach you all of that, which is theory. That'S like the science of hair, cutting it's the gold right there right yeah, but in haircuts so stuff that you're going to do every single day in the salon, things that you like to cut so not doing them in like old, cheesy, 80s and 70s haircuts. Do any haircuts that we do now long layers, shags, blade, bobs, french bobs, pixies mullets, all that kind of stuff right, they're, all those things. So that's what we teach in in our hands-on classes. It'S obviously what we teach in our kdf lives as well. So before i start on this side, what i need to do is i need to make sure that i always know where the apex is, so i'm actually going to section this other side off exactly the same, and that's going to allow us to keep an eye On where the apex is just drilling concrete, so what we're going to do is we're going to create round concave layers all right, the the kind of go-to version is to just work the horizontal sections, all the way through lift everything up to the ceiling and cut Shorts along it's kind of the opposite to what i just did here, i lifted everything up to say, and i could show it along that way. So i could do that through here, but what that doesn't do for me is it doesn't give me any fluidity of round right. It'S just this generic thing i put over the top. It'S different to triangular right round is round right. It'S a fluid shape right, so round is radial. So for me to make a round line, i need to pivot off this spot right here, just like a clock, so that creates a circular shape. So if i pivot my sections what's happening this way, i'm creating a round shape. Now, if i follow the head shape, it's going to be head shape. Don'T think that this head shape is a perfect round object, it's its own form of shape. Do you know what i mean it's head shape and everyone's got a similar pattern, but they're all very different, so for me to put a proper clean round shape over it. I have to do something i have to over direct slightly forward so that the balance of weight from front to back drops that's a round shape in hair cutting. So it's actually slightly lighter and shorter at the front and it gets heavier in the back because of the forward over direction. And that's what creates this? If you don't want any of get longer, that's what square shapes are from and i think did we do square layers a few weeks back. I did that all right. Let'S do this so we're going to use the length of the apex from the opposite side. That will allow me to see the difference between the two so i'll use that as my guide, when i cut into this now, so my first section is from the apex. Sorry pivots, so that means it's narrower at the apex gets wider towards the base of the section trying to keep that in this region of the head shape about the size of my fingers. Obviously, as it gets towards the bottom, it's going to get wider and wider, but i won't really be cutting any of that. I'M cutting what's up here concave, so i want to protect what's down here so 90 degrees, that's straight out from the head shape, so yeah. So straight out not up to the ceiling, if i do that, that's going to take this shorter and leave that longer. So that's not round! That'S more like this side right! So for me to make it round, i need to go 90 straight out from the head and i use the piece from the other side at the apex and i'm going to cut a line that follows the head shape. So from that spot right there we're going to go downhill, i'm following this. So whatever line you see there guys that's what my fingers are going to do. Why am i doing that? Because it works with that person's head shape and i would say pretty much always do that because that's how it's going to fall, it's going to fall on this part of the cranium. So i'm copying that part of the head shape and everything is individually theirs. So, if you're cutting to follow each person, you're cutting to actually make it fit with their head shape, if you're, just lifting up to the ceiling, cutting whatever round line, don't expect it to fall and fit on that person's head right. You'D have to come do stuff to it, whereas this i'm working with her head shape absolutely immediately. So now what we're going to do is we're going to move and start to pivot around. So my second section again is going to from the pivot point, and now it comes out it's pivoting around so remember it needs to get heavier towards the back for it to be round. So i'm going to push number two into number one. So that's not really over direction. That'S elevation! All right! This section i have is more of a horizontal section, so horizontal sections, when you move them, that's elevation. It'S not over direction and i'm bringing number two into one. So the exact same spot, where number one was cut number two and number one are going into that. That immediately makes two longer and heavier than number one. So i'm immediately starting to create, what's known as a concave layer, so by pushing two into one, it's starting to do this. These insights are gold mines, who's drilling and then they said you're drilling into the earth. With these gray haircuts, so section number three and number two so number two is now gon na come straight off the head and i'm gon na pull the push number three into number two. So i'm working into the previous section. So the mirror here is massive right. You guys are the mirror right now, that's where my mirror would be, and i've been looking in the mirror to make sure that this is going into that, because i'm still looking at the way, i'm elevating this way and the way i'm actually seeing that line. So i can't see my elevation. I can only see the direction and my cutting line. So that's what mirrors are for monitors. You can see this being pushed into always look in the mirror before you even open close these that's a good safety thing. So look what's happening just in those three sections. We can see our face frame, starting so let's say she's like i wanted to start the chin. Then you'd have to make sure that that first section when it falls it falls at the chin. I wouldn't naturally recommend that that's so like late 90s early 2000s. Everyone have like - let's try all this in here, so yeah, let's keep going. So, let's just take the previous section get my next one. Now all these videos will be saved on the igtv yeah. Everything goes on. Everything goes on my ig tv. After so all the free education is in my ig tv. If you don't watch it live so you'll be able to catch this after and to the previous all the way so i'm pivoting around. So you can see now my body position is over here, i'm not facing that way anymore. So again, really what we're teaching you is, how to ride the bike, and then you can do all the tricks afterwards, once you're able to ride back, you know, that's all it is really it's the. It is the basics. It'S the fundamentals, the distribution of weight within hair, cutting, which is up down back forwards and in and out so i'm on my last section in this this front panel and you can see where i'm at with my body position. Now, i'm all the way over here. I started - and i was here so i've pivoted around with it and really what i'm doing is i'm keeping the guide in between my shoulders. So the guide enables me to put myself in the right place. So i'm not stood like this because i'm not working straight up from the head, i'm pushing into the previous. So my previous is that ankle. So i need to be in that position to push this into it. A lot more honest on the body position today. Very important with both sides also, i might cut something different than what i'm trying to cut based on me, studying it's being stood in the wrong place. So, let's give that a little cross check and you can see what's happening it's getting longer and heavier just like a round concave layer does so to me that is so much nicer and more complementary than coming through this way and just pulling forward and taking that Corner off yeah and now i've worked with this part of her head shape. So crosstalk you have to question the opposite angle. Right now, that's very simple! When you work horizontally, you know to check vertically and when you check vertically, you know to check horizontally. Well, i've cut horizontally and i've cut diagonally and i've cut vertically. So how do i cross check all of that? It'S really easy. I'Ve created a curve right so think of that part of circular right, so to check the opposite of this movement is actually to do this. That'S to check the opposite. This will check my movement through each section as it pivoted through and i'll pull it straight out. Where it was cut and what i'm looking for is a line that gets heavier towards the back and that's exactly what i'm seeing that's me bringing forward into the previous if i hadn't brought into the previous, this line would be like the ceiling right flat. Exactly so more exaggeration, because it's pushed forward, that's what gets us that drop! So now that's in there and guess what this is the weakest part. It'S the front, there's less hair up here, because we've got nothing here right. So the only thing that would happen now is it the outline will get heavier just like it would naturally because of the hairline um yeah. I love the way you drill all these techniques and then uh. How can we get our hands on the theory on the whiteboard? Okay, so uh? The theory is um, it's a class, i'm actually teaching a class. That is this on may. The 10th, which is knowledge, destroys fear theory and it's about a two three hour class, and it's me taking you through absolutely everything about the science of hair, cutting the intricacies of movements so not necessarily teaching you haircuts more of the bits inside the haircuts like. What'S elevation what's over direction and all that kind of stuff and how does it affect different sectionings and all that kind of stuff um? Basically the the the nuts and bolts that you would need to know? All of that, so you can join that. That'S the link for that is on my profile on my bio. You can just click on the link tree there and it's kdf theory on may the 10th everybody gets a recording of it. So if you don't watch it live, i send you the video anyway so and it's fifty dollars, which i think is a bargain. That'S it that's a story, and this uh this year you can expect to see a kdf theory book coming out uh digital book, as well as a physical book. If you want so basically my madness in the book, all that love that all the pages - the notes i love breaking - hair cutting down, i've done it. My entire career and that's kind of like probably why you know who i am um - is just breaking hair. Cutting down and trying to make it easier and simple for everybody to understand to make it a more common knowledge, so i'm continuing working through guys just pivoting around just like i did in the front and i'm over directing forward into my previous section. So my body position is pivoting around with the haircut as well. I really like this variation because it is a true round layer because of the pivot factor. You can make something heavier in the back easily without doing this, but it's not really that it's, the fluidity of section number one all the way connected to section number, whatever the back is, and that is something in itself. I feel like yeah. I think the fluidity of it as opposed to just pulling everything all forward, and then you get such a huge drop off in the back. It'S like you were in a backpack yeah, so heavy not up here, just all back there, and then you think if you throw all that back there. What'S it doing to this area yeah, that area needs to be more like this and then natural, so that we don't. You know everybody is very excited about your book. Oh that's, cool, yeah, nerds, that's cool forward into the previous. What else have we got done? That'S coming up your one-on-ones, oh yeah, yeah yeah, we've started to do one-on-one classes with either of us me katie or kelly. We do one-on-one sessions here in san diego and basically it's it what's great about one on one. Is it allows you to customize your day? It'S like an a car situation and we can go through a full day of breaking those kind of things down for you, the ultimate haircutting private, tutoring, pretty much um and you get to bring a friend for free yeah. So it's like two for one. So you can kind of you know subsidize the cost between you two. I don't have enough guide there. I just went too far and i couldn't see it and that's a sign right. There don't cut immediately, don't cut, don't take for granted and think that you're, like a jedi master and you'll, find it no go back, see if you can naturally find it that way, because once you cut something, that's not supposed to be cut, it's too late. It'S gone, and now i can see it. I can feel it too in your bones. Well, yeah! If you pull up the hair and you're looking and you can't figure out where you're going to cut like, don't guess that some people do. Oh my gosh, because they're afraid of when their teacher or whoever comes along and looks that they're going to get in trouble you're getting way more trouble. If you start cutting holes in here, yes, well, there's a few people that are beginners that watch these too so set yourself up in vegas, set yourself up for success yeah. I have a charity thing, i'm doing in a few weeks. I guess in last 16th of may in las vegas, um i'll post on my page about that. A little bit more information see. I didn't go far enough back now, i'm still where my guide is. It'S got some talking about other things. Yeah. We have a theory, class um, obviously um. We have our video series. Our knowledge destroys video series, there's knowledge of choice, sphere, one and two. I also have a classic series um. My favorite is knowledge destroy sphere 2, because it literally covers all of that yeah. It'S like my hands-on class, but in virtual video format, multi-cameras and uh about 11 tutorials on that and you get that for 175, which is pretty awesome and you get lifetime access. So those are the options and again there's all the free stuff on ig tv and you're, preserving all of that length too you're going down. You know why, because that that section that first one i've never dropped below that elevation right. So that's worked all the way through, so the natural round of the head is my guide. I never go below that. Obviously, if i start going below that i'll start to cut into this, take more weight out, so my concave can change so ultimate body pivoting as well. All the way around i'm just showing your feet round and round yeah. It'S a shimmy, a scuffle. So now, looking at that, as it falls and looking, we can see that it's heavier in the back than it is in the front, whereas the opposite side does the opposite balance so round versus triangular. Why would you use either one? How would you cut either one? These are two variations: they're, not the only and be all versions of it. These are just things that i've evolved into doing from you know working some of the classic ways. You'Ve probably been taught to do. Those layered shapes as well. Again, it's all trying to be more efficient with what we're doing uh without losing the integrity of the technique that we're creating so round versus triangle yeah. So we have round on this side and then triangular on that side. So you can see the difference immediately. This is way more open than the other side, but it isn't always this. Is it that's what we get stuck in clients and stylists get stuck in what you're looking at in the mirror, if your client's always facing the mirror you're only going to always balance this right and that's just one view right. Unfortunately, it's the one that the client always sees right the front view, but everybody else on planet earth sees all this about them as well, so triangular. Yes, it keeps it heavier and leaner in the front, but look what it does to the back area. It takes all of that excess density takes that corner off away so that you will actually have dimension and lift in the back now that maybe that person's been craving, whereas on the round shape it's taken away from the front right, it is a mullet. That'S what round shapes are guys, it's just an extremely long version of the mullet, so it's party in the back right, no with the way around, is there's this in the front part in the back. That'S it because it's longer in the back, so that's what's happening with this shape. We'Ve got it dropping. So what becomes more difficult in round layers? Guys is the volume in the back, because it's just heavy gravity's already getting this and pulling it down, whereas on the triangular side it's much lighter, so i will be able to get lift and volume. With that to me, it's common sense that if you put weight back here, it stays there. If i put a backpack on it, doesn't disappear, you see it right to me. That is what that is you're putting weight back there. You can see it too, as you're moving the doll head back and forth how much less movement you know how much more dense this one is down here, yeah on on the round yeah and remember we have more hair in the back than we do in the Front so, if you're pushing all the weight into the back, expect it to be weighty and heavy, but the triangular opposes that it allows you to keep the length but take all that excess weight out, and you know it's also a good shape. Combine the two together. So pull this back, pull that forward. You get a great balance on that that'll, be something we'll do on another time, but to create more of a diamond shape, put the corner there, not there or there anyway. I hope you guys enjoyed that today. That was a lot of fun, yeah and we'll be back again, as we always are, with some more education, some more free, tutorials and uh yeah, so stay tuned for uh tickets. For my hands-on class pdf i mean yeah, which is here in san diego in july, and then, if you guys want to uh, you can get my code for kdf. I mean uh for pivot. Point um, you get 25 off. I think something like that of mannequins and tripods, and my code is kdf ed, so kdf ed, pretty simple and you will get a huge discount with that, and this stuff is not cheap, so it really helps so again, i want to thank you guys for tuning In thanks everybody for joining me,
Comments
Steven Michael: I just stumbled upon this guy. He's incredibly good at explaining weight distribution, the why's, the why not's and the reasons. When you know why you're doing something, you're more on purpose. Bravo on this vid!
Matter over Mind: Where can I find the link for classes? Website? This was so incredibly helpful! I’m in Cosmo school and none of the instructors have been as informative and as helpful as this video! I have anxiety about cutting hair on the floor bc I don’t feel like I understand the why,where,when,how etc…. ♀️
Roya Moshiri: You did so good and educated a lot of detail which is so important. I love it thank you so much ❤️✌️
Katie N J: I have to say thankyou so much for this. We are not hairdressers! I live in a place where I have tried every hairdressers within 50 miles, (uk in the sticks) this is what i am hoping for but it never gets achieved. I always end up with horizontal layers and have wanted a concave long cut where the hair is fuller at the front as im now 40 and the front has began to get thinner and greyer! You wont thank me for writing this perhaps but i have to tell you that my husband an electriction copied each step and i have to say that this has saved my life as i now have the haircut that i have always wanted but have not been able to explain to any hairdresser and achieve. I find it very hard to explain to them and come out each time not over impressed and worse off in the pocket department! Only one hairdresser was able to do it and i have to drive over 100 miles. Sadly she left the shop and has dissapeared so.....I realise that this is a serious tutorial but I would like to say that you explained and showed very well how to achieve the correct angles, and you have saved my bacon. I would love some tips on sorting out dark hair colour that has gone grey at the roots!, my newest hairdresser wont let me come every 3 weeks to sort out the roots and 5 to 6 weeks is too long. Using home dye, and not being a hairdresser i unfortunately have dark hair with red roots :( I had to leave you this message to tell you what we did today, it was fun and the husband is well pleased with himself, and im over the moon that i found your tutorial. It was a laugh, we had fun trying, i now have great hair! so i hope you dont mind my writing this. You are fantastic at what you do and its very nice to see. Have fun over there, Katie and paul (uk)
Rose Hackney: Amazing hair cutting tips!!! Also I love that water bottle!! Where can I get one?? Thanks!
Christine Cordes: Can I get more information on your classes and cutting theory? Do you have a website or more online classes?
Roseli Burbon: Parabéns parabéns parabéns
Mary C: Could you please put on a long wig and give yourself this haircut? It would help so much with do you own hair! I love your videos thank you
annie fredrickson: The best tutorial I have ever seen
Lisa Rios: BEST Layering video on the internet!!
Mary C: I did this to myself..my back does not blend…it’s long and straight with layers but the next layers are too high..I keep laying it but it still looks like 2 haircuts
Rika Giani: Where can I buy your book
behnaz tayebi: Thank you
maribel mndza: Y traducido a español, porfavor
Piotr Kania: whats his name? an amazing teacher!
ออลิยา นิราช: Handsome teacher
Sugarmoongarden: Awesome I want him To cut my hair plz lol
Aprendiz de Salão: Deveria ter escovado este cabelo para finalizar o video
Flor Tovar: What is your Instagram page to follow
spumanti: Stop talking too much
kathy neely: Yes less semantics
Mara Antonia Gonçalves: Blá blá blá. Em vez de mostrar o corte, fala, fala pelos cotovelos. Seja mais objetivo
Chandra Aja: What a waste of time talking unnececeray.
Sonia perales Perales: Habla mucho,habla y corta
William Rucker: Content is good. Less banter and personality would be better. Uuggh
Avo Angami: Too much explanation l don't have patience
Maria Jose: Mucho habla
Mara Cartagena: Whats his name?
Anar Emiraslanli: ♀️♀️♀️♀️
Rika Giani: I would like your name plse?
Rosa Aballe: Biuti nalang manequin lang model,ku Tao Yan ,jinombag kn yang tiga gupit,daldal mas marami pa sa.hibla Ng buhok Ang dinaldal nta bago gupit
Amaya Ve: Hablas mucho
Sonia Gonzalez: UF!!! k aburrido el video k fome
A D: who are you ???
Ruby Bales: to much toking