Very Easy! Long Satin Bonnet For Braids And Locs- Yele Stitches Tutorials
- Posted on 01 August, 2021
- Long Hair
- By Anonymous
In this video I show how to make a long satin bonnet with a flat front that is great for your edges, and an elastic at the back for firmness. I have made other bonnet videos and satin hair accessories videos which you can watch here: https://www.youtube.com/watch?v=t36fWg...
Satin lined bonnets are known to be great for natural and curly hair as they promote moisture retention and prevent breakage. The smooth texture allows for little to no friction on your hair.
Let us connect!
IG: @yelestitches
Website: yelestitches.com
Etsy Shop: etsy.com/shop/yelestitches
Materials
African print Fabric ; https://www.etsy.com/listing/964404816...
Satin lining; etsy.com
Sewing machine; singer.com
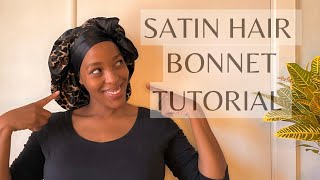
Hi everybody today, i'm going to be showing you how to make this nice bonnet. Looking thing, it's like a long bonnet, but it's great for braids. So i had my braids done yesterday and this is perfect for it. The reason why this one is different from the rest you've seen before is that it is very flat in front, so it's not going to be aggressive on your edges and then it has the elastic at the back to keep it firm on your head. So if you want to know how to make this, let's do it together. The first thing that you need is to fold your fabric in a rectangular way where one side folds to be 20 inches and the other side is 28.5 inches. That is if it was not unfold, it was going to be 40 inches by 28 inches. Now, i'm working with this black satin lining and the original satin lining the color for one. The next thing is to find the midpoint of the upper side of your folding, and then you find the midpoint of the side of your folding, so the 28.5 inches that were needed at first as a one inch seam allowance. So that means the midpoint of your side would be 13.5 inches because the extra 1.5 inches or so is just for seam allowance. So the main, the main, the main part, is 27 inches. So you just find the midpoint, which is 13 or 13.5 inches on the side and at the lower part. Also, you pick the middle now. The next thing is to join all these points. Together, you join the first point by nice, smooth curve, i'm using my free ad right now, because i don't know if my curve will do a great job, so you see the free hand will actually really work for it and then i just joined the other side. Also with a nice smooth curve, so it looks like i'm drawing the shape of a sleeve if you've seen my sleeve pattern tutorial, you know that the sleeve looks somewhat like this okay. So after i finish doing that, i'm just going to cut out this line. I'M going to cut it out and you see that the cotton is affecting what's the colorful satin as it's also affecting the black satin that i put under it, so i'm trying to cut both of them at once. You see work smart and don't work too hard. This is me working smart because i'm cutting the two fabrics at the same time, if you have any issue with that you're on your own, our work is smart. He'S no laziness, he's working smart, all right! So after doing that, you see that i'm just going to squeeze i'm looking you up with what it looks like the front is flat and the back is squeezed up. That'S where the elastic is going to be so to know the part that is going to be flat, i'm just going to measure from one ear to the other. Here mine is about 11 inches, so that's 11 inches divided by two, since my fabric is on fold. So that would be 5.5 inches, so i'm going to mark that 5.5 inches, because that is where my elastic is going to start all the way to the back of my fabric and the front where the fold is is going to be the flat side. If you have any questions so far, don't forget to leave it in the comment section, because i'm here for you all right. So the next thing is to just sew the upper part together with a nice uh, 0.5 seam allowance, and then i just left this tiny little space here is this for toning. You know we always turn these things inside out, so that space is for turning whatever we sew from the cap. Okay, so after doing that, this is what it looks like when we turned it inside out. So the next thing is to just take the bottom of our sewing very bottom and then sew all the way from the bottom, from the flowery or from the pattern satin sewed, that line all the way down to the black satin as well. So the bottom of it to the bottom of the black so from one bottom of the one side of the satin to the other bottom of the other side of the samsung. Now, after showing that what we are going to have is this, we just i just started with 0.5 inches seam allowance. The next step is to take the bottoms again and then sew that side together right side on right side. So you see i'm just taking the seam at the bottom that seam the same part and then i'm going to face it to the same part of the colorful pattern. So the same part of the black one is going to face that same joining of the colorful. One and i'm going to make them that right side is going to face each other and then i'm going to stitch all around it and leave a two inch seam allowance. Also because we need that seam allowance to pass the elastic that is going to be at the bottom of our bony cap. So after sewing that this is what we are going to have, and we are just. We have the tiny space right here for the elastic. Now we're going to go back to the two inch space that we put at the top. That'S that small space is the salvation of the entire bonnet. You know from that tiny space. The entire bone is saved because we can now turn all our artwork inside out and cover all the irregular stitching or the funny stitching that we did inside the bonnet okay. So now i turned it inside out with the tiny stitch and we have this. You see the down part and we have the upper part both of them having like two inches salvation on either end of the beneath. So the next thing we're going to do is to sew a 1.25 inches seam round about the top of the bonnet. Now you can use 1.25 1.5 two inches depending on the width of the elastic. My elastic is one inch wide, and that is why i'm using 1.25. So if yours is like 1.5 inches wide use 1.75, so the only thing there is just at extra 0.25 inches. So your elastic will sit very well in the tunnel of your a.m of your boney okay. So now i'm going to take it to the sewing machine now and sew it. I just sewed the 1.25 inch round about it. Next thing is to measure 5.5 inches, which was the length from one here to one year. For me, it could be different for you, so i'm going to after measuring that i'm going to just mark the 5.5 inches, because that's where my elastic is going to start from and end on the other side. Okay, so my elastic lens that i would advice is to you. I would advise you to use seven inches. I used longer than that, and i did not like it. It was a little bit free, so use seven inches elastic and you pass it through the two inch uh space that you left earlier. That'S when she's placed i used to tone everything, that's what you're going to use to pass the elastic. So i passed the elastic and i sewed it on that - mark that i made earlier and i'm going to just pass it to the other mark that i made on the other side of my cap. So i'm trying to turn i'm trying to push the elastic through to the very end, so i can remove my pin. You see me i've removed my pin now, i'm going to gently move my elastic to the mark that i marked earlier and then i'm just going to sew right on there. So that is the the way to put your elastic at the back of the pony. After doing that, i'm just trying to stretch out the elastic and make it smooth at the back. You know to give it a nice finish and then i'm going to go to the bottom of my bonnet and then i'm going to just sew 0.5 inch round about that bottom. That 0.5 inch is just a toenail to put my elastic for the bottom of the bonnet, because that is where your braid is going to come out from, especially because you don't want to it's to curl up or lose the texture or the curls that it has. No, whatever kind of braid that you put in so that particular place is just so the braids can come out easily and they can breathe or whatever, okay, so the elastic for the bottom you're going to need about seven inches of elastic as well. So just take seven inches of elastic and then with a tiny uh office. Pin i'm going to just pass the elastic right into the little toenail that i made for it and then i'm going to just sew down the elastic together like so you can tie it up if you have enough elastic to tie up. I just wanted to just see it because my elastic was feeling a little short, but you can use seven inches still the six inches that i used now after sewing it together. I just put the elastic back in nicely and then i'm just going to stitch the opening that i made in the beginning. Now you can stitch it, you can unstitch it. You can use your sewing machine, but the sewing machine is so much easier. So i just use the sewing machine to sew right on top of that, and then we have the nice squeeze or puff at the bottom of our uh cap. And now this is me just wearing the cap. It looks so good. My braids are going to pray for me, and so, if you want your brace to pray for you, you should probably make this kind of bonus for yourself, and this looks good if you like this video, please don't forget to give it a thumbs up share to Your friends make sure you subscribe to my channel. It'S been wonderful serving you see you next time, bye,


Comments
Autumn Alexandra: Thank you for the content... I love the bonnet. May I ask where you found that beautiful colorful satin?
Lakiesha Thompson: The bonnet is beautiful and well made but for beginners you should start with the folds of material in the beginning. Everything was already placed. Thank you for the tutorial.
Onigbindeh Bukunmi: Work smart and don’t work too hard I love the colour full stain material, it made a really beautiful bonnet
Delolu tv: Welldone Mama apart learning, I enjoyed watching it. U are a real vibe
Kemba Kirton: Thanks Queen!
Paula Johnson: I am not clear on this. I cut as you instructed but the steo by step I was looking for as a novice was not done. Help me please.
Rommy Rodriguez: No entendí nada por lo menos sub titulos