How To Customize Full Wig | Ft. Her Hair Company
- Posted on 22 February, 2018
- Long Hair
- By Anonymous
This is how I customize my wig after I have bleached my knots. Aleah already has a video on customizing a closure.
__________
All items used can be found at your local Sally's or beauty supply store.
Don't forget to check out our Podcast Bonnets & Brunch on Soundcloud, iTunes, & Stitcher
- SoundCloud: www.soundcloud.com/bonnetsandbrunch
- iTunes: https://itunes.apple.com/us/podcast/b...
Stitcher: https://www.stitcher.com/podcast/bonn...
I do not own the rights to this music.
Song: Cruise With Me - Lakey Inspired
https://soundcloud.com/lakeyinspired
-------------------------------
CONNECT WITH US!
Instagram: @essntl
Twitter: @BeEssntl
Blog: www.BeEssntl.com
Business Inquiries: [email protected]
For Sponsorships or Endorsements: https://famebit.com/#/profile/ESSNTL
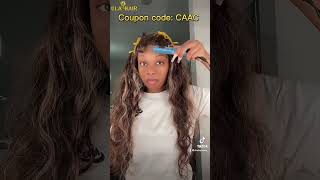
And welcome back to our channel. I know it's been a minute since I've posted a video Mike's been kind of crazy, that's subscribed, but for me right now, this video, I'm gon na, show you how to prep my units. I made this place from here that I got her hair company and when I say so, wan na see how I prepped this units - garlic, all customized, okay, so boom we're here exhibit a this is what you get after. You'Ve tinted your lace, bleach, the nights. You know you started your, I mean like us, a basic, but your average customization process, but this is not where you stop. This is where you begin you see. The part in here is just kind of really dense. It'S not really. You know together we're gon na fix this from here on out. This is where you really get into the nitty-gritty of customizing your week to look like those Eiji models. What lace looking like it's grown from your scalp cut the wig all right. So when I was trying to pluck this bad boy, okay, I cannot reiterate enough how important is to take your time. You don't want to over. Pluck your part, because number one, that's gon na, be able to see your money because you're gon na mess up this closure or front so the truth that you bought so yeah. Take your time don't rush into it. You'Re gon na be here for a while. So just go ahead and get a little comfortable, just plug flipped. Look, I'm really sorry that my hand was kind of blocking your view, charges to the game and not my heart: okay, thanks. Okay, so we're here and we're still plucky making a little bit of progress. But this is a closure. It is not a frontal and, as you can see right here, I'm parting and I'm gon na go in and just pluck some more I'm kind of customizing like you can see. Some people do when they have their front shows, mainly because I want this week to look as natural as possible and if you see before it was just so dense and so full and that's not natural at all, that your hairline isn't a hundred percent full from The front of your forehead all the way back and it's just not how it works so yeah, I'm just plucking, pluck and pluck in to get this thing as natural and realistic as possible. So I hope your plucking is going well, as you can see, you know still plucking, but if you want that wig to look like nothing but scalp, you know you got ta put some time into it. Like I said before, you got ta take your time. It'S better to under pluck and kind of gradually get to where you want to go as opposed to go in there and go in the most, and now you can like cool. What, when I see like the end, is near and is looking how I want it to look. I like it to kind of sit and prep the wig ledge is also even a word with some mousse. I just smoothing that out now to kind of tame it fly away, just to get it as flat as we can get okay. So this is what we're looking like right now um. This is the finished result of all this plucking that I've done. I am gon na pluck it some more probably when I put it on so. I didn't want to over, pluck as I've been stressing in this video, so yeah now we're gon na go on to the fun part layering and getting this wig even more together. Okay, so now it's time for some layers, you can either use a comb, razor, thingamajig or just a regular razor. I will use a comb if I was a beginner, because it's probably gon na be a lot easier, but I'm just gon na go in with a regular razor. I want some long layers, so I'm gon na start toward the bottom and work my way down. If you want shorter layers, you would you know, put that razor a little higher up and work your way down, but, like I said, I just want some long layers, I'm not a professional. This method works for me. I usually like to just kind of layer. It'S kind of give a little icing body, because you know you make a wig. It'S all the same length. It'S gon na have movement, it's just very blah and we don't want block. We want popping all right. I know you're probably wondering why she's only working on this left side, but for the sake of time I didn't want to show you guys, like you're, doing the entire thing, because this video - probably like 25 minutes long so yeah, I'm just working on this one side. Taking my time working in sections because, like I said, I'm not professional and I don't want to mess this up, so it's all layered up how I want it and now it's time to curl, because we're not done yet we're not done curling your hair on your Wig stand will save your arm so much stretch. Trust me believe me: do it? Okay? I don't know why it's going to figure this out, but ever since I have is literally changed the game so to get some volume in the front. You know, like that run your fingers doing is just bouncing it flowy you're gon na flat out your hair to the back. That'S how you get like the push forward like I don't you forget about my videos, but the kind of flowy pop in front bang. S type of vibe: that's how you get it and I'd go ahead, and just do all this. On my week, Sam cuz, the safely stolen her in my arm. Always thanks, listen getting a wig to look how you want it to look just takes time, and yes, I'm in my bonnet, because this was a day process it takes. You know it takes a lot once you get the hang of it. I promise like it'll. Come second nature to you: alright, so there we have it. This is this: is it she's all done when I put the wig on and I'll probably make even more dressing? So that's when you really can get it. You know to look in its final form, but as of right now, this is it. This is how I spread all of my wigs thanks for watching, and please comment below for any more videos that you like to see. Oh


Comments
LaMonica Blair: I don't even wear wigs and I enjoyed watching this video
Her Hair Company: Awesome tutorial!!!!
Terry Lapper: Love all the tips.
NiCole Sky: Bout time you posted girl!!! You were missed
Just Eat No Talking: Yay so happy you posted
Michelle's Daughter: Where did u get the wig stand?
Michelle's Daughter: Hey Dana!