Introduction To Fibermesh Tutorial - Medium/Long Hair
- Posted on 11 October, 2015
- Medium Hair
- By Anonymous
A fibermesh tutorial for long hair
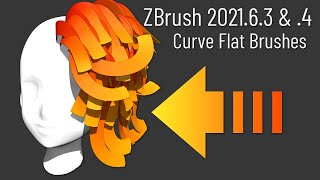
What'S up YouTube, so I just got done recording this awesome fibermesh tutorial that I did not realize that my mic was muted, so I'm going to be kind of narrating this video as you go long. So I'm starting off with this speech, sculpt of mind that I did a while ago - and I thought it'd be a fun little example for this fibermesh tutorial. So the first thing I did is really quickly just blocked out what kind of style I want my hair be with geometry. Of course this is like super poofy and rough bit. I got the idea down that. I wanted the left side of the model to kind of wrap around the back and the right side to just kind of be flowing down. So I'm just going to mask out my area that I want the five-match to be then, once I get that general area I'll refine it by taking away parts of the mask and adding a little bit more back for a female character, doesn't have to be too Precise, because a lot of the volume of the hair covers the roots for male hair, you might want be a little bit more precise. It'S a little bit more refining going on designed to be perfect. So now we are going to jump down to the fibermesh menu and click preview and we get this awesome, looking afro thing going on here and we will refine some of the initial settings under the modifier step. I think the first thing I did here was change. The background, though so it's easier to see, so you just select a color go document and then click back and that changes the background color. So now the five-match is a little bit easier to see and right now, I'm going over fast preview. A fast preview is nice because it runs a lot quicker, but you don't get an exact, accurate representation right here. So it's a good idea to switch in and out and right now, I'm going to change this segments, which is also very important. If you don't have enough segments, you get a lot of jaggedness going on your hair and it just ends up being really hard to control. So I changed that to 8 and I just set the gravity zero because I don't really want the hair to be true. P, because it's a little bit harder to work with, you can use gravity if you're trying to get a very precise form to your hair and you're trying to get a lot of initial settings. But for this I'm not too worried about the initial things because I'll be doing a lot of modification to there. It'S more useful on mail here, because you can get specific forms with the gravity and all these other options. And then you can just duplicate the hair and drag it around differ ml hair. It'S a little bit harder because you have long strains to worry about and you want specific shapes for them. So I just increase the length to 800 or 600 here and I'm going to change a length variation down to next to nothing think I did point 1. 5. Looking back, I probably show just one with zero, but that's okay. There are these things, don't do too much, so I think I'm going to accept this and start working with the hair. This is probably where I'm going over fast preview Barry talks about that, so we'll accept it and I'm going to leave it outside fast preview. For now, and at this point, I'm ready to start masking out areas of the hair and working with the bulk sections to get the form right. So right now everything's kind of hard to see. Still right now I have polyframe on and there's so many segments and strains that you can't really see what's going on. Even if I change the colors of the poly frame, it still is kind of hard to see. So I think what I do here is. I change the color of the hair by just selecting a gray tone and filling the object. So now it's a little bit easier to see. So I'm going to mask out the right side of the hair, and this will be the part that flows over the ear and I'm a square. I want the part to be as well. I want the part to be on the left side of the model. So now I just group the masked area and I'll just remove the back part of the mask and group masked again and that will create three polygroups. I got one the back one on the left on the right right here. I'M going to load another brush that I'll be using a lot so I'll go to brush, and then it takes me a while fine guru, because I even use this a while right there and I'll pick magnet, allow this grooming brushes, don't really work, as you think They would so I'll try it avoid using them as much as possible. The brushes I will be using a lot are move snake hook, pinch and smooth so right here, I'm using the groom, magnet brush to just kind of pull everything together and I turn auto masking to 100 %. So I can work with the polygroups I set up, while still being able to view the rest of the hair and then I'll use the move brush to just the length and I'm changing the Z intensity of smooth down. Because a hundred percent C intensity on smooth affects the string so tons, so I want to make drastic changes right now, so I'm switching it fast for you just so. I have a little bit more of an interactive experience with the hair, because without fast preview it works very slowly. So this is what the outfits preview you actually see. The cards run through instead of just a strand. So now I'll use a move fresh to kind of just pull the hair, where I want it to again, I'm not going to use any chrome brushes because they can be pretty hard to work with another brush that some people use a sperm spike. It'S similar to grow magnet but uh it can produce similar results again, it's kind of hard to work with, though so I just try to avoid it. So now I'm just kind of work out the volume here they have one put the move brush later on at work on details and individual strains. So now I got that basic volume worked out. I'M going to do the same thing for the left side, just pull it all together and then move it out to just a length and right here. I'M also demonstrating that the orientation of your camera has a lot to do with how the girl brushes work. So if you look at it from the front and then use it, it will actually pull the hairs towards you, so you want to be careful what direction you're looking at when you use the brushes, so I just look at from the top, so I can get Pulled straight out from the model and I'm pulling it out and smoothing it, and here I'm talking about preserve length that just affects the move and smooth brush. So the hairs will not shorten up when you use any of those brushes which can be useful in some situations. I think I use it throughout this video once or twice so now. I'M moving on to the back, and I realized that I missed a part of a poly group in the first group. So right now I have a problem where I have a lot of shorter hairs inside of this poly group. That can be a problem. So what I'm going to do is just pull everything out again with a guru magnet brush and you can't really see it too well, but there's a lot of short hairs in this group. So I'm going to use the clip brush to extra try even everything out for me and what the clip brush does with any mesh. Is it just takes all the points from one side of the clip curve and it moves it to the line. So after I do that, I can smooth everything out and try even up the lengths, so I'm not actually worrying about that group right now. I think I'm just messing around with the back, but I'll demonstrate the evening outta hair soon here. So I'm just going to work in the form of the back here with a move brush. I think I use this makeup brush here too, and this is kind of a good opportunity for me a perfect what I want the back to do as well, because I'll have the side kind of in the way there. So now I'm going to take care of this uneven polygroup with a cloak curved brush. The clip curved brush is a little weird too, because it doesn't work right away for some reason you have to cut mess around with it like right. There. You see me just click on stuff and finally, it just works out over. So I just clicked off a large chunk of the hair and, like I said that, just pushes all the points towards the curve. So now I can smooth out the points so they're more. Even along the curve, and now my hair's a lot more, even in terms of length, so after I do that, I can just use a move brush and pull it back out. I turned up the Z intensity of it even out the points a little bit more because if you have a large concentration points at the end of the curve, you're going to have a lot jaggedness towards the middle. So you want the point to be sort of even and the smooth brush does your save for you, ayyyy evens out the spacing and the points. So again, I'm just in the length with the move and I'm smoothing it as I go like I just said. I want those points to be evenly spaced and I'll. Just work out the form once again and again, I'm not using a current brushes, just the snake hook brush in the move brush, just because you kind of know what to expect from those brushes, but the groom, brushes kind of have a mind of their own, especially Since it uses a camera normal, it can produce whack your so little time that this is a general concept. You split your hair into different polygroups. You adjust the lengths even it out and then you can work on details by either making more groups by masking out areas and adjusting those groups or you can use the brushes like groom, spike and girl magnet to pull out different areas in here. But right here I'm just adjusting the form still so now we'll work on this left side here and I'm actually going started off with group magnet just because it's such a large curve. I need to create so I'll pull everything to general area that I want it and then I'll move it back. I'M kind of trying to even out the hair here because there's a lot of shorter pieces so that it helped a little bit by pulling out with the move brush and then it's moving it. So they actually helped me a lot to get start to the curve. For there so now I'll just move it to where I want I'm just moving and smoothing and you'll, probably pinch the hair too, because as you move it, it kind of spreads out for some reason so yeah, I'm pinching it here. So now I'm almost done with the general forms that I want. This is kind of the first step to any fiber mesh hair system that you're working on just blocking it out being the general forms. Then you can refine it from there and I think here I'm using the alt function on the move brush to add volume. So you just hold Altima using move brush to pull the points out along a normal, which is good for adding volumes like around the parts and the roots in case they are going through a model. There'S something like I said, I'm doing the exact thing, adding some volume to the top there. So now I'm kind of adding some extra texture to the hair with the girl magnet brush, and this can produce some good results or some very bad results just be ready to undo if something goes crazy, but I'm just kind of simulating clumps of the hair. As you see, the kromagg new approach actually pulled down a lot of the parts of the hair that didn't want to be pulled down, and I also kind of pulled the points. So I have a lot of jag macness at that area of the hair, and this is where it gets tough to work with, because the move brush isn't really doing much because there aren't many points there for the move brush to actually move so bright in a Pen, smooth that out a little bit, you can see that outside of the hair is moving a lot more than the inside, and if you start off with three segments, you would have a lot more troubles than this. Even it might be a good idea to even go higher if you're having these kind of problems so again, just using the crew magnet brush to add some extra texture to the hair, like I said before, sometimes it's easier to actually just mask out small sections of The hair and just create new poly groups to work with just sort of take a speed, though I'm just avoiding that and just showing you some rudimentary details that can be added with using these brushes. If you want to get something realistic, you really have to spend a lot of time working on the details so right now I'm kind of smoothing and inflating stuff just because a lot of these strains are very concentrated, so it they're looking like a solid form. So I'm using the inflate and smooth brush to just kind of spread them out a little bit and you can always adjust the previous settings. You can see on the right there on the fibermesh drop-down and that will adjust the density of the hair. So you can always turn the density down if you have too many fibers, so I'm getting something that looks a little bit more like natural hair again. This is just very quick, though you'll have to spend a lot of time. If you want something really good and then you get some crazy stuff going out of five wrench, sometimes that you can't explain right now, I'm using the move brush, I think, and some of the strains are just like exploding. That'S just something you got to deal with a fiber mesh, it's kind of finicky. I thought I had masks on or something, but it's just how fibermesh works. So, just as a final example for this video, I will add another strand of hair just for a little bit extra detail. This is a another way you can go about. Any details is just adding more fiber mesh systems, so I'm just going mask a lot area here, and this is an alternative to creating a new polygroup on our initial system. If you're, not careful, though you can make it look weird because the densities are kind of different, so you got to be careful, so I'm going to change the color. So it's easier to see and then just like the first system, I'll pull it out and then just a link with move and right. Here I preserve length um so I'll change that back to zero. There we go and I'll actually use a grue magnet brush to get this train started from there else. They cook it down and, as you see, even the normal move. Brushes can have some weird effects, but as long as you keep smoothing as you go, you can always pinch it when you're done or use the curved magnet brush to all bring it back together. So again, I'm being weird stuff going out at the boot brush, but I'll just smooth it pinch it move it do whatever you got to do to make the clump look right. So that is pretty much it for this introduction to fiber mesh. If you guys would like, I could create a separate tutorial for male here, just because the approach that you take, the male here's a little bit different. You spend a little bit more time and the preview settings or modifiers drop down just to get correct forms and a lot of times. You can just take those forms and duplicate them. So let me know what you think of the video and thanks for watching you


Comments
James Ryan: Great tutorial. You did a very good job explaining everything
Brendan Larsen: great video, thanks. i really appreciate seeing the problems encountered and worked through in real time.
Warren Sanchez: Very helpful. Thanks for this tutorial. :)
Cool Out Sessions: Awesome work. Thank you.
Ashwin C: Please do make that tutorial on male hair. Thank you very much this helped me a lot
Peachling: How do you get the options at the top right "fill objects, auto groups, etc" Great video, Thanks!
Radeonoff: u can also use simple move brush for grooming. just go to brush-fubermesh and set preserve lenght to 100
Lizzy Koopa: wish you would of linked the groom brush you are using in the description, but beyond that awesome tutorial
Mike D: You've done a great job with what Pixologic has given you to work with, but that's really all you can do. Not only does Fibermesh look like crap, it also looks like a pain in the ass to manage.
djovic: Hello, good tuto, I lerned very much. I have a question. How we can create and export the texture please? Thanks for answer
Caleb Lewis: lol clip curve works when you hold ctrl, then shift. it's not some finicky tool. works perfectl. Great tutorial. Learned all kinds. *mind you, it has to be selected first. otherwise you'll just use the select tool. Thats probably whats messing you up
syntaxed2: They claim fibermesh workflow is artistic yet the brush strokes must be very linearly done, with little artistic freedom. Hell, theres more artistic freedom even with C4D hair lol
y y: Is it normal that i don't have the GroomMagnet brush??? I have the 4r7 version...
Paulo Vinicius: This simply will never work without mask one side of normal. I'm trying and trying to keep it on the right side of normal (i mean mask before fibermesh workflow
김영재: Thank you.~
OscarPapa: thank you
JSG1138: "Just group masked area and done " God i hate tutorials