How To Make A Topper/Toupee With 1 Bundle And A Closure #Cranialprosthesis #Wigmaking #Toupeehair
- Posted on 08 February, 2023
- Pixie
- By Anonymous
How to make a topper. In this video we will install a circle lace closure and a bundle of wefted hair onto a topper/toupee base #cranialprosthesis #toupeehair
Learn how to make wigs, lace units, cranial prosthetics, toppers, toupees, and more!
GET LIFETIME ACCESS
Courses starting at $24.99
Bit.ly/wigmaking101
=========================================================
☎️CONTACT:
For Business + Reviews + Sponsorships +Inquiries
=========================================================
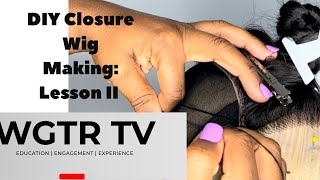
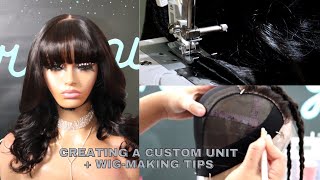
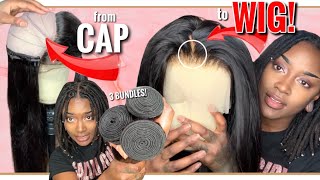
All right, so this is kind of like a mock piece of a Topper Topper base and I'm using a large grid, because I just wanted to use this as for a sample to teach you how to apply a weft or two and a closure onto your uh. Topper, to create a fringe um cover to create some kind of volume and for someone who has thinning hairline in the top of their head. So this is actually a design we're going to create that you'd normally see within African-American short hairstyles pixie cut styles with long bangs. It'S also in Caucasian uh markets as well. They wear you know hairstyles, where they do the pixie cuts as well. So um I'm going to show you how you can attach a bundle or two if you want to put more fullness and one of these closures now you can also double this as a 4x4 closure. I have videos on how you can apply a four by four closure by cutting it and leaving it open and put it in the top, so it can close it out. This is one that's already made that I got from a beauty supply store and it's actually like if you can see it's supposed to mimic skin in there. So it's a fabric and it's been heat set into it. So I'm not exactly sure if you guys can see it so when I try to pull some hair away, you can kind of see like you can see that is supposed to mimic skin, so see that's supposed to mimic skin. So it feels like a little plasticky piece and, as you can see, the hair is actually glued in on the inside. It'S like a press, there's a machine that they use where they press this in. So if you think that anyone that mass produced wigs um, especially Asian, I'm just gon na throw it out there because I'm honest about it - they don't know how to ventilate. They only know how to press into create, there's a machine that they press the hair into, and it makes it look like this so just to make sure you guys know that so we're going to apply this to the top first, we're not going to sew it On yet we're just going to Mark where it's going to go so this is the front. This is the back, so it's kind of hold back here, so you want to find your Center and you're going to pin it right there and if you need something to get the hair out of the way so that you can make your markings, please do so. If you find that it lifts the entire thing up, where you have to work too hard just find some spots to pin The Edge is down, see how it went. I try to lift it up to move the hair out of the way it lifts up too. So you're just finding some places to pin it down, and then we just want to kind of get this hair out of the way and if anything is not laying down just make sure it's flat down there. So that's my closure piece. That'S flat down! I'M going to take a marking tool, preferably you want to use a chalk marker or a chalk, a Taylor's chalk, or something because it cleans off easy. The reason why I am using a permanent marker is it's easier for you guys to see when I'm instructing and teaching so I'm making my marking around the circle around the closure. So I know where it's actually supposed to be set and then I can unpin it. So I don't know if you guys can see that, but that's my marking, I know I'm drawing on my mannequin head, but that's okay, I'm fine with that and then your next thing is to create this circle pattern around. So we already know you're going to go around the actual Inside Edge of the bias tape. So when I mean Inside Edge of the bias tape you're going to start in this area, not actually on the tape, because you want to be able to apply your um your wig clips on, but we're going to try and draw this in a circle. So we're just going to start from the center from wherever point we're at and then we're going to just do separate circles that eventually, I'm going to show you how you can just lead right into the next one. So you're not doing this all the way around you're just doing separate circles all the way down so you're connecting your circles all the way down until you run out of room and that's where you're going to place your wefts and once you get to a certain Point you're going to feed them into each other, so might be hard to see but you're going to make your circle for your closure. Whatever your closure, that's your opening and then you're just going to make separate circles down until you get to your Edge and then, when you start to sew, you're actually going to start sewing right at the edge all right. So now you can see when I lay it down, you can actually see you know the circles. You can make them a lot closer if you need to but uh it's just a nice starting base, and this marking right here symbols the front. I also did that with the bat with the underside too, so that I would remember, and the best place to start it's in the back and at one of the um dark pieces. So we want to start at one of the back darts and we are going to make sure this is out of the way and remember we're going to start our first track, just above the um, the bias tape not on the bias tape. So I'm going to place it just above so you'll see when I do attach it'll still be a part of that exposed. So we can put the uh with Clips on I'm gon na feed this through the machine and then I'm going to begin sewing all right. So once you get to a certain point, just about two inch distance before the starting point, you're going to go you're going to sew towards it, leave like about an inch opening and then you're just going to go right up into the next line. Provided that you could see it and follow the line that you've drawn foreign, so you're going to get to a point where you know you have to keep going in this circle. So it's better to just go into the next line. When you get to a certain point, trust me, you will know when to do that, but you're trying to keep this circle motion going until you close out and leave it open for your uh closure. Your top closure piece all right. So now we're getting to a point where the closure piece is getting close to matching up, so I'm going to keep going and then I'm going to show you how I finish it off cool. So at a particular point, if you can see here, I'm just going to lead it off into an edge right on into it in back stitch a few times, and when I pull it from under the machine, it's can be cut off from right there, and I Can pull this right on up foreign so now my closure should be able to fit right into that, and then I could Stitch another on top or not it's totally up to you. But what I'm going to do is I'm actually going to put this into the sewing machine, so I'm going to slide it right on through and from that point, that's where you're going to start at so I'm gon na put this right on into the sewing machine And I'm going to put my needle through, you see, there's a raw Edge, that's what we're sewing down, put it down and then I'm going to stitch, reverse and Stitch down now. Can you do this with a lace closure? Yes, you can. You just have to make sure you're sewing on the excess and not on the hair, where it'll cause a bump, and it won't lay see you want to make sure that it's laying your needle is on that and not on the hair on top of the hair. So just take your time in this all right, foreign, all right so make sure you can get any excess threads out of the way, and this should lay nice and flat and cover right over now, some people might feel they need to put a a track. On top of that, if you want to you, can I actually do have enough hair to demonstrate that so I'm going to re uh bundle this closure and then I'm going to sew a track right on top and so I'll track right on top of it. So I'm going to push it right through the sewing machine and then I'm going to take my track and I'm going to sew right on top of it to cover. Thank you so needle down, oh missed, it make sure it's down through all layers that you intend to sew, and there you are. You can see the bottom and you're able to like look for any excess threads or anything like that. Um you're also allowed to add fabric under here to make it look a little bit more natural, it's totally up to you, but that last bit allows you to lay the closure down without seeing that skin part and there you are trying to make sure. I didn't sew over the hair because when you do that, you have bumps that happen or it doesn't lay completely flat. So this is what I mean when you lay over it and then, when you try to lay it down, it doesn't lay completely flat. So you got to work a little bit harder to flatten it out, but um it's as simple as just watering setting it to get it to lay. But this is a Topper piece goes right on top of the person's head, so we're gon na style it and go from there.


Comments
Sheandra Lowery: Do you have the link for the topper base?
TiffanyToniMUA: Where did you get that net base?