Balyage Ombre Using Ponytails
- Posted on 14 November, 2021
- Ponytail Hairstyles
- By Anonymous
Balyage Ombre Using Ponytails
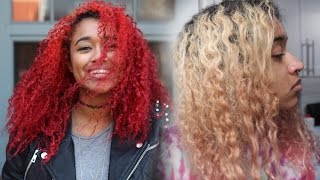
I have been wanting to bleach my hair to dye it pink for a while, but I didn't want to bleach the whole lot so I found a video which looked pretty easy to follow, which was putting your hair in ponytail sections and bleaching those. The method I tried to follow was by The Life of Hair:
https://www.youtube.com/watch?v=ecTyiD...
The end goal was to put a pink dye over it, so I wasn't too concerned how yellow it went as I just wanted to lighten it.
Music by Atch
SoundCloud: https://bit.ly/AtchSoundCloud
Spotify: https://bit.ly/AtchSpotify
Instagram: www.instagram.com/atchmusic
twitter: sliminside1
instagram: sliminside
email: [email protected]
#balyageombre #browntoblonde #bleachathome
Kind of see what i'm doing that's the plan - oh, should i have to have someone should not, and i mean yes, i could go to the hairdresser's but where's the fun in that it's not a good thing to get on your eyes. That'S this one done, i'm exhausted. How can i make so much mess? Well, this is looking good hello and welcome back to my channel long time. No see i'm so sorry, i'm for a video up for ages, but i have a lot going on, but anyway, i'm here today and as you can see, i've got me scruffy t-shirt on, and that means one thing and we're eventually gon na tackle these grades. So i've been thinking two ways about doing this. I was gon na use because i've got loads of those schwarzkopf and dyes left. So i was gon na use the permanent dyes, but with just a normal 10 volume developer. Oh i'm gon na bleach it and i've got some semi-permanent um creations. I think it is with a permanent on top. So what you probably can't really see very well is the gray. The green is pretty bad, but i'll put some of that i'll put the green. The green is that bad i've been using this to cover it up. It'S really good, actually it's just from b m, but it does the job, and i mean i've been using that for ages who really need to tackle this. I'Ve been wanting to do a balayage for a while, and i've come across a technique, which seems it seems quite easy. But you know me, i mean nothing's ever simple with me, but we'll give it a go, but what it involves is sectioning your hair and then putting them into tight ponytails like high into your hair, and then you, i don't know if i'm going to bleach this Whole lot, i might sort of put a ponytail here and then put another ponytail there and then just bleach this section, because you can probably see so this this section here is all me natural color and it's quite a very dark brown. This section here is where i've like bleached it and had permanent colors like box eye colours on it. So i'm just going to show you the back to let you see a comparison, so we might be able to do a before and after this is the back. So i did leave it quite it's quite greasy at the minute, because i wanted to leave it greasy to because it's better if it has got oil in it or something rather than like wash it the night before. So this is where we're at i'm gon na. Try and probably bleach the ends of it, we'll see how that turns out and then i'll be going over with i've got some bright pink. That might be another video. I'Ve got some bright pink and then i've got some permanent pink for the top, which i'm not expecting to go that pink, because this is on a dark brown. So it's not going to lift or anything but anyway i'll be back in a minute. So, like i said, the tutorial that i found is by the life of hair and it's a balayage ombre. I will leave the description i will. I will leave the link in the description box. If you wanted to have a look, so basically the first thing he does, is he sections the hair into full? And here, even though i've got the same part, i'm going to do a middle part for this? I don't think this has to be too neat got my hair's that greasy i could fry an egg on it, and then you section it here as well, so this will be the first one and then at the back, so we're just going to take it straight Down and split it into two at the back, these bunches that we've got here will get split again got one here to there same on the other side and then two at the back. All right. We'Re just going to tie these up out of the way right. So the back one is to take a quadrant, so i'm going to take a quadrant here, this section it needs to stick out. So we've got that bit and that's sticking out there then we're going to get another section we'll do the same. This is going to be sticking out again, so we've got this bit sticking out as well and then for the last bit, don't find it rusted if your arms are able already i've only done two sections right, the last section i'm going to do the same. So tight to the head, i've got three one: two three three bunches, i'm gon na do that with the other side and then i'll come back for the top. I swapped those little black things for like a proper bubble, so what he does is take it from the occipital bone, which i don't know is where, but it kind of goes across right there. So we're going to make this a section and then you have to take it right up into the ovary from the hair head and make a ponytail like that. Definitely gives your muscles a workout. The arms are eager and that's how it should look like two on the sides and then three in each section of the box. You'Ve got five sections on each right. What i'm going to do is i'm going to do half in 30 ball in half and 20 evolved because i'm putting a color on, and i want the color to have some some kind of depths and shades. That'S what i'm going to do so i'm going to do half half of each point till. Actually, i might do a third, so i'm going to third each ponytail, so i'm going to do one third, with 20 ball! No i'm going to do one third with nothing, because it's already kind of nothing, it's already kind of got some lightner on, but just like only halfway down and then half 20 volt half 30 ball. That'S the plan right! I think i'm just going to use your fingers because i just find it easier. I mean i'll i'll use the brush a little bit just to yeah just run up the stairs. That'S why i'm breathing it's easier said than done to try and sort of like not make it a line. I just might just comb it just at the top here i don't know it's not gon na go horribly wrong. I'M just really concentrating on the top section. As well, because i'm not that bothered about it going all the way through and then we've got some tinfoil. I do salute you hairdressers, because this just make this look really easy and i mean yes, i could go to the hairdresser's, oh where's, the phone. In that you know, i suppose the hairdresser wouldn't go on your nose or your eyes with the good thing together on your eyes, ouch and your face. How do i manage it? It'S just like a skill. I have right. I think i love he's put too big of a clump in there. So do this with the 20 ball. This is just it just feels like it's going horribly wrong already, like i feel, like i'm gon na end it for like a band. Oh well! Oh well! Hmm, that's this one done, i'm exhausted all right! I think i'll just do this in two. I was meant to take the take the bathmat out as well. I'M hoping that i do end up with a band in my hair and not being too bad, because i put it in a middle part and i have a safe pattern. It'S harder on your hair's long, it's hard tucking that thing in at the bottom and then your hair, your other hair, gets wrapped around it. You know when you watch people doing stuff with the hair, they always make them. Look that easy, don't they're, always dead, easy and they're wrapping everything down neatly, and is it just fake because we obviously have not a hairdresser, but how can i make so much mess? How can i make it look so messy this isn't what he did on his video. He just like just went the whole lot, but i mean he's trained professional, so you know, of course he would and i'm sure the last time i did this. My hair didn't even change color, so i'm making sure i lava. No, i'm making sure i slather it on well. This is looking good i'll. Do the back and i'll come back? Well, i'm back. I have to tell you that was bloody, exhausting. So i literally just blasted it on and we'll hope for the best. Oh, better set a timer all right, 25 minutes starting now, but we probably started about like 20 minutes ago, because it's taking that long to put these in so i'll just show you the finished product. When i put all these lovely neat um things in so this is what it looks like from the front, and this is what it looks like from the back. It'S so hard getting it. This neat, i didn't know whether i should just do those bits you know, but then so this is this is this is what it is so see you in 25 minutes and we're back right well looks like a giant yeah. Doesn'T it so we'll see how this turns out? I'Ve, no idea whether we'll be able to tell if it's different when i've done the 20 to the 30, but we'll see been on 25 minutes. I think i mean the idea is not to make this blonde. I want a diet pink, so the whole idea is to just get a bit of variation of color. I mean there's a one. One is a 20 one. Is the 30. and they're both the same really one one of these was 21, and i think this must be the 30 this one, maybe the 20., and i didn't want to sort of do it all the way through you can see it's like different colors, which Is what i wanted? This is what i didn't want, the band there right, so that's them all out now take all these bubbles out, i'm gon na wash it we'll come back, see what i say right, i'm back and you can see how blonde it went. So i put it aside part now and i have i have noticed like a abandon there's like abandoned across here, but i'm hoping that once i put the color on it's not too bad, it looks alright. To be honest, i think it looks worse than the camera, but you can see like the colors. I wish that in all those bits i left over the front, i think i should have just i should have just colored them, but it feels really feels really dry on the ends. It'S desperate for, like some moisture sweet, this side and i'll show you the back. I haven't straightened it because i'm going to put the color straight on i'm pleased with the obviously i don't think i'd be very pleased with the color. If i was going to um leave it like this but uh. This is literally just bleach, so i haven't toned it or anything. So now i'm going to torn it. So i'll just show you underneath. So i didn't touch this top bit at all. So we've still got the gray you can see. We'Ve still got the gray and the dark brown all right, so phase two, i'm going to make another video. So if you want to see the color and i'm going to see what i'm i'm going for pink, so i got this ages ago. It'S the directions! Color! I said to loop thick as a color, and this is what he picked, so it's literally like luminous pink. So this is a semi-permanent, so i'm going to put the semi-permanent stuff on the bits that i've bleached and then, as the top part, i've got the rose. 5Ml, the guy tan i've got the guide. Tang midnight rose 5ml. So that's so that's going to be going on my roots and just like pull it a bit down. It'Ll not go to plan, but then anyway, that's another story. So i hope you enjoyed this video of me, bleaching, my hair and, like i said it was never going to be to leave this color. It was always going to be to go pink, but i'm quite happy for a base for pink. So if you want to see the pink going on i'll see you in the next video, if you want to see another clothing, haul i'll see you in that video bye. For now, you


Comments
Melissa Wisniewski: Great to see you back. Look forward to more videos from you dear love your long hair! Love from Australia ❤❤
Rhonda Maloney: So nice to see you again! Your hair has gotten so long, mine takes ages to grow ☹️
Natasha: Love you and your videos! You always do such an amazing job and I loooove how it’s like chatting to a bestie over video ⭐️
sharon oneill: Hi Karen great to see you back looking fab x
Gail J Lyons: You are hilarious and yes, you have mad, crazy skills!
Sha Na: How does your handle all this?? Seriously..wanna know!