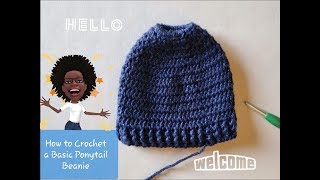
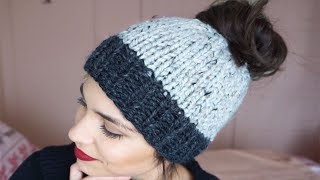
Christmas Gift Ideas Episode 4 Messy Bun/Ponytail Beanie Child & Adult Size
- Posted on 15 November, 2020
- Ponytail Hairstyles
- By Anonymous
Hi guys! This is Kari!
Just wanted to thank you for watching. Don't forget to check out the links below and leave me a comment if there is something you'd like to see on my channel.
If you make this please tag your photo on IG, I'd love to see your work!! My IG link is below. Happy Hooking!!
Take care! Be safe!
Follow me on IG
https://www.instagram.com/crochetmekno...
Visit my eBay store for crocheted items for sale. Custom orders are always available!
https://ebay.com/usr/crochetmeknots
Hi guys welcome back to my channel. This is carrie with crochet me knots on today's tutorial. We are on episode 4 of my christmas gift ideas and what we're making today is this messy bun beanie and we are using the um, the cluster v-stitch, to make this. So i've gone ahead and already made one in a two-tone, so i did a two color, but for the tutorial i'm going to use just one and i'll just let you know when you would need to be switching colors that way, if you're making it in a Two color you'll know when to switch, but i just wanted to show you what it looks like in the two color: it's really pretty. So it is a messy bun and we are going to work this from the top to the bottom. And then we are going to finish off in this really pretty elastic brim, so um. What we need today is just for the tutorial. I'M going to show you uh how to start it and then, of course, how to finish it off um. So i'm going to use what's left of this taupe color and we do need two different size hooks so for the body of the beanie, we're gon na use the five millimeter hook and for the brim. I always like to go a size smaller to make it a little bit to get that elastic and that way it doesn't um. If we use this, sometimes it can start to uh ruffle out, so there might be like a little ruffling. So that's why i drop a size to make the brim so for that we are going to need a four millimeter hook. Uh. We need a yarn needle a pair of scissors and i am using and i used medium weight, worsted weight yarn for this hat um. So if you're using a different weight, uh the cluster v stitch is crocheted in multiples of two, so uh i'll give you the foundation chain count for both uh sizes, for a little girl and for adult sizes, alright guys. So let's get everything together and let's get started all right guys so, like i said, if you um, if you're gon na make this for a little girl or a little boy, i know it's a messy bun beanie, but maybe there's little boys with long hair. So if you're making it for a child, then you're going to crochet a foundation chain of 24. if you're making an adult size, which is what i'm making for the tutorial, it is going to be a chain of 36., so um i've gone ahead and crocheted. My 36, so whether you're making it for an adult or a child, the increase is going to be the same you're just going to have a different count. Different number of cluster v stitches, but that is the only difference so also, if you're, using a lighter weight. Yarn then, like i said, remember it's multiples of two. So just go ahead and um. The only difference is the opening at the top of the hat. You want it to be smaller for a little girl because their heads are small. So you don't want this opening to be too large or it's exposing like half of the top of their head. So that's why i make the foundation chain smaller, so just kind of eyeball it if you're using a different weight yarn. But that's why there's a difference in count all right, so i've chained my 36, so we are going to join to the first chain, so just make sure you don't twist it and then just slip stitch into that first chain and join it okay. So i'm going to be hiding my tail as i go, so i'm gon na chain one and we're gon na single crochet right back into that same stitch. So i'm gon na start to hide my tail behind there and we're going to single crochet all the way around. So just single crochet in every stitch, and if you want to hide your tail, it's just the best way. I think that way you don't have to weave it in at the end, with a needle just go ahead and single crochet to like behind it. So there you go so we're going to single crochet all the way around so for this round round one, if you crochet 24 you're going to have 24 single crochets and if you're doing the adult size, we will have 36 and i'll meet you back here at The end of the first round, all right guys, i'm at the end of the first round, and i am going to just slip stitch onto the top of the first single crochet, and that is round one. So you should have 36 single crochets or 24, depending on the size that you are making okay. So if you're using two colors you're not going to switch colors yet so just go ahead and chain two and we're gon na begin our each chain. Two of each round is not gon na count as a stitch. That'S just to get us up to the height for our stitch, so we are going to start our be uh. Our cluster or b uh stitch, the cluster v-stitch. So how you make that is, you are going to yarn over and we're going to go right back into the same stitch and we're going to pull up a loop yarn over again and pull through two loops. Now we're going to yarn over go back into the same stitch, pull up a loop yarn over and pull through two now we have three loops on our hook, we're going to yarn over and pull through all three and chain one and that's our first cluster and Then we are going to yarn over again go back into the same stitch, pull up a loop and repeat that cluster again and pull through three and that creates our little cluster v stitch right there! Okay, so we don't chain one between each of our v stitches. The only chain one will be in between each of the clusters within the v stitch. So next we're going to skip the next stitch and then we're going to start another cluster v-stitch. So we insert and pull up a loop yarn over and pull through two yarn over again go back into the stitch, pull up a loop yarn over and pull through two. Now we have three loops. We yarn over and pull through all three. Now we do chain one - and we finish our last cluster, so yarn over pull up a loop, pull through two pull through two and pull through all three, and that is our cluster v-stitch. So skip the next stitch and repeat that, okay, so those are that's how you make the cluster v-stitch, so we are going to continue that all the way down, remember, skip in between and never chain in, between, your b stitches. The only chain in between each of the clusters for your b so skip the next one and then work another cluster v stitch and then skip the next one and continue all the way around. So if you started with a if you have 24 single crochets at the end of this, which is round two, you will have 12 of these cluster v stitches. If you did your 36, then we will have 18. so go ahead and continue all the way around and i'll meet you for the end of round two, all right, guys, i'm coming to the end of the second round, and i am skipping and working my last Cluster v-stitch and we should have one stitch left over and we are just going to go ahead and slip stitch at the top of that first cluster, there. Okay! So now you should have um if you did 24. If you started for a little girl, then you will have 12 of these cluster v stitches and if you're doing the adult size, you will have 18, so just go ahead and count them oops white day. Oh i'm starting on the wrong head. Okay! So there you go and 18. all right. You guys, oh we're on the right track, that kind of weight. I thought gosh. Why is that? Did i not do all right so we're good okay, so our next round is going to be our only increase round. So, whether you're, making it for a child or an adult you're going to follow the same increase, i just thought it'd be easier than having to start. Everybody start the same and then have to work different increase rows for different sizes. So that's why i started off with a smaller um foundation chain. It just makes it easier to follow for everyone. Okay, so now, if you do want to switch colors, you can do that and i'll show you just really quick how to do that. I'M just going to grab this blue. I know it doesn't match, but i'm just going to show you how you would switch colors in between. So don't cut your yarn. Don'T cut your yarn because you're going to be coming back to that same starting point and that is going to be on the inside and you're not going to see it. And let me show you, as you can see, we didn't cut and it's easier because you would have uh tails in each row and you don't want that. So don't cut your yarn you're not going to see it on the inside. So the trick is just to make sure you don't get tangled into it. Okay, so hold on to your um starting color, don't cut it and what we're gon na do is just go ahead and grab your second color, and then we are going to slip stitch into the center of our v. Our first v stitch so just go ahead and stick your hook in there and just grab your second color and slip stitch with it and chain two and we're going to work. Our rv stitch our cluster restitch in there and then we're going to go right into the middle of that other, the following v stitch and we're just going to work it and that's what that looks like so we switched. Actually, this doesn't look too bad. I actually like the blue with this taupey color. So that's what that looks like if you switch colors okay, so i'm gon na pull this apart. Real quick, just thought: i'd show you what to do if you're, switching colors and if you want to make more than two colors. Well, that's your choice and i'm sure it'll be beautiful. If you want to make a red white and green for christmas, that'd be pretty so you'd be doing the same thing just grabbing whatever color you need. So for this tutorial i am just making a solid color, so i am going to slip stitch into that v and chain two and work my cluster v-stitch, so we're always going to put them into the center of the previous v stitch, except when we work an Increase but i'll show you when we get to it, but that is where we make our and then just skip right over to the v center. Okay, so now we're going to work our increase. So the repeat for this row is going to be three cluster v stitches and then we're gon na work, our increase where we're gon na work. Our increase now is in between the two v stitches. So we have a cluster v here and we have the cluster right here, the v stitch so in between the two: that's, where we're gon na work, our increase, so we're gon na put one cluster b stitch in that space. So we have three regular cluster v stitches and then we work an increase in between the two. So right now we go right back to the middle right in the center of that v: stitch that cluster we're going to work our cluster b and then work. Two more in the two more cluster v stitches into the center of each v. So, okay, so we have one two three and now we're gon na work, an increase in between those two cluster v stitches, and that is your repeat for this row and that is going to be the only increase row for the remainder of the beanie. So now we go back to the center and work three regular cluster v stitches and then work the increase in between okay. So there we go so now you work two more so we just did that increase there work two more oops almost did a double there. So one two work another one in the center and then work an increase in between the two v stitches. So that is the repeat for row number three. So when you're done with row number three, you will have 18 v stitch cluster v stitches. If you're working the child size - and you will have 24 cluster v stitches, if you're working the adult size so go ahead and continue this row, which is this round number three and i'll, see you back here at the end of row, number three all right guys! I'M coming to the end, you might see a slight ruffling, but that's fine, because we're increasing, so i have two. So this is my third and we are going to end with that increase in between those two and again, we are going to slip stitch right on to the top all right, so that is our third round and again, if you are making it for a child. You'Ll have 18 of these cluster v stitches and if you're making the adult size, you will have 24. So there's not going to be any more increases. So if you are switching color again, don't cut this one, so just go ahead and grab the color that you need, which is the previous row, if you're using two and just grab it and then just slip stitch with it and start chain two and then we're Gon na work, all our v stitches or clusters now into the middle of each of our cluster b's. So that's what we need: there's! No more increase, so you're going to keep going just working your cluster v stitches. Now there is a total of 10 rows, so the first row was the single crochet. So this is row number three and we're starting on row. Uh round number four. So there's a total of ten! So then go ahead and start four and then go ahead and continue until you have your ten rows uh for a child size. I think you could do uh, eight or nine, depending on how uh long you want the beanie, because then we do have to make the brim so just go ahead and keep going until you have uh the 10 for adult and if you're, making eight or nine For the child, size and uh i'll be back to show you how to start the uh, the brim part so go ahead and continue and i'll be back to show you how to how to finish off with the brim of the beanie, all right guys. So for the purpose of the tutorial, i'm just going to give you a little swatch of what it is and then i'll be back to show you what how to finish it off. But i just wanted to show you how to start the brim. So you should be at the end of uh, whether it's your 10th round or, if you're, making it for child 8th or 9th, depending on how long you wanted that. So for the brim, we are going to switch now to our four millimeter hook. Now, i'm going to show you how to make the elastic brim like this, and this is uh. You know really good if you're working hats from the top top to bottom hats, because usually you can start this elastic with just a single crochet band, how to crochet this and, if you're working from the bottom to the top. But this is a really good way to make the brim the same way in that elastic um. Look that elastic brim fashion, if you're making a top to bottom hat. So this is the best way. I know how to do this, so okay, you're at your last round and you've just joined with a slip stitch so now, depending on how wide you want the band. So normally i do about seven. So i'm going to chain seven and that's about how white the little brim is going to be. So if you want to make it a little wider, you can now keep in mind for the messy bun beanies. You do want to have that a little more fitted to the head, because you do have your bun or your ponytail popping out of the top. So it's not like a slouchy beanie, where you can have that slouch in the top. So that's why i like to make it just with seven seven chains, which is a good uh width for the brim? Okay, so once we have our seven now another option, if you find this to be too complicated for you or too much work, you could always just uh single crochet. Do several rows of single crochet to make the brim that's another option so right now you could just chain one and then single crochet into the same stitch and all the stitches all around and then just continue to single crochet. Until you have, you know, maybe five or six rows of it and you have your brim. So that's another option you might find. This is not worth the time. I just really like the way that elastic brim looks all right. So once we have our seven, we are going to single crochet into the second chain from the hook and we're going to single crochet into all of the chains. Okay, so there you have your and one more. Let'S not forget that little guy, all right, so there we go and now we are going to slip stitch. This is the where we slip stitch so that stitch right here is already taken, so we're going to go into the next one that little chain one and we're going to slip stitch into there and into the next one, and then we're going to kind of. Like turn our work, and now we are going to single crochet into that first single crochet and for the rest, we are only going to work in the front loop. So we're just going to take the front loop and single crochet front loop. Only single crochet in the front loops only and when we get to the top here on that last single we're going to just work on both loops and single crochet and chain, one we're going to turn our work and we are going to single crochet into that. First, single and then we're just going to use the back loop, so single crochet into the back loops. Only and that's going to create all the little ridges to make it look like the elastic. So we're always working on the inside loops. On the inside of the hat, so you're just going to be alternating between front and back loop, but always working on the loop. That'S on the inside of the hat, okay! So once again we're down to the base so that stitch right there is taken. So we're gon na go slip stitch into the next one and into the next one and turn your work and then single crochet in the first stitch in the first and then just using the front loop. Only because it's the inside of the hat so we're just working on the inside loop, only which is the front and then on that last one we get both loops and chain one and turn. So that's the repeat, and again we single crochet in the first and then just using the back loops single crochet, all the way down and slip stitch and slip, stitch and turn. So that is the repeat: we'll start with a single crochet and front loop, only okay! So always remember to make sure you go through both at the end when you're working from the inside out. So when you're working from the uh top to the bottom of the of the brim make sure you do go through both because we don't want to have any big holes at the on the edge of that brim so chain one and turn single crochet into both Loops and just work in the back loops so go ahead and continue this all the way around and then i'll be back to complete the beanie and to show you how to join the two ends of our brim. So go ahead and continue. Now we slip stitch here in the next one and turn and go all the way up so go ahead and continue that all the way around and i'll be back to show you how to finish off the brim and how to finish off the beanie. Okay guys. So here we go. I am at the end of the brim, so just finishing up my last single crochet in a back loop row and you might end up on the one coming back it just it just depends on the size that you made, but so then we just slip stitch Here and the next one, okay, so now to join them. We are just going to instead of cutting and using our yarn needle we're just gon na slip stitch. So we're gon na chain one and we are just going to go into our stitches and then try to get all four loops and just slip stitch all the way up. So there we go just line up your stitches and slip stitch all the way up and that'll create a little ridge, so it'll match the the brim just like that, so i'm gon na chain one to fasten off and cut our yarn and there it is. So you can't tell which one, because it looks just like the brim. Okay, so now you can take your yarn needle and go ahead and weave in your end on the inside, but that is basically it, and that is what this looks like. I think it looks really pretty in a solid color, but if you did do your two or however many colors you wanted, then that looks really cute as well all right guys. Well, i really hope you enjoyed this tutorial on this messy bun v-cluster v-stitch cluster beanie. So please give me a thumbs up if you liked it and don't forget to subscribe on your way out, and i think i might be posting uh the matching fingerless gloves for this uh for the christmas. So i might be posting that up in a couple of weeks, if you're interested in that so just check back um, not quite sure yet, but i think that's in the works so don't hold me to it. But um. They had been asking me for different styles of messy bun beanies, and i thought the the uh the cluster v-stitch was really pretty for it. So all right guys well again, don't forget to subscribe, make sure notifications are on and check the links down below. If you did make this beanie, i would love to see some pictures of your work. You can uh hit me up on instagram and just uh dm me. Some photos of your work and i'll try to showcase it on my next video. So please guys stay safe and i'll, see you on the next one, bye, guys

Comments
Christina Torrez: Beautiful messy bun beanie!! Love it
tazza1000: Ended up perfect. Thanks for a quick fun project for me to do last night. I've already had requests to make more!!! I loved how you did the brim at the end - I'll be using this technique in the future!!!
Wonder Granny: Nice pattern.
Jennifer S: My beanie keeps increasing in size as I go after row three. What am I doing wrong. It ends up way too wide
Melissa Hardy: Thanks for this. If you could let us slow it down that would be great though.
55brenda2008: Please recheck round 3 in children’s size. How can you end up with 18 vstitch clusters when you have 12 vstitches in round 2 and increase every third stitch in round 3. My math says you will have a total of 16 vstitch clusters in round 3.
Tiffany Yang: made this but the brim keeps curling upwards and beanie was too big even though i didn’t increase after 3rd row…???