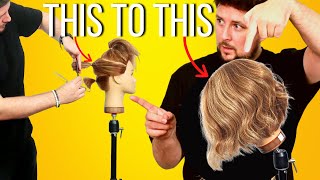
Ben Brown Hair Graduated Bob Tutorial
- Posted on 27 June, 2020
- Trending
- By Anonymous
Thank you for watching our video, if you like our tutorials please LIKE and SUBSCRIBE to keep up to date with all our content!!!!
Where to find us
instagram @benbrownahir
twitter @benbrownleftie
Facebook Bbeducation uk
online education www.bbeducationuk.co.uk/online-educati...
website www.bbeducationuk.co.uk
Hi everybody and welcome to this tutorial, I'm going to be taking you through a triangular graduation today. This is really a preview of our full-length tutorial on BB education online, so they're caught to the second knuckle, as which Laplace the second knuckle. Our tension changes within our fingers, so here you can see our vertical triangular shape, giving us our guide for whether weight will sit and how much weight will be positioned. You must only start from the sensor start from the center simply assures by using the same guide for each section. Despite the fact, each section is slightly different were still taken from the same central pivoting section as our guide, with the leg that you choose at the hairline, be sure to leave enough of the hat and still bend otherwise, we'll have difficulties. The hair may push out. Just keep going ahead and pulling those sections straight back to the wall behind you so you're. Creating your shapes outside is a nice flat square line and the main reasons we pivot our sections is simply to transition the direction the weight is traveling in initially the way it was traveling vertically and we're sitting at the top as we pivot, the weight begins to Travel in the direction of our diagonal in this instance is traveling forward you once it's finished, we'll need to cross-check another cross check. We'Re going to take this cross section we're going to pull the section back to where we were crossing you once we've got our balance or go ahead and start the next side pivoting from the center similar so like how a clock face would be working from the Center but ticking and ticking in ticking and pivoting like orange segments, you you, we need to also check our balance. I take two shots of hair on the same position on the opposite side at the head and I pull them slowly with the same speed to check our balance. Now we have both sides done. We can start the top section text format a previous section and bring down your new section to meet this you. The way you can really save for her is to not is you will see a step or a heavyweight line form you can simply reanimate your section. Take away a small amount to resolve this, you, as I take an exception. I always start in the middle. This just helps me to maintain the same guard underneath and the same starting point as the middle has the higher elevation we work through into the sides pulling the sections flat it's important to not over direct this if you're over drought, this forward, as we've said before It will go too short, so really maintain that body position and run and really be consistent with your use of mechanics. You avoid the temptation to lower your elevation, keep your innovation the same as the back. Remember. We are forming our graduation moment, not length you, so we decided to work on Santa Paws and today your course put a lip of the side B section in a very similar way sort than before we're essentially following the shape below. So we take very small sections. Keep them now, sections fine helps us manage any unwanted / direction, one of the best places to really start deciding where innovation is to get your two sections together, your previous and your new and see me pull it directly off the base. So this is parallel from its base. Now this means it will cook this section to here. It means it's going to be longer here than there there, by building weight vertically below. We know increases how how much length, but with disparity, if you well between them. So the lower you go the heavier lines gon na fall, so I always say don't be afraid if you are lifting high, just use the mirror, look ahead and see where you are. Where is that position of your base line you? So you see all our sections are working towards the middle parting, so each time we take a section, the hair that's left is getting smaller and smaller. You, you, okay, so that completes our tutorial today again to see the full version of this. You need to subscribe to be the education UK, let credit UK and if you did like this video, please like and comment and please subscribe to keep all up to date with all our content and all our videos or our tutorials. Thank you. So much guys you


Comments
Lindsay Mcgrath: Love this cut. I'm newly qualified and struggle as a left handed stylist with cuts. So glad iv found you!! Can't wait to try this out thank you!!
brian trammell: Love your no b.s. approach. You cut to the chase . You are quickly becoming my favorite artist
Marri: Excellent tutorial. Thank you so much.❤️
Maria Esperanza Diaz: Amazing jobs!! thanks for teaching
Julio E Fare: Love all your videos. Such and inspiration. Thank You.
ST MARK: It's BEAUTIFUL. I LOVE this channel.
vinola bikunda: Thanks a mil !! This is a great help
Moazzama Karim: Excellent job learn a lot thanks.
Deborah Terndrup: Nice job!