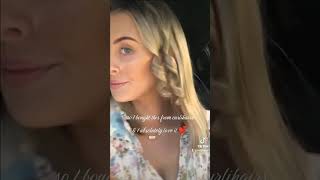
Get Red-Y For Fall!||Diy Hair Color||Ft. Asteriahair|| L'Oreal Hi-Color Deep Auburn Red||Pt. 1
- Posted on 22 September, 2018
- Closure Wig
- By Anonymous
GET RED-y FOR FALL!||DIY HAIR COLOR||ft. ASTERIAHAIR|| L’Oréal Hi-Color Deep Auburn Red||Pt. 1
Hey my FAV’s! Welcome to my channel! In this video I will be showing you how to create a BOMB hair color for fall.
This will be a 3pt series so please stay tuned for pt 2 & 3 where I’ll show you how to construct,customize, style and install a Unit/Wig.
HAIR SPECS⬇️
AsteriaHair Peruvian Straight: 20’22’24’24’
Direct hair link: https://m.asteriahair.com/high-quality...
Products:
3 box’s of L’Oréal Hi-Color Deep Auburn Red
20 volume developer (Salon Care) purchased at Sally’s Beauty Supply
Got 2b Glued Blasting Freeze Spray
—————————————————————————————————————
BUSINESS INQUIRES ONLY⬇️
_________________________________________________________________
_________________________________________________________________
Connect With Me ⬇️
Instagram: @InFAVORofSTYLE
—————————————————————————————————————
This video is NOT sponsored
All products/materials used in this video were purchased with my own money.
Hi sugar amigo, coming to you in a three-part series on how to color, construct and install a unit if you are looking to get a ready for fall, hair color - something like this. Please stay tuned for the remainder of this video. So let's go ahead and get into this color, so I'm starting off with a L'Oreal hi color in the color deep urban red. I have a total amount of three boxes that I'm gon na be using to do this color and I'm also gon na be using a 20 volume developer, go ahead and mix it up in the bowl right there. I'M just showing you that I mixed up 2.5. Four ounces of 20 volume developer instead of 30, because that's all I had at home. So I got my mixing measuring cup and I'm going to measure it out, pour it up in there and begin to mix it up a little bit I'll. Give that wrist. A a okay, so once I mix all that up, I am then going to add the red intensifier into the mixture, and once that is done, I will mix that up as well and just make sure it really makes them good. You have all the color in there and once I get done with that, let's get started, I am using Osteria hair. This is straight hair and I have a total amount of four bundles. So I have the limps of twenty twenty two and then two twenty fours. So once again that's a twenty twenty-two and 224 and I also have a closure, but that did not come from Osteria, but I will be using that in order to construct the wig, so I'm gon na go ahead and get my gloves on and begin to color. So I'm just demonstrating how I apply the color to the wefts I mean to the hair wefts it hair, there's really no fancy-schmancy way. I just make sure that I saturate saturate saturate and then also when I'm up towards the web of the hair. The top part. I do not go horizontal with applying the brush. I go more in a vertical angle, so that way, there's no harsh lines of demarcation. So once I have applied the color to the wefts, I make sure to open up the hair and then comb it through. So once I've combed through the hair, I will then make sure everything is good, put it in a bag and then start on the second bundle. This is my second 24 inch bundle and I am basically repeating the same steps put it in the bag mix up. Some more color - I think this is now my third box and uh yeah yeah, see that look really, then tens, if I didn't want me to be great, but I mixed that all alone up and then I begin on. My third bundle same process. Okay, my last box of color, I'm going to use this to color my closure same process. It'S not repetitive. We are going to be resourceful flip that back over and then begin to color the closure. I start at the ends because I do want that gradient effect. Ombre innocence and then, once again I go at a vertical angle when using my brush cuz, I don't want harsh lines and I want a good transition, so we will do that for the remaining of the closure comb it through, but also got to be glue. You guys, I didn't do it at the beginning, but this is my tip on how to not get the color on the lace, so it won't bleed okay. So now what we're doing is just cleaning it up. I have a visually colored, all the bundles. I am putting everything to the side, letting the hair sit. I let it sit for about two three, four or five hours. I can't remember. I went to church and then I came back and it looks like a crime scene but boom. This is the hair once it has been air-dried now. This is once I've made the wig and now in the next video. Please stay tuned for that because I will show you how I constructed this week, but this is just a wig after it has air dried and stay tuned for the next video

Comments
Angieee J: How long did you keep the color on for ?